Hot Enough For Ya? Super-cold Cocktail-pops Will Help

The staff of Instructables know how to cut loose and cool off in this already-too-hot summer. They’re making their own popsicles out of cocktails. If only everyone were lucky enough to have employers who endorse these kinds of projects at work.

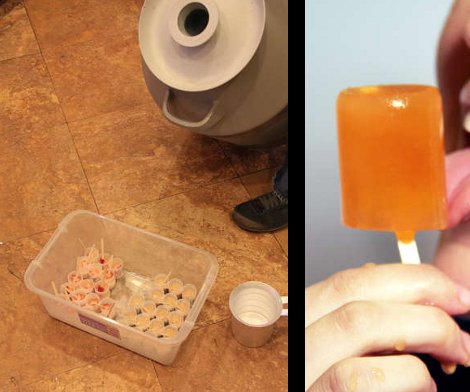
So the problem here is the the freezing point of liquor. Your margarita, daiquiri, strawberry with champagne, white russian and other favorites just aren’t ever going to solidify in a run-of-the-mill freezer because zero degrees Fahrenheit just won’t cut it. So the big guns were brought to bear. The cocktail-pops were lined up in a container and dowsed with liquid nitrogen.

The substance boils off at around -321 F, more than cold enough to quickly freeze these alcoholic goodies. But use caution. After they’ve been frozen you need to throw them in the freezer to warm them up. The first guinea pigs burned their tongues when trying to lick the pops too soon.

Don’t want to buy your liquid nitrogen? Why not just make your own?

Self-feeding Pen Printer

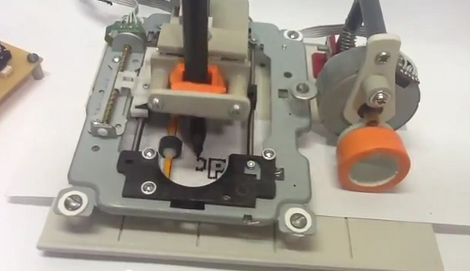
At first look we thought this was a plotter, but it’s really more of a dot matrix (or line matrix) printer. [Bruno] whipped this up using parts from a DVD optical drive. It is capable of moving the pen along the Z and X axes, and feeding the paper along the Y axis.

The video after the break shows the machine printing Megaman, an image perfectly suited to the low-resolution pixels this can put out. But even without the high-pixel counts you might get from a thermal printer, we just love the look of this one. And who doesn’t have an optical drive sitting around just waiting to be hacked? It looks like the one part you’re going to have to source is the stepper motor and geared feed wheel that moves the paper.

Continue reading “Self-feeding Pen Printer”

Turning The Wii Classic Controller Into A Gaming Rig

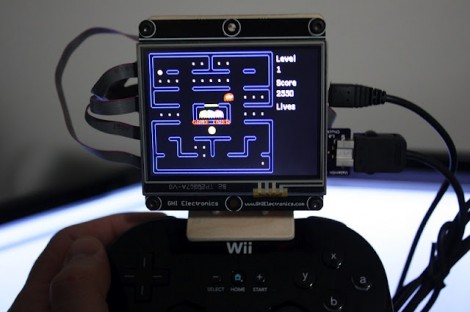
A bit of clever design lets you mount a screen and gaming hardware right on this controller. [Valentin Ivanov] had already been using the Wii Classic Controller Pro as an input for his Gadgeteer-based projects. He wanted a way to marry the project board, display, and controller into one single unit.

We’re huge fans the design because it doesn’t require any alteration of the controller. Instead, five carefully designed pieces were cut from some thin plywood. They lock together into an assembly that embraces the top of the controller while providing plenty of mounting options for the prototyping hardware thanks to a large grid of holes. A couple of pieces of bronze rod lock the mounting bracket in place by keying into the screw holes in the bottom of the controller.

In the image above you can see Mini Pacman running on the rig. It’s now nearly portable, only relying on a barrel jack for power but we’re sure a battery pack could stand in if necessary.

Head-mounted Memory Catcher

A picture’s worth a thousand words so what is a hat that can take 360 degree pictures worth? Just make sure you put it on whenever leaving the house and capturing that next memorable moment will be just one click of a button away.

[Mikeasaurus] recently put together this… special… headgear. He used film-based disposable cameras and this choice presented a few interesting challenges. But the choice is not necessarily a bad one, as you can get six of these without really blowing your budget. He cut the top off of a plastic garbage can to serve as a headband on which to mount the hardware (zip-ties to the rescue). But things get hairy when it comes to triggering all of the shutters at once. These are spring-loaded shutter releases and you can’t just patch into them electrically like you could a digital camera. His solution is a group of six servo motors which do the button pushing for him.

A thirty-six exposure trial run turned out okay. Several times the shots didn’t come out, but at the end of his post he shares a few of the good ones that did. We’re going to stear clear of this one as we can’t abide manually winding all six cameras between each shot. But it does give us an idea for a single-camera hat that uses a 45-degree mirror which swivels. We’ll just put that one in the growing pile of ideas we need to make time for.

Building A Clutch For Vim

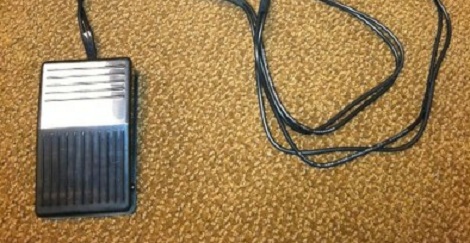
Whether you’re using emacs, vi, or vim, your fingers will be performing acrobatics on your keyboard because of the mouseless interface. [alevchuk] thought his feet could be used as a way to reduce the amount of keystrokes, so he built the vim clutch. It’s a USB-enabled foot pedal that will insert characters before the cursor in vim.

Vim requires the user to type the letter ‘i’ to insert text before the cursor. [alevchuk] thought this function could be easily replicated by a foot pedal, so he found an extremely cheap USB foot pedal to serve as his vim clutch. Ideally, the pedal should send ‘i’ when it is pressed and Esc when it’s released. [alevchuk] took two pedals, programmed one to send ‘i’ and the other to send Esc, and put them in the same enclosure.

The result is a working clutch for inserting before the cursor in vim. [alevchuk] is looking into a three-pedal model to add inserting at the beginning and end of the line to his vim clutch, so we’ll keep an eye out for when he posts that build.

Turning A Raspberry Pi Into A Laptop With A LapDock

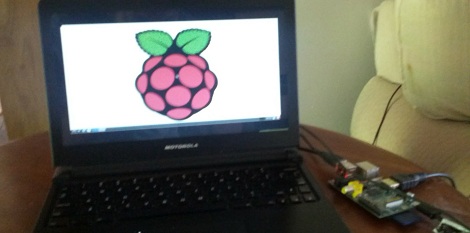
Being a $35, full-fledged Linux computer, the Raspberry Pi brings a lot to the table. There’s one problem, though: this computer doesn’t come with a keyboard, mouse, display, or even a battery. Luckily, it’s pretty easy to add these devices with the help of a Motorola LapDock and turn a RasPi into a fully portable computing platform.

The Motorola LapDock is the latest take on the dumb terminal. Consisting of only a 1366 x 768 display, keyboard, touch pad and 38Wh battery, the LapDock is meant to serve as a docking station and breakout for a few select Motorola cell phones. There are only two connections on the LapDock – a micro USB and micro HDMI port – connecting the peripherals to the cell phone. With just a few adapters, it’s possible to plug the Raspi into the LapDock, and have a Raspberry Pi-based laptop for under $100.

Interestingly, the Raspi can also be powered over the USB connection to the LapDock, meaning an external power supply isn’t required. Right now the state of a LapDock-ified Raspi is a bit inelegant, but we’ll expect someone to come up with a proper docking adapter to get rid of all the wires and add a WiFi module shortly.

via adafruit

N64 In An N64 Controller

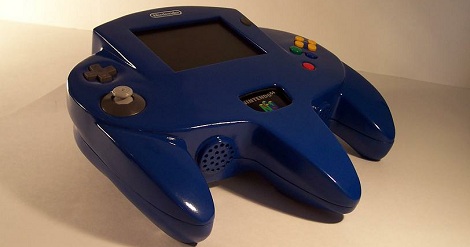
We’ve seen portable N64s before, but none were at the level of [Bungle]’s oversized N64 controller casemod.

Instead of the usual ‘sanding Bondo and gluing styrene’ method we’ve seen in other casemods, [Bungle] decided to make a silicone mold with a positive master. Not only did [Bungle] end up with a case indistinguishable from something produced in a factory, but the molding process left him with more internal room and the ability to make identical duplicates of his over sized controller.

The electronics are the standard fare – a slightly modified N64 with a PSone LCD screen. Because the rumble and memory packs are built in to the body of the gigantic controller, [Bungle] added a multifunction pak to provide ports for power, brightness controls, a/v, and a second controller.

This is an amazing build that really steps up the game for console modders. You can check out [Bungle]’s demo video after the break.

Continue reading “N64 In An N64 Controller”