FLORA: A Better Arduino LilyPad

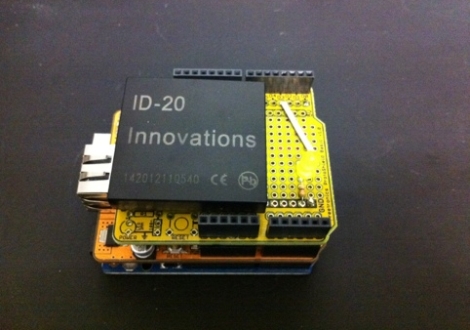
[Ladyada] has been working on FLORA, her wearable electronics platform, for a few months now. Even though it has just been announced the specs look much better than the previous queen of the hill, the Arduino LilyPad.

Going down the spec sheet for both the FLORA and the LilyPad, we see that FLORA has twice as much flash and SRAM as the LilyPad. The LilyPad has more options for I/O, but [Ladyada]’s FLORA has the benefit of not using an ISP header for programming; FLORA is completely USB-compatable. FLORA is also about a quarter-inch in diameter smaller than the LilyPad, something to take into account when you’re going for a wearable project.

On top of Bluetooth, GPS, accelerometer, compass and other modules planned for FLORA ( it doesn’t look like they’re available yet, though), FLORA has USB HID support so it can operate as a USB keyboard, mouse, MIDI device, or connect to a cell phone. If you’ve ever wanted a keytar cardigan, this is the board for you.

Check out [Ladyada]’s video demo of a LED-equipped fabric after the break.

Continue reading “FLORA: A Better Arduino LilyPad”

Sensor Array Tries To Outdo The Other Guys

The team over at the Louisville Hackerspace LVL1 is not going to be outdone when it comes to collecting environmental data. They put together this Frankenstein of sensor boards that lets you collect a heap of data showing what is going on around it.

At the center-left a small Arduino clone is responsible for collecting the data. Data storage is not talked about on their write-up, but if that’s an ATmega328 chip you should be able to work out an easy way to store data on the 1k of internal EEPROM. If that’s not enough, there is an I2C bus included on the board making it easy to add a compatible EEPROM.

The sensor on the bottom left should look familiar. It’s a DHT11 temperature and humidity sensor we’ve seen popping up in projects lately. But wait, there’s also a TMP102 temperature sensor; but that’s not the end of it. A BMP085 pressure sensor also includes a third temperature sensing option. Want to see when the lights go on in the room? There’s a CdS sensor and a TSL230R Lux sensor for that. An op-amp circuit can measure the sound level in the room via one of the Arduino’s ADC pins. And finally, an RTC board is used for time stamping the data.

Obviously this is overkill, and we’re sure it’s meant as a test platform for various sensors. All of them have been mounted on the protoboard and wired up using the point-to-point soldering method.

[Jamie Zawinski] Controls His Drapes From The Command Line

As one of the founders of Netscape and the Mozilla Project, [Jamie Zawinski] is no stranger to frustration elicited from syntax errors, terrible implementations, and things that don’t work even though they should. This familiarity of frustration is what makes [jwz]’s command line controlled curtains so great; it’s rare to see someone so technically proficient freaking out over the lack of DHCP on an Arduino Ethernet.

[Jamie]’s project begins as so many do – modifying an existing piece of hardware to connect to the Internet. This is easier said than done, as [Jamie] fried a USB hub, FTDI cable and an Arduino Ethernet all at the same time. Finally turned onto the seeed relay shield, [jwz] got busy writing scripts to power his curtain.

Of course, this level of automation is nothing without a good bit of integration. After [Jamie] realized his projector (a Panasonic PT-D5500U) and receiver (Denon AVR-2805) could talk to his computer, he got busy mashing them together with a Griffin PowerMate. Mashing the button on the PowerMate turns on the projector and closes the drapes. There’s also a cron job running so that [Jamie] is reminded of the glowing orange ball in the sky.

Automating The Shutdown Of APC UPS Devices

ups-shutdown-device

[Ishan Karve] works in some bizarro world where the building management demands that all servers and Uninterruptible Power Supplies be shut down at the end of each evening. While inconceivable to most systems admins, he has no recourse but to comply. This means that his employees need to turn things off before they leave for the day, and since they often work up to 15 hours a day, waiting for Windows server to shut down seems like an eternity.

Being the good manager he is, [Ishan] decided to build a device that handles the clean shutdown of their servers and UPS for them. An Arduino board serves as the brains of the device, communicating with and issuing shutdown commands to the UPS over a serial port. The Arduino is also connected to the office network, enabling it to send ARP requests to the servers in order to determine when they have completely shut down for the day. In order to protect against an accidental shutdown due to network connectivity issues, [Ishan] added an RTC module to the mix so that the Arduino does not issue shutdown commands until at least 8 pm.

Instead of waiting around for Windows to do its thing, [Ishan’s] employees can take off once they start the server shutdown process, knowing that they are totally compliant with their landlord’s crazy requests.

Programming AVR I2C Interface

I2C as many of you know, is a simple serial interface for many peripheral devices to micro controllers, but it can quickly become confusing to people who may not be accustom to it. Because of that, I2C tutorials are always welcome, and this new tutorial by [Embedds] does an excellent job of how to use I2C with an AVR with a 24C16 2Kbyte EEPROM.

The first half of the tutorial provides a clear explanation of how I2C works, including its signal structure, addressing, and data packets. It then moves on to AVR territory showing how to setup the I2C in an AtMega micro controller. The author uses a pretty standard to most of us Arduino, with software written in AVR C and a nifty little GUI programming application which eases the hassle of dealing with AVRDude directly.

Plenty of code samples follow from twiddling registers to a full blown application reading and writing bits from the EEPROM to a serial terminal on a PC.

[Alex] Shows Us What Happens When Dance Dance Revolution Meets Simon

ddr-simon

[Alex] was digging through his closet and came upon an old PS2 game pad for Dance Dance Revolution. He hated the idea of throwing it out just slightly more than the idea of playing DDR again, so he decided to find a way to reuse it.

He was a big fan of the game Simon (aka Genius) as a kid and thought that the DDR pad would make a novel interface for the classic game. Using the PS2XLib by [Bill Porter], which allows an Arduino to easily communicate with a PS2 controller, [Alex] put his Simon replica together in no time flat.

He painted an empty ice cream container with the classic Simon colors, installing a small LED under each quadrant, then wrote the game’s code.

As you can see in the video below, his version of the game works nicely, and forces you to actually get up and move a bit, which we like.

Continue reading “[Alex] Shows Us What Happens When Dance Dance Revolution Meets Simon”

Minimalist RGB LED Cube Has A Very Short BoM

charlieplexed-led-cube

[Asher Glick] wrote in to share a project he has been working on with his friend [Kevin Baker], a 4x4x4 RGB LED cube. The pair are students at Rensselaer Polytechnic Institute and also members of the newly-formed Embedded Hardware Club on campus. As their first collaborative project, they decided to take on the ubiquitous LED cube, trimming down the component count to nothing more than 64 LEDs, a protoboard, some wire, and a single Arduino.

Many cubes we have seen use shift registers or decade counters to account for all the I/O required to drive so many LEDs. Their version of the cube has none of these extra components, solely relying on 16 of the Arduino’s I/O pins for control instead. You might notice something a bit different about the structure of their cube as well. Rather than using a grid of LEDs like we see in most Charlieplexed cubes, they constructed theirs using 16 LED “spires”, tucking the additional wiring underneath the board.

The result looks great, as you can see in the videos below. The cube looks pretty easy to build, and with a cost around $60 it is a reasonably cheap project as well.

Nice job, we look forward to seeing all sorts of fun projects from the Embedded Hardware Club in the future!

Continue reading “Minimalist RGB LED Cube Has A Very Short BoM”