A UPS For Your Pi That’s A Little Different

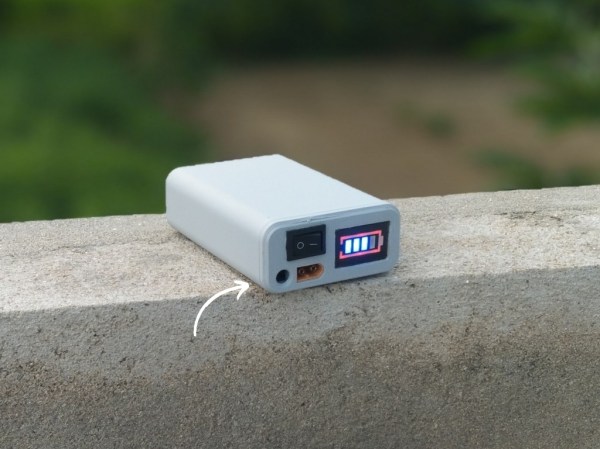
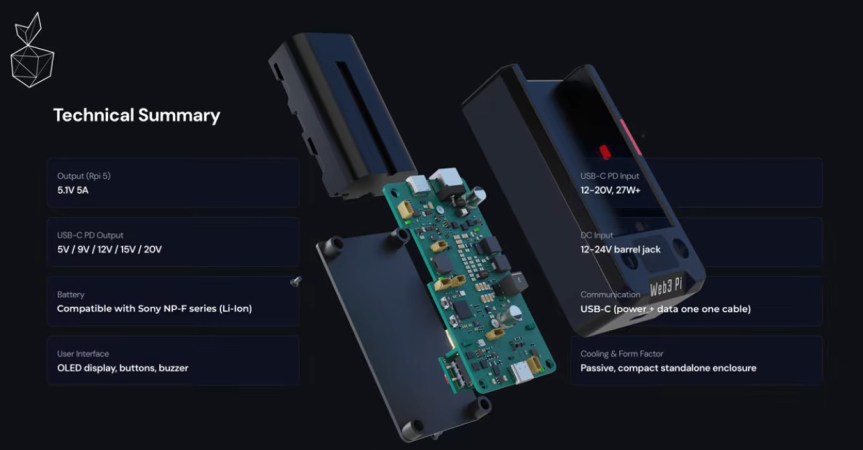
There are many uninterruptible power supply (UPS) solutions for the Raspberry Pi that take the form of HATs with a battery on board, but they’re not suitable for every situation. Web3-Pi are using the Pi 5 as an Ethereum node, and found the need for a UPS that didn’t sit on top of the Pi. Their solution is the Web3 Pi UPS, a device that sits in the USB power chain.

It’s a box that takes three power inputs, USB-C PD, a barrel jack, or a hot-swappable Sony camera battery, and puts out the constant 5 V at 5 A the Pi requires. The USB output isn’t just for power, it can communicate with the Pi to deliver telemetry and ask the OS to shut itself down if power reserves are failing. Inside are a CH32 RISC-V microcontroller that handles the power circuitry, and an RP2040 that handles control and an OLED screen for a UI. The project’s web site also mentions provision for an LTE add-on for remote monitoring, however this doesn’t at the time of writing appear to be fully implemented in the GitHub repository.

While it’s probable that few of you are mining Ethereum on your PI, we can see that there are plenty of other situations that this project could find a home in. It’s not the first Pi UPS we’ve seen, though some of them are considerably less complex or capable.

Continue reading “A UPS For Your Pi That’s A Little Different”
DIY UPS Keeps Home Assistant Running

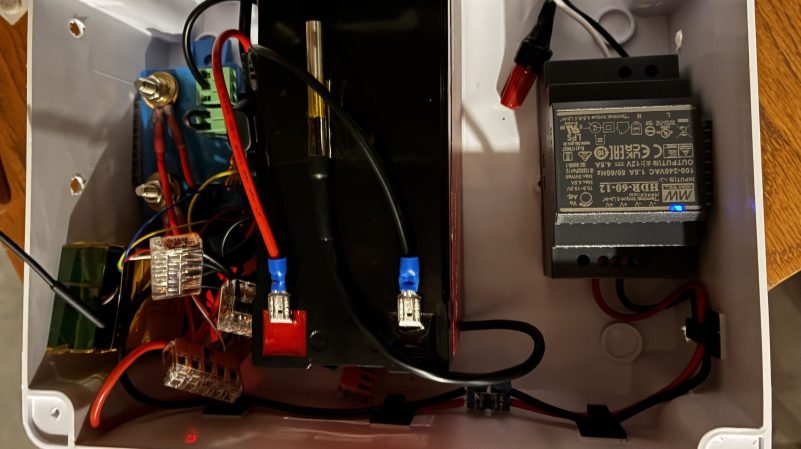
If you put a bunch of computers in charge of your house, it’s generally desirable to ensure their up-time is as close to 100% as possible. An uninterruptible power supply can help in this regard. To that end, that’s why [Bill Collis] whipped one up for his Home Assistant setup.

[Bill]’s UPS is charged with one job—keeping the Home Assistant Green hub and an Xfinity XB7 cable modem online when the grid goes dark. The construction is relatively straightforward. When the grid is up, everything is powered via a Mean Well AC-DC 12 V power supply, while the power is also used to charge a 12.8 V 10 Ah lithium iron phosphate battery pack. When the grid goes out, the system switches over to running the attached hardware on pure battery power. A Victron BatteryProtect is used to automatically disconnect the load if the battery voltage drops too low. Meanwhile, a Shelly Plus Uni module is used to monitor battery voltage and system status, integrated right into Home Assistant itself.

If you want to keep the basics of your smart home going at all times, something like this is a pretty simple way to go.  We’ve featured some other great UPS builds in the past, too. If you’re whipping up your own hardware to keep your home or lab alive in the dark of night, don’t hesitate to notify the tipsline.

Tiny UPS Keeps WiFi Online

For any mission-critical computer system, it’s a good idea to think about how the system will handle power outages. At the very least it’s a good idea to give the computer enough time to gracefully shut down if the power outage will last for an indefinite time. But for extremely critical infrastructure, like our home Wi-Fi, we might consider a more long-term battery backup that can let us get through the longest of power outages.

Part of why this project from [Next Builder] works so well is that most off-the-shelf routers don’t actually use that much energy. Keeping that and a modem online when the power is out only requires a few lithium batteries. To that end, three lithium ion cells are arranged in series to provide the router with between 9 and 12 volts, complete with a battery management system (BMS) to ensure they aren’t over- or under-charged and that they are balanced. The router plugs directly into a barrel jack, eliminating any switching losses from having to use an inverter during battery operation.

While [Next Builder] is a student who lives in an area with frequent interruptions to the electricity supply, this does a good job of keeping him online. If you’re planning for worse or longer outages, a design like this is easily adapted for more batteries provided the correct BMS is used to keep the cells safely charged and regulated. You can also adapt much larger UPS systems to power more of your home’s electrical system, provided you can find enough batteries.

The Cost Of A Cheap UPS Is 10 Hours And A Replacement PCB

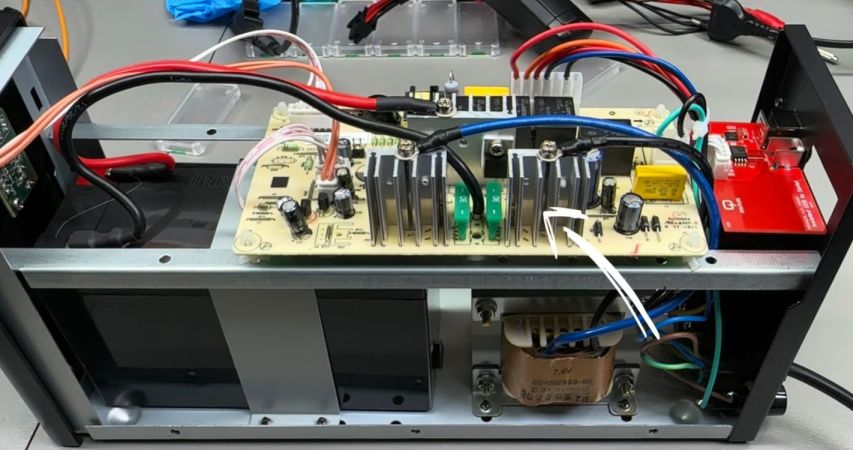
Recently [Florin] was in the market for a basic uninterruptible power supply (UPS) to provide some peace of mind for the smart home equipment he had stashed around. Unfortunately, the cheap Serioux LD600LI unit he picked up left a bit to be desired, and required a bit of retrofitting.

To be fair, the issues that [Florin] ended up dealing with were less about the UPS’ capability to deal with these power issues, and more with the USB interface on the UPS. Initially the UPS seemed to communicate happily with HomeAssistant (HA) via Network UPS Tools over a generic USB protocol, after figuring out what device profile matched this re-branded generic UPS. That’s when HA began to constantly lose the connection with the UPS, risking its integration in the smart home setup.

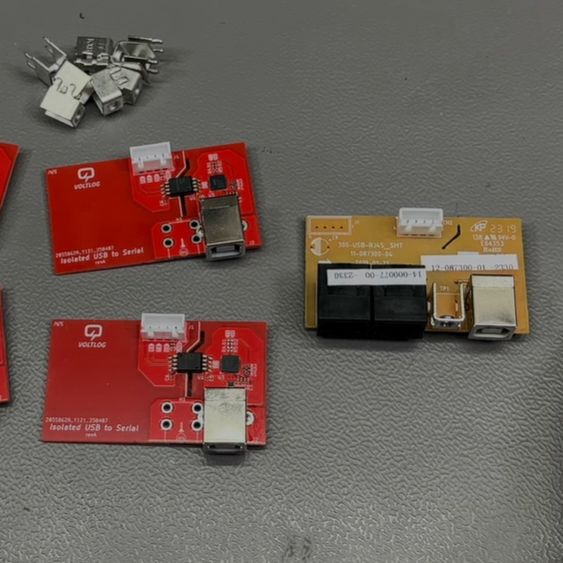
The old and new USB-serial boards side by side. (Credit: VoltLog, YouTube)

After tearing down the UPS to see what was going on, [Florin] found that it used a fairly generic USB-serial adapter featuring the common Cypress CY7C63310 family of low-speed USB controller. Apparently the firmware on this controller was simply not up to the task or poorly implemented, so a replacement was needed.

The process and implementation is covered in detail in the video. It’s quite straightforward, taking the 9600 baud serial link from the UPS’ main board and using a Silabs CP2102N USB-to-UART controller to create a virtual serial port on the USB side. These conversion boards have to be fully isolated, of course, which is where the HopeRF CMT8120 dual-channel digital isolator comes into play.

After assembly it almost fully worked, except that a Sonoff Zigbee controller in the smart home setup used the same Silabs controller, with thus the same USB PID/VID combo. Fortunately in Silabs AN721 it’s described how you can use an alternate PID (0xEA63) which fixed this issue until the next device with a CP2102N is installed

As it turns out, the cost of a $40 UPS is actually 10 hours of work and $61 in parts, although one cannot put a value on all the lessons learned here.

Continue reading “The Cost Of A Cheap UPS Is 10 Hours And A Replacement PCB”

A Modern Battery For A Classic Laptop

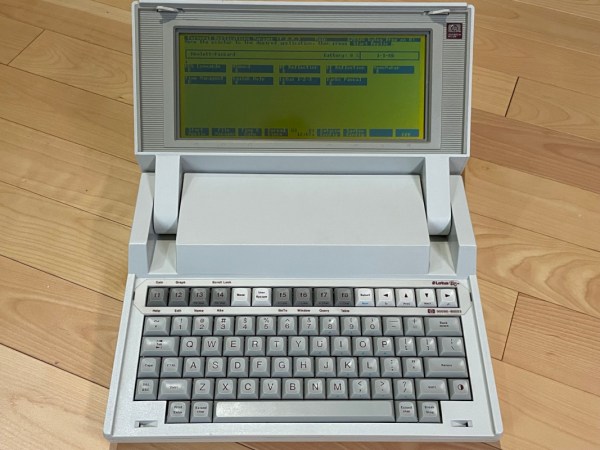
Aside from their ability to operate fairly well in extreme temperatures, lead-acid batteries don’t have many benefits compared to more modern battery technology. They’re heavy, not particularly energy dense, have limited charge cycles, and often can’t be fully discharged without damage or greatly increased wear. With that in mind, one can imagine that a laptop that uses a battery like this would be not only extremely old but also limited by this technology. Of course, in the modern day we can do a lot to bring these retro machines up to modern standards like adding in some lithium batteries to this HP laptop.

Simply swapping the batteries in this computer won’t get the job done though, as lead-acid and lithium batteries need different circuitry in order to be safe while also getting the maximum amount of energy out. [CYUL] is using a cheap UPS module from AliExpress which comes with two 18650 cells to perform this conversion, although with a high likelihood of counterfeiting in this market, the 18650s were swapped out with two that were known to be from Samsung. The USB module also needs to be modified a bit to change the voltage output to match the needs of the HP-110Plus, and of course a modernized rebuild like this wouldn’t be complete without a USB-C port to function as the new power jack.

[CYUL] notes at the end of the build log that even without every hardware upgrade made to this computer (and ignoring its limited usefulness in the modern world) it has a limited shelf life as the BIOS won’t work past 2035. Hopefully with computers like this we’ll start seeing some firmware modifications as well that’ll let them work indefinitely into the future. For modern computers we’ll hope to avoid the similar 2038 problem by switching everything over to 64 bit systems and making other software updates as well.

PCB Design Review: A 5V UPS With LTC4040

Do you have a 5 V device you want to run 24/7, no matter whether you have electricity? Not to worry – Linear Technology has made a perfect IC for you, the LTC4040; with the perfect assortment of features, except perhaps for the hefty price tag.

[Lukilukeskywalker] has shared a PCB for us to review – a LTC4040-based stamp you can drop onto your PCB whenever you want a LTC4040 design. It’s a really nice module to see designed – things like LiFePO4 support make this IC a perfect solution for many hacker usecases. For instance, are you designing a custom Pi HAT? Drop this module to give your HAT the UPS capability for barely any PCB effort. if your Pi or any other single-board computer needs just a little bit of custom sauce, this module spices it up alright!

Continue reading “PCB Design Review: A 5V UPS With LTC4040”

Upgrading A Cheap LX-2BUPS UPS Board To Fix Fatal Flaws

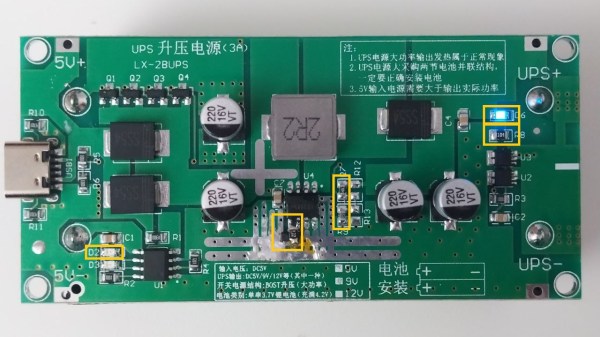
Cheap uninterruptable power supply (UPS) boards that take Li-ion cells of some description seem to have cropped up everywhere the past years. Finding use in applications such as keeping single-board computers ticking along in the case of a power failure, they would seem to be a panacea. Unfortunately most of these boards come with a series of fatal flaws, such as those that [MisterHW] found in an LX-2BUPS board obtained from AliExpress. Worst of all was the deep discharge of the Li-ion cells to below 2 V, which took some ingenuity and hard work to fix this and other problems.

The patched up XR2981 boost IC with MCP809 reset IC installed. (Credit: [MisterHW])
This particular board is rated for 5V at 3A, featuring the all too common TP4056 as charging IC and the XYSemi XR2981 boost converter. Since there is no off-switch or other protections on the board, the XR2981 will happily keep operating until around 2.6V, at a rather astoundingly high idle power consumption. Because of this the fixes mostly concentrated on optimizing the XR2981, by using better resistor values (R7, R8, R9), as well as adding a 3.15V MCP809 reset IC, to reduce idle power usage of the boost converter and disable it below a safe cell voltage.

The final coup de grâce was the eviction of the red LED (D6) and replacing it with the blue LED from D2, to stop the former from draining the cell as well. With these changes in place, no-load power usage dropped from nearly 900 µA to just over 200 µA, while preventing deep discharge. Although this board now has a second life, it does raise the question of what the point of these cheap UPS boards is if you have to spend money and time on reworking them before they’re somewhat acceptable. What is your go-to solution for these boards?