An Epic Tale Of Thermistors: Tricks For Much Better Temperature Sensing

For years [Edward] has been building professional grade underwater sensing nodes at prices approachable for an interested individual without a government grant. An important component of these is temperature, and he has been on a quest to get the highest accuracy temperature readings from whatever parts hit that sweet optimum between cost and complexity. First there were traditional temperature sensor ICs, but after deploying numerous nodes [Edward] was running into the limit of their accuracy. Could he use clever code and circuitry to get better results? The short answer is yes, but the long answer is a many part series of posts starting in 2016 detailing [Edward]’s exploration to get there.

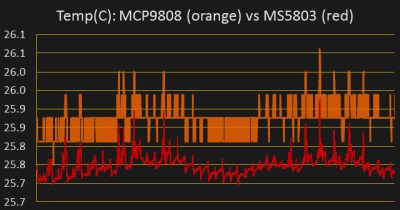
Orange is 12 bits, red is 24

The first step is a thermistor, a conceptually simple device: resistance varies with temperature (seriously, how much more simple can a sensor get?). You can measure them by tapping the center of a voltage divider the same way you’d measure any other resistance, but [Edward] had discarded this idea because the naive approach combined with his Arduino’s 10 bit ADC yielded resolution too poor to be worthwhile for his needs. But by using the right analog reference voltage and adjusting the voltage divider he could get a 20x improvement in resolution, down to 0.05°C in the relevant temperature range. This and more is the subject of the first post.

What comes next? Oversampling. Apparently fueled by a project featured on Hackaday back in 2015 [Edward] embarked on a journey to applying it to his thermistor problem. To quote [Edward] directly, to get “n extra bits of resolution, you need to read the ADC four to the power of n times”. Three bits gives about an order of magnitude better resolution. This effectively lets you resolve signals smaller than a single sample but only if there is some jitter in the signal you’re measuring. Reading the same analog line with no perturbation gives no benefit. The rest of the post deals with the process of artificially perturbing the signal, which turns out to be significantly complex, but the result is roughly 16 bit accuracy from a 10 bit ADC!

What’s the upside? High quality sensor readings from a few passives and a cheap Arduino. If that’s your jam check out this excellent series when designing your next sensing project!

Smarten Up Your Air Conditioning With The ESP8266

If you’re looking for “smart” home appliances, there’s no shortage of options on the market. Even relatively low-end gadgets are jumping on the Internet of Things bandwagon these days (for better or for worse). But what if you’re not looking to purchase a brand new major appliance right now? In that case, you might be interested in seeing how [Giulio Pons] added some high-tech features to his existing air conditioner on the cheap.

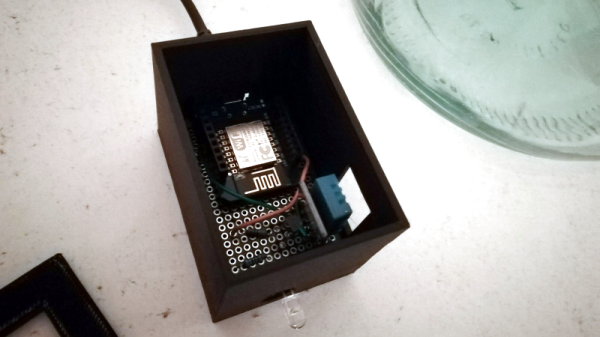
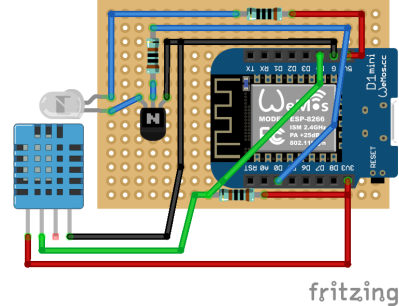
Since his AC unit had an infrared remote control, the first thing [Giulio] needed to do was come up with a way to emulate it. An easy enough project using the ESP8266 and an IR LED, especially when he found that somebody had already written a IR communications library for his particular brand of AC. From there, he could start tacking on sensors and functionality.

With the addition of a DHT11 sensor, [Giulio] can have the AC turn on and off based on the current room temperature. It also gives him an easy way to verify the AC is actually on and operating. By checking to see if the room starts cooling off after sending the IR command to start the AC, his software can determine whether it should try resending the code, or maybe send a notification to alert him that something doesn’t seem right. Of course, it wouldn’t be a proper ESP8266 project without some Internet connectivity, so he’s also created a smartphone application that lets him control the system while away from home.

Now admittedly nothing in this project is exactly new, we’ve seen plenty of hackers switch on their AC with the ESP8266 at this point. But what we particularly liked was how well thought out and documented the whole process was. The rationale behind each decision is explained, and he even documented things like his network topology to help illustrate how the whole system comes together. Even if the techniques are well known by many of us, this is the kind of project documentation that makes it accessible to newcomers. Our hats off to [Giulio] for going the extra mile.

In the past we’ve seen a similar project that allowed you to control your AC from Slack, and our very own [Maya Posch] took us on a whirlwind tour of the very impressive ESP8266-powered environmental monitoring system she helped develop.

Picking The Right Sensors For Home Automation

Imagine that you’re starting a project where you need to measure temperature and humidity. That sounds easy in the abstract, but choosing a real device out of many involves digging into seemingly infinite details and trade-offs that come with them. If it’s a low-stakes monitoring project, picking the first sensor that comes to mind might suffice. But when the project aims to control an AC system in an office of temperature-sensitive coders, it pays to take a hard look at the source of all information: the sensor.

Continuing a previous article I would like to use that same BMaC project from that article as a way to illustrate how even a couple of greenhorns can figure out how to pick everything from environmental sensors to various actuators, integrating it into a coherent system that in the end actually does what it should.

Continue reading “Picking The Right Sensors For Home Automation”

Simple ESP8266 Weather Station Using Blynk

Today’s hacker finds themself in a very interesting moment in time. The availability of powerful microcontrollers and standardized sensor modules is such that assembling the hardware for something like an Internet-connected environmental monitor is about as complex as building with LEGO. Hardware has become elementary in many cases, leaving software as the weak link. It’s easy to build the sensor node to collect the data, but how do you display it in a useful and appealing way?

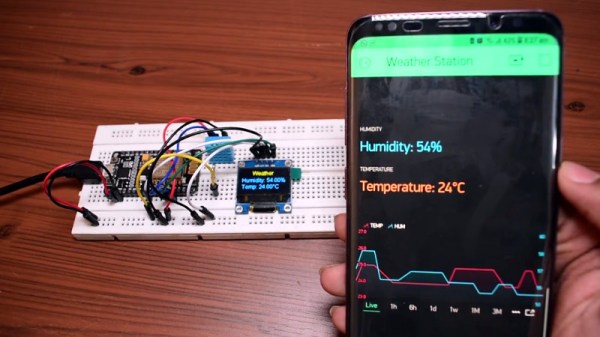
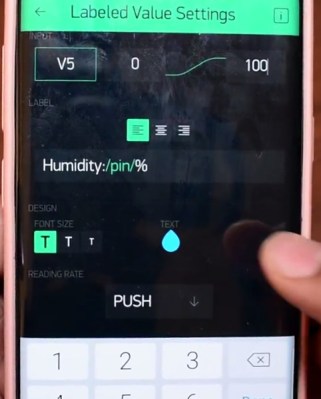
This simple indoor temperature and humidity sensor put together by [Shyam Ravi] shows one possible solution to the problem using Blynk. In the video after the break, he first walks you through wiring the demonstration hardware, and then moves on to creating the Blynk interface. While it might not be the ideal solution for all applications, it does show you how quickly you can go from a handful of components on the bench to displaying useful data.

In addition to the NodeMCU board, [Shyam] adds a DHT11 sensor and SSD1306 OLED display. He’s provided a wiring diagram in the repository along with the Arduino code for the ESP8266, but the hardware side of this demonstration really isn’t that important. You could omit the OLED or switch over to something like a BME280 sensor if you wanted to. The real trick is in the software.

For readers who haven’t played with it before, Blynk is a service that allows you to create GUIs to interact with microcontrollers from anywhere in the world. The code provided by [Shyam] reads the humidity and temperature data from the DHT11 sensor, and “writes” it to the Blynk service. From within the application, you can then visualize that data in a number of ways using the simple drag-and-drop interface.

We’ve seen Blynk and ESP8266 used to control everything from mood lighting to clearance-rack robotic toys. It’s a powerful combination, and something to keep in mind next time you need to knock something together in short order.

Continue reading “Simple ESP8266 Weather Station Using Blynk”

Statistics And Hacking: A Stout Little Distribution

Previously, we discussed how to apply the most basic hypothesis test: the z-test. It requires a relatively large sample size, and might be appreciated less by hackers searching for truth on a tight budget of time and money.

As an alternative, we briefly mentioned the t-test. The basic procedure still applies: form hypotheses, sample data, check your assumptions, and perform the test. This time though, we’ll run the test with real data from IoT sensors, and programmatically rather than by hand.

The most important difference between the z-test and the t-test is that the t-test uses a different probability distribution. It is called the ‘t-distribution’, and is similar in principle to the normal distribution used by the z-test, but was developed by studying the properties of small sample sizes. The precise shape of the distribution depends on your sample size. Continue reading “Statistics And Hacking: A Stout Little Distribution”

Hackers Vs. Mold: Building A Humidistat Fan

Having a mold problem in your home is terrible, especially if you have an allergy to it. It can be toxic, aggravate asthma, and damage your possessions. But let’s be honest, before you even get to those listed issues, having mold where you live feels disgusting.

You can clean it with the regular use of unpleasant chemicals like bleach, although only with limited effectiveness. So I was not particularly happy to discover mold growing on the kitchen wall, and decided to do science at it. Happily, I managed to fix my mold problems with a little bit of hacker ingenuity.

Continue reading “Hackers Vs. Mold: Building A Humidistat Fan”

Fight Mold And Mildew With An IoT Bathroom Fan

Delicious sheets of wallboard coated with yummy latex paints, all kept warm and moist by a daily deluge of showers and habitually forgetting to turn on the bathroom exhaust fan. You want mildew? Because that’s how you get mildew.

Fed up with the fuzzy little black spots on the ceiling, [Innovative Tom] decided to make bathroom ventilation a bit easier with this humidity-sensing IoT control for his bathroom exhaust fan. Truthfully, his build accomplishes little more than a $15 timer switch for the fan would, with one critical difference — it turns the fan on automatically when the DHT11 sensor tells the WeMos board that the relative humidity has gone over 60%. A relay shield kicks the fan on until the humidity falls below a set point. A Blynk app lets him monitor conditions in the bathroom and override the automatic fan, which is handy for when you need it for white noise generation more than exhaust. The best part of the project is the ample documentation and complete BOM in the description of the video below, making this an excellent beginner’s project.

No bathroom fan? Not a problem — this standalone humidity-sensing fan can help. Or perhaps you have other bathroom ventilation needs that this methane-sensing fan could help with?

Continue reading “Fight Mold And Mildew With An IoT Bathroom Fan”