All Your I/O Pins Belong To ArduinoDashboard

arduino_dashboard

So if you’re knee deep in an Arduino-based project and you want to constantly monitor all of the micro’s pins, what’s the best way to go about it? [Jonathan Clark] from LVL1 in Louisville was looking to keep a closer eye on his board and whipped up an application he calls ArduinoDashboard.

Programmed in Processing, the application gives you a look at all of your Arduino board’s analog and digital pins in a simple to use display. All that’s required to run the application is a bit of code inserted at the top of your sketch, which can be called anywhere in your program’s loop. Once the code snipped is called, all of the board’s pins are read and the data is sent to your PC.

ArduinoDashboard is still very much in beta at the moment, but it looks to be stable enough for everyday use. [Jonathan] has plenty of improvements and new features in mind, so be sure to check back often to see what’s changed.

[via Adafruit Blog]

Tree Climbing Bot Climbs Tree

To test his new skills with his Arduino, [Ben] decided that he would build a robot. With no particular need to fill other than the need to build something cool he chose to build himself a tree climbing robot. He designed the body of the robot in Google Sketchup before beginning the build. The body is made mainly from aluminium, with four motors for the gripping legs and one for the spine. [Ben] controlled the motors with the familiar L298 motor driver chip and measured their position and speed using some cleverly mounted potentiometers.  The robot can climb trees of varying diameter by using the speed of the motors driving the legs to determine when the tree has been gripped.

[Ben] was then kind enough to write up a full instructable describing the build, this project includes a bit of everything, from motor control and liner drives to tips on creating a robot frame; a good read for someone wanting to get into robotics. Also check out the video after the break to see the robot in action.

Continue reading “Tree Climbing Bot Climbs Tree”

Bluetooth Wristwatch Based On An Arduino

We hate to admit it, but we missed out on the TI Chronos watch deal last week. While we’re still a little bit burned over the fact that these watches sold out so fast, [Ahmet] sent in his Open Source Bluetooth Watch and we’re thinking this could eventually be a decent replacement.

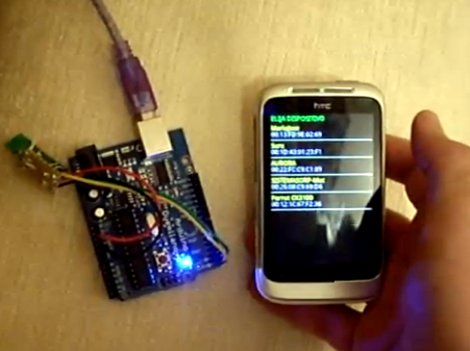
The watch is built around an Arduino Pro Mini, a scavenged Nokia LCD, and a BlueSMiRF Gold. The Bluetooth connects to a Nokia N900 with a little Bluetooth client app [Ahmet] wrote. He also wrote a small GUI for the watch’s LCD display. Afterwards, he was able to display missed calls, new email, and is now working on support for changing songs on his N900’s media player.

Admittedly, a little work needs to be done on the enclosure. Still, the potential for this watch is much greater than the iPod as a watch project we saw last year. Right now, we’re thinking about what could be added to [Ahmet]’s watch. An accelerometer would probably be on the top of our list, but if you have any ideas feel free to leave them in the comments.

Check out the walk through of the watch’s functions after the break.

Continue reading “Bluetooth Wristwatch Based On An Arduino”

High Voltage: Controlling A Flyback Transformer With An Arduino

If you’d like to build a Jacob’s ladder, an ignition system for a flamethrower, or for some ungodly reason you need 15 kilovolts for a prop replica or cosplay build, this one is for you. It’s an easy to build high voltage power supply that interfaces with an Arduino.

After harvesting a flyback from the power board of a CRT, [Andrew Moser] added a new primary coil to the transformer. This boosts 12 volts that can be easily controlled by an Arduino to something that will arc an inch and a half. The next step building the flyback driver. [Andrew] used a MOSFET and MOSFET driver for this circuit (although he says this guy works without the driver). After that, all that’s left to do is write some software and test it out.

Of course this comes with the boilerplate warning, “If you don’t know what you’re doing, you might die.” That being said, if you ever wanted to test out an Arduino’s resistance to EMP, this is the project for you. Check out the flyback powering a Jacob’s ladder after the break.

Continue reading “High Voltage: Controlling A Flyback Transformer With An Arduino”

Homebrew Weather Station Plus A Pan And Tilt Camera Rig

[Sebastian] wrote in to share his web site, where he has a bunch of different electronics projects. After looking through them, we found a pair that we thought you might find interesting.

The first project is a homebrew weather monitoring station that [Sebastian] put together. He designed a weather shield, incorporating humidity, pressure and light sensors, along with digital I/O ports for monitoring an anemometer. The entire setup is powered using solar panels, and data is relayed to his computer via an Xbee.

The second item that caught our eye was a digital camera pan and tilt rig. The system was built using a Lynxmotion pan and tilt kit, which is controlled by an Arduino. The code he provides allows him to capture very large composite images without having to spend too much time “sewing” them together. While this second project mostly consists of schematics for a base plate and pan/tilt code, it struck us as something that could be very useful for any budding photographers looking to take panoramic shots.

All of the schematics and code for his projects are available on his site, so be sure to look around – you might find something interesting!

Robotic Arm And Claw Sculpted Entirely From ShapeLock

shapelock_robotic_claw

[Alexey] wrote in to share a mechanical claw (Google Translation) he has been hard at work on for quite some time. While a lot of people will turn to some sort of 3D plastic printer such as the MakerBot if they need plastic parts built, [Alexey] didn’t have access to one. Instead, he carefully crafted the entire mechanism from polycaprolactone, or as it’s more commonly known, Shapelock.

Using a wide range of tools from hair dryers and knives to lighting fixtures, he manually sculpted the claw and its control arm out of plastic, piece by piece. We are particularly impressed by the gearing he was able to cut from the plastic, which can be finicky at times.

As you can see in the video below, The claw mimics each movement he makes with the control arm via a handful of Arduino-driven servos. Everything seems to work quite well, and despite the rough translation by Google, we think this is a great project. If you are looking to do something similar yourself, he has plenty of pictures on his site, which should give you a pretty good idea as to how things were put together.

Continue reading “Robotic Arm And Claw Sculpted Entirely From ShapeLock”

Building A Message Board With A Web Interface

[Sergio] is just getting into hardware hacking. He started by getting an HD44780 compatible LCD screen running with his Arduino. To take the project to the next level, he decided to add a web interface for changing the message displayed on the LCD.

He’s doing things on the cheap (a man after our own hearts), purchasing many of his components off of eBay. Unfortunately that decision came back to bite him when it was time to connect his Arduino to the network. The Ethernet Shield knock-off wasn’t the same as the official version. That one’s got a Wiznet W5100 ethernet chip with does a lot of the heavy lifting for you. Instead, [Sergio] is using a board with an ENC28J60. It took a bit of searching, but eventually he came up with an example to help him get his Arduino serving web pages and listening for updates from them.

The ENC28J60 is actually not a bad piece of hardware. It’s cheap enough, and there are a few hardware/software demos out there that are worth taking a look at.