C64 Finally Gets The SRAM Corporate Wouldn’t Pay For

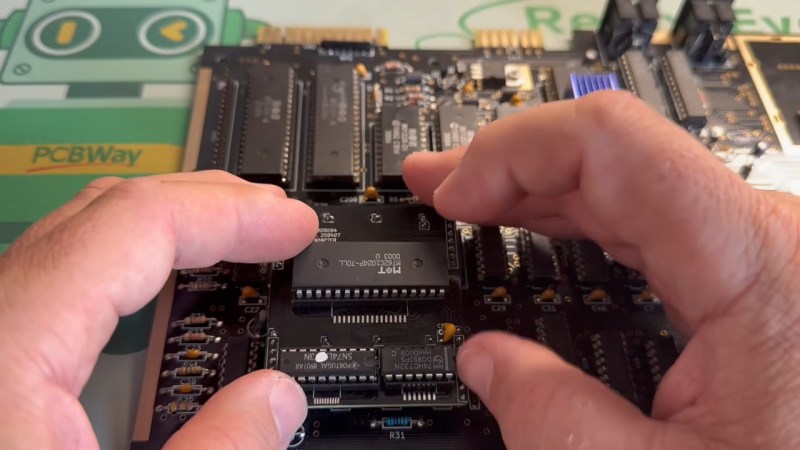
If you think RAM is expensive now, try putting yourselves in the shoes of a Commodore engineer, circa 1981. RAM was eye-wateringly expensive by modern standards, and Jack Tramiel wanted 64K of the stuff for the next computer — hence the name, Commodore 64 — but he didn’t want to pay for it. The solution was to use cheaper dynamic RAM over the more expensive static RAM that later took over the market in the kilobyte range. That’s a small problem for retrocomputer hobbyists, because while we’re complaining about the price of gigabytes of the stuff, you can’t buy new DRAM chips that fit a Commodore at any price. That’s why [Fabio Battaglia] aka [hkzlab] came up with an adapter board to fit easily-available SRAM chips onto aging C64s. 

Nothing lasts forever: not cold September rain, and not DRAM chips. Heat damage? Internal corrosion? There are probably multiple failure modes, but someday the old stock of chips will run out and the retrocomputer community is going to be ready for it. [Keith Olson] sent us a tip on a video by [The Retro Shack] about this very problem that serves as a good demo of what you get when you put SRAM into a C64. (Thanks [Keith]!) That said, the adapter board on offer is only good for C64s with the 250407 motherboard. If yours is different, you may have to modify the board. But hey, it’s open source, so go ye and do that thing. Let us know via the tips line if you do.

Continue reading “C64 Finally Gets The SRAM Corporate Wouldn’t Pay For”
A Scratch-Built Commodore 64, Turing Style

Building a Commodore 64 is among the easier projects for retrocomputing fans to tackle. That’s because the C64’s core chipset does most of the heavy lifting; source those and you’re probably 80% of the way there. But what if you can’t find those chips, or if you want more of a challenge than plugging and chugging? Are you out of luck?

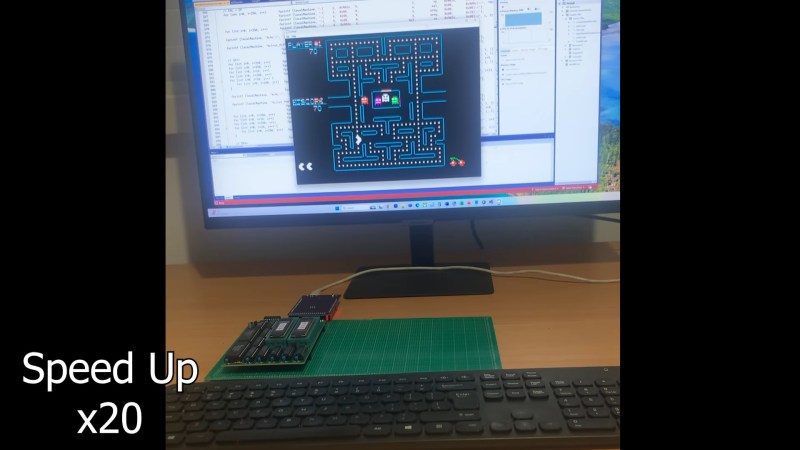
Hardly. The video below from [DrMattRegan] is the first in a series on his scratch-built C64 that doesn’t use the core chipset, and it looks pretty promising. This video concentrates on building a replacement for the 6502 microprocessor — actually the 6510, but close enough — using just a couple of EPROMs, some SRAM chips, and a few standard logic chips to glue everything together. He uses the EPROMs as a “rulebook” that contains the code to emulate the 6502 — derived from his earlier Turing 6502 project — and the SRAM chips as a “notebook” for scratch memory and registers to make a Turing-complete random access machine.

[DrMatt] has made good progress so far, with the core 6502 CPU built on a PCB and able to run the Apple II version of Pac-Man as a benchmark. We’re looking forward to the rest of this series, but in the meantime, a look back at his VIC-less VIC-20 project might be informative.

Continue reading “A Scratch-Built Commodore 64, Turing Style”

An RP2040-based PC-FX Development Cartridge

[David Shadoff] has a clear soft spot for the NEC console systems and has been collecting many tools and data about them. When developing with these old systems, having a way to upload code quickly is a real bonus, hence the creation of the PC-FX Dev Cart. Based on the Raspberry Pi RP2040, the custom cartridge PCB has everything needed to run software uploadable via a USB-C connection.

While the PC-FX is a CDROM-based system, it does sport a so-called FX-BMP or backup memory port cartridge slot, which games can use to save state and perform other special functions. Under certain circumstances, the PC-FX can be instructed to boot from this memory space, and this cartridge project is intended to enable this. Having a quick way to upload and execute code is very useful when exploring how these old systems work, developing new applications, or improving the accuracy of system emulators. The original FX-BMP cartridge has little more inside than a supercapacitor-backed SRAM and a custom interfacing IC, and of course, it would be quite a hassle to use this to develop custom code.

Continue reading “An RP2040-based PC-FX Development Cartridge”

Electronic Etch-A-Sketch, No Microcontroller Required

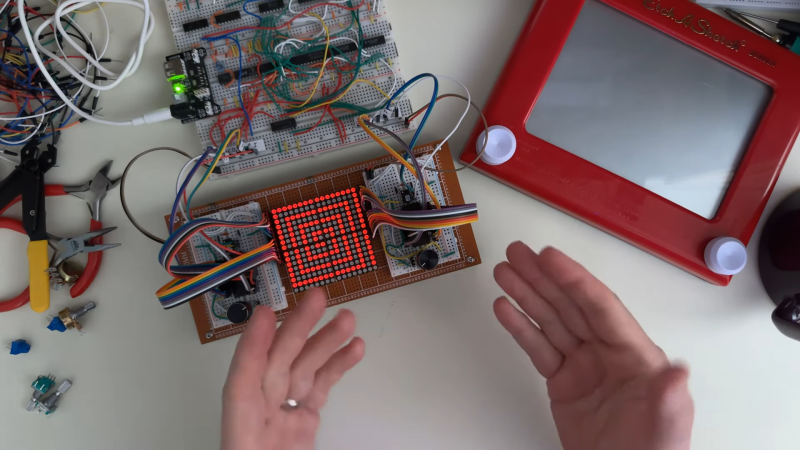
In a lot of ways, Etch-A-Sketch is the perfect toy; simple, easy to use, creative, endlessly engaging, and as a bonus, it’s completely mechanical. We find that last attribute to be a big part of its charm, but that’s not to say an electronic version of the classic toy can’t be pretty cool, especially when it’s done without the aid of a microcontroller.

This is one of those “because I can” projects that we always find so interesting, and more so because it wasn’t entirely clear to [BigZaphod] that he had the skills to pull it off. While his initial design centered around a bunch of 8×8 LED matrix displays and a 256×4-bit RAM chip, the rest of it was a lot of hand-waving. After a few experiments with addressing the LEDs, [Zaphod] started filling in the blanks with a refresh circuit using a 555 — naturally — and a pair of counters. Properly debounced encoders for the horizontal and vertical controls came next, along with more counters to track the cursor and a host of other circuits that ended up looking like a “one of each” selection from the 7400-series catalog.

While we do wish for a schematic on this one, it’s still a pretty enjoyable video, and the end product seems to work really well. The electronic version has a few features the original lacks, such as wrapping the cursor to the other side of the screen. We’d imagine that the buttons on the encoders could be put to work, too; perhaps a click could make it so you can move the cursor without leaving a trail behind. That might be a challenge to execute in logic, but then again, that was the point of the whole thing.

Still jonesing for that mechanical Etch-A-Sketch experience? Not a problem.

Continue reading “Electronic Etch-A-Sketch, No Microcontroller Required”

A Pi Pico on a breakout board inside a Busch 2090 educational computer

Pi Pico Becomes SRAM For 1981 Educational Computer

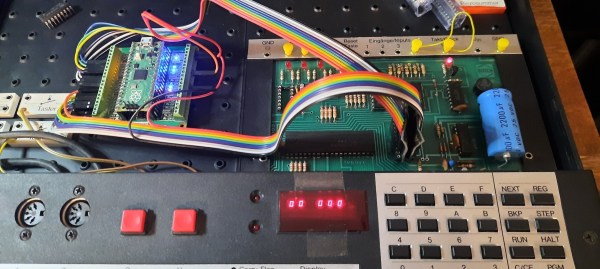
Ever since the Raspberry Pi Pico was introduced in early 2021 we’ve seen the tiny Pi being used for an astonishing variety of applications. It has powered countless clocks, gadgets, games, and accessories for all kinds of computers old and new. [Michael Wessel] has recently added an interesting new application in the “old computer” category, by turning a Pico into a 2114 SRAM emulator for his Busch 2090, an educational computer system from 1981.

The pinout of the classic 2114 SRAM chip is quite simple: ten address lines, four data lines, Write Enable and Chip Select. Since the 3.3 V Pico is more or less 5V tolerant, you could directly connect these signals to its GPIO ports, but [Michael] considered it more reliable to use level shifters between the two voltage domains. He experimented with a few standard level shifter circuits, but quickly realized he had to take the 33 kΩ pulldown resistors on the Busch 2090’s address bus into account. By just adding a couple of resistors to the Pico’s ports he could make completely passive level shifters, which worked just fine since the system’s clock frequency is only 500 kHz.

[Michael] demonstrates his RAM replacement in the video below, with a neat set of blinkenlights showing the data being shuttled around in real time. He has plans to make a proper PCB for his project, as well as to enable all kinds of neat features by modifying the system’s RAM in real time. This is of course not limited to the Busch 2090: the 2114 chip was widely used in the 1980s, so the PicoRAM can probably be used in many other systems of the era. Code for the Pi is available on GitHub if you’re interested in trying this for yourself. If you’d like to find out what programming a Busch 2090 feels like, you can emulate one using an Arduino.

Continue reading “Pi Pico Becomes SRAM For 1981 Educational Computer”

Opening Up ASIC Design

The odds are that if you’ve heard about application-specific integrated circuits (ASICs) at all, it’s in the context of cryptocurrency mining. For some currencies, the only way to efficiently mine them anymore is to build computers so single-purposed they can’t do anything else. But an ASIC is a handy tool to develop for plenty of embedded applications where efficiency is a key design goal. Building integrated circuits isn’t particularly straightforward or open, though, so you’ll need some tools to develop them such as OpenRAM.

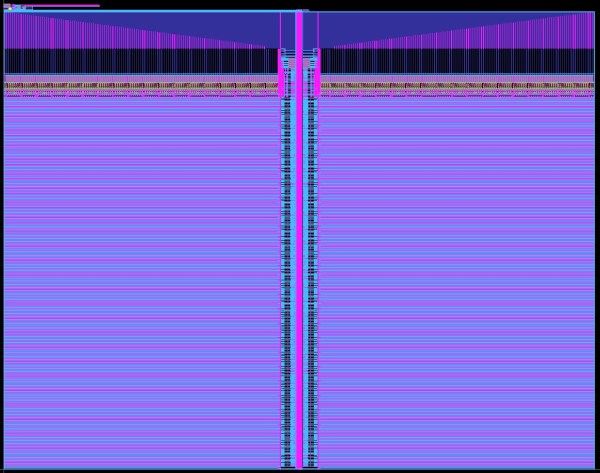
Designing the working memory of a purpose-built computing system is a surprisingly complex task which OpenRAM seeks to demystify a bit. Built in Python, it can help a designer handle routing models, power modeling, timing, and plenty of other considerations when building static RAM modules within integrated circuits. Other tools for taking care of this step of IC design are proprietary, so this is one step on the way to a completely open toolchain that anyone can use to start building their own ASIC.

This tool is relatively new and while we mentioned it briefly in an article back in February, it’s worth taking a look at for anyone who needs more than something like an FPGA might offer and who also wants to use an open-source tool. Be sure to take a look at the project’s GitHub page for more detailed information as well. There are open-source toolchains if you plan on sticking with your FPGA of choice, though.

the conversion from hynix SRAM to FRAM on a Pokemon Yellow PCB

Pokemon Time Capsule

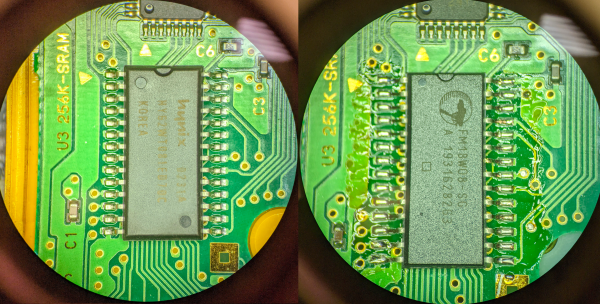
The precious Pokemon we spent hours capturing in the early nineties remain trapped, not just by pokeballs, but within a cartridge ravaged by time. Generally, Pokemon games before the GameBoy Advance era had SRAM and a small coin cell to save state as NVRAM (Non-volatile random access memory) was more expensive. These coin cells last 10-15 years, and many of the Pokemon games came out 20 years ago. [9943246367] decided to ditch the battery and swap the SRAM for a proper NVRAM on a Pokemon Yellow cartridge, 23 years later.

The magic that makes it work is a FRAM (ferroelectric random access memory) made by Cypress that is pin-compatible with the 256K SRAM (made by SK Hynix) on the original game cartridge PCB. While FRAM data will only last 10 years, it is a write-after-read process so as long as you load your save file every 10 years, you can keep your Pokemon going for decades. For stability, [9943246367] added a 10k pull-up on the inverted CE (chip enable) pin to make sure the FRAM is disabled when not in use. A quick test shows it works beautifully. Overall, a clever and easy to have to preserve your Pokemon properly.

Since you’re replacing the chip, you will lose the data if you haven’t already. Perhaps you can use [Selim’s] Pokemon Transporter to transport your pokemon safely from the SRAM to the FRAM.