Halloween Hacks: Scaring Small Children With Huffman Coding

The team over at NerdKits decided they needed to do something for Halloween. Only on Halloween is scaring small children is an admirable goal, so they demoed a way to play creepy sounds after a door has been opened.

To trigger the sound, a magnetic reed switch from an alarm system is attached to a front door. This triggers the microcontroller and with a bit of delay, some creepy audio can be played on a pair of speakers. The team decided to store all the audio data on the flash memory of their ATmega328p, but that wouldn’t allow for a very long scream. To extend the length of the wails of the damned, the NerdKits team decided to use Huffman coded audio.

Because Huffman coding relies on the most common value being assigned the shortest code, the team used a bit of Python and C magic to figure out the optimal encoding for their audio file. After the evil laugh was sufficiently compressed, the microcontroller was programmed to decode the audio and send it to a pair of speakers. The team made all the software for their project available here for your perusal.

Although this project could be thrown together in an hour with an Arduino and an MP3 shield, the NerdKits team wants to get kids to learn how things work, also an admirable goal. [Humberto] from NerdKits put a video up explaining the theory of the project. Check it out after the break.

Continue reading “Halloween Hacks: Scaring Small Children With Huffman Coding”

Tiny MP3 Module Is Perfect For Your Next Project

tiny_embedded_mp3_module

If your next project needs the ability to play MP3s but you don’t have a lot of room to spare in your enclosure, [Boris] has just the thing you need. His tiny embedded MP3 module supports playback of up to 65,536 songs or as many as you can fit on a 16GB microSD card, which isn’t bad in the least.

The module relies on a PIC24F for input and control, while a VS1011 handles all of the MP3 decoding responsibilities. He says that the module would be great for voice-enabled vending machines, telephone systems, cars, and more.

With such a wide range of possible applications, he decided that the module should be able to support several different input methods. The board can be controlled via a set of digital input buttons, which is perfect for direct human interaction, while it also supports serial control for scenarios where it is part of a larger embedded system.

Of course, we’ve seen tiny MP3 players like this before, but we like the fact that this module was designed to operate in standalone mode or as a component in a larger device. Of course all of the device’s schematics, code, and a BoM are available, allowing you to build your own if you are comfortable with SMD soldering.

Remote-controlled VMUSIC2 Audio Player

ir_controlled_vmusic2_audio_player

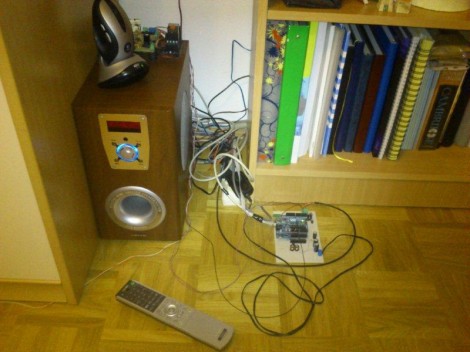
[Ron] was looking for a way to play his MP3s around the house without having to use his computer. He also wanted the ability to remotely control his tunes with an old camcorder remote he had sitting around – not exactly a feature you would find in an off the shelf personal audio player.

Ultimately, he decided to construct his own remote-controlled audio player using a VMUSIC2 audio module, which can decode MP3s from any standard USB drive. The VMUSIC2 is controlled by a Propeller demo board, which also handles receiving and decoding IR signals from his camcorder remote. While he was originally dumping ID3 tag data to his computer for debugging purposes, he recently added an LCD screen for displaying song information in a more useful manner.

The MP3 player seems to work pretty well if the video below is any indication, though it’s begging for a nice enclosure to tie things together. We like the project so far, so we’re sure [Ron] won’t fail to impress when it’s completely finished.

Continue reading “Remote-controlled VMUSIC2 Audio Player”

magic_music_table_accessible_jukebox

Magic Table Gives Disabled Child Control Over Her Music

Instructables user [XenonJohn] recently put together a fantastic tutorial detailing how he made an RFID-controlled jukebox. The Magic Music Table was created for a disabled child, who is unable to use a CD payer, nor navigate small buttons and menus on MP3 players. He originally though about making the buttons more accessible a la the Frankenkindle, but ultimately settled on making the table instead.

Embedded in the center of the Music Table under a piece of plexiglass is a small project box containing an iPod, Arduino Mega, and a Parallax RFID reader. He crafted small RFID “bricks” that can be waved over the RFID reader, triggering the iPod to play a specific album from a large playlist. The Arduino acts as the middleman, controlling the RFID reader and relaying the appropriate information to the iPod when required.

The system looks pretty sturdy, and [XenonJohn] says that it works great. We think it’s a wonderful use of technology – you certainly can’t argue with brightening up a child’s day.

Continue reading to see a video of the Magic Music Table in action.

Continue reading “Magic Table Gives Disabled Child Control Over Her Music”

Makita Jobsite Radio Gets A Few Extra Bells And Whistles

[Jose] added several features to a Makita AM/FM jobsite radio, and did such a good job that you can’t tell they weren’t originally part of the design. The original radio has a compartment for a battery pack used with Makita’s line of rechargeable tools, and offers AM/FM radio, as well as auxiliary audio playback via a pair of speakers. [Jose] augmented those speakers by adding a pair of tweeters as well.

Next on his list of features were a couple of power bus add-ons. In the image on the right you can see the results of adding an automotive cigarette lighter to the side of the unit. Opposite this you’ll find a pair of USB ports that are activated by a lighted toggle switch. The ports are part of a USB car charger that is patched into the battery with a flip of that switch.

Finally, there’s a built-in Bluetooth audio receiver that connects to the auxiliary input. As shown in the image on the left, he can now play tunes from his cellphone without the need for a cord. See him showing off the device in the video after the break.

Continue reading “Makita Jobsite Radio Gets A Few Extra Bells And Whistles”

Adding An External Audio Input To The Sansa Clip+

adding_external_mic_input_sansa_clip

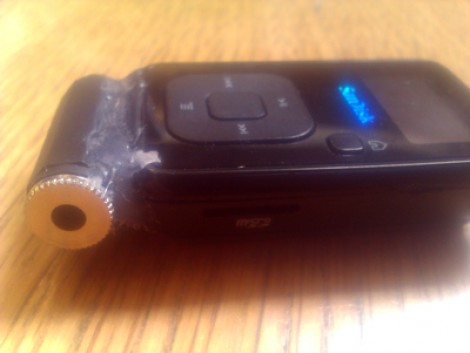
Workshop 88 member [Jim] got his hands on a couple of SanDisk Sansa Clip+ MP3 recorder/players from Woot, and was anxious to see what he could do with them.

The first order of business was to install RockBox, an open source hardware package built for a wide range of MP3 players. He was impressed with how robust the firmware was, though he thought the Sansa’s built-in microphone could use a bit of upgrading. Acting on a tip from a fellow square dance enthusiast, he disassembled one to see how he might add an external audio input.

He pried the existing mic apart, and desoldered it from the motherboard, installing a small capacitor and resistor in its place. He extended some wires through the case, then powered up the unit to make sure it was still alive and well. Since things still looked good, [Jim] put some audio on the Sansa’s new inputs and sure enough it recorded the audio without a hitch.

He says that his initial guesses for the capacitor and resistor values were pretty decent, though with a bit of tweaking he should be able to get exactly the recording levels he was looking for. Not bad for a $20 audio recorder!

Schäuble Jr Aims To Take Away Your Privacy!

[Mnt] wrote in to tell us about this 360 degree array of cameras featured on [Codeninja]. This has to be one of the most impressive arrays of cameras and sound equipment that we’ve seen at Hack a day.

The array is capable of 360 degree x 140 degree panoramic views using the 9 cameras arranged in a circle around the base. Impressive in itself, these cameras are all capable of both pan and tilt rotation via and Arduino-controlled servo setup. It also has a native 360 degree camera mounted on top of everything for calibration purposes and IR-LED illumination capabilities.

On top of all of this, the camera array also features audio capability with a 9-microphone setup, presumably one for each camera. This, coupled with piezoelectric speakers should provide for echolocation capability. Although jokingly called the “Schäuble Jr.” after a German politician, we’re not sure of the true purpose for this “sensor array.” We can only hope that it will be used for good. A very impressive build, it will be interesting to see what comes of it.