Music Synthesized From The Game Of Life

gameoflife_synth

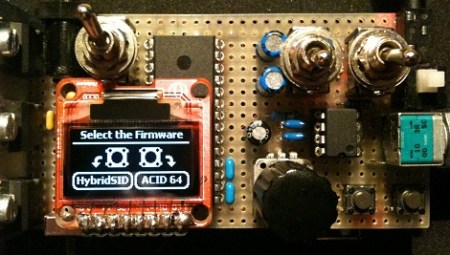
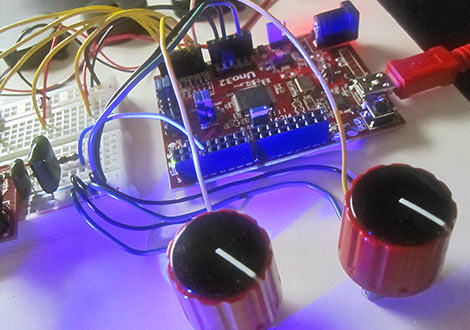
[vtol] has built a very elaborate system of electronic sound machines, which can be patched together in various ways in order to create all sorts of sounds and sound effects. The modules range from simple noise synthesizers to pitch shifters, sequencers, and effects processors. The most recent addition to his synthesizer system is a matrix sequencer named 2112, which focuses on generating random sounds from a very familiar mechanism.

The sequencer simulates Conway’s Game of Life, representing the colony movements in beeps and buzzes, creating a nearly infinite array of random sound effects. Using firmware from the Game of Life board by Ladyada, the sequencer generates different sound patterns based upon the number of colonies on the board. The output varies according to the shapes and proximity of the organisms to one another. Since it is part of his already modular system, the 2112 board can be combined with any number of his other sound generators and effects machines to make all sorts of circuit bent music.

Keep reading to check out the trio of videos below demonstrating the Game of Life board in action.

Continue reading “Music Synthesized From The Game Of Life”

Arduino And Open Sound Control Without An Ethernet Shield

Open Sound Control (OSC) is a communications protocol that can be seen as a modern alternative to MIDI. It’s specifically designed to play nicely with network communication systems. The problem with using it along with Arduino-based gadgets is that you then need to use something like an Ethernet shield to provide the network connection. [Liam Lacey] decided to use Processing as a go-between for OSC and the Arduino in lieu of the Ethernet Shield. One of the major benefits of this method is that it gives you some flexibility when it comes to how the Arduino communicates. Since a USB connected Arduino can be addressed by the Processing sketch in the same way as an AVR chip connected via an RS232 serial port, [Liam’s] method will allow you to prototype on an Arduino board, but transition to your own non-USB hardware for the finished project. The one big drawback to this method is the need to have a computer connected to your controller, but we’d bet you’d need one to run MAXmsp anyway.

SudoGlove Gets A Big Software Upgrade

[Jeremy Blum] recently finished writing a couple of software packages for his SudoGlove system that turns it into a music controller with a lot of features. We’ve seen the hardware in a previous post and as a goal for this iteration he decided not to alter the hardware or the firmware controlling it whatsoever–making this a PC-side software only hack. It’s nice to see improvement on the original ideas as we feel most of the glove-based projects we’ve covered end up getting thrown in the junk box after the developer’s interest wanes.

After the break you can see and hear a demonstration of the complete system. The front end of application shown was written using Processing and includes a slew of user configurations for each sensor on the glove itself. Under the hood [Jeremy] built on the PureData framework in order to really unlock the potential for translating physical movement into synthesized sound. There is also a visual feedback application which will help you practice your movements, important if you’re giving live performances where each finger is a different instrument. Everything for this project, both hardware and software, has been released under a CC license so check out [Jeremy’s] site if you’re interested in building on part or all of the good work he’s done.

Update: [Jeremy] wrote in with a bit of a correction for our synopsis. The application shown in the video is written entirely in PureData and the visual debugger was written with Processing. The two are standalone packages that don’t depend on each other. He also sent us a link to download the code packages.

Continue reading “SudoGlove Gets A Big Software Upgrade”

WiFi Radio Plays Your Tunes In Style

wifi_radio

Instructables user [Jan] likes listening to music while hacking away in his workshop, but listening to the same CDs gets tired and boring after awhile. He contemplated listening to streaming audio over the Internet, but hated the idea of needing a computer around at all times. After a bit of reading, he found some information about building a WiFi radio, and got started on constructing his own.

Using a guide he found at the MightyOhm, he hacked an Asus router to use OpenWRT, adding a music player daemon to tune in various stations. He added a small LCD display and an ATmega32 to drive it, as well as a rotary encoder to allow him to switch between stations.

The case was built using several layers of  MDF which were cut using a CNC mill, and joined together with glue and wooden dowels. The front and back panels were milled out of  alucobond sheets, with the remainder of the case covered in white wood veneer. The detail that went into this build is great, we especially love the “WiFi Symbol” speaker grilles.

All of his code and schematics are available for download, should you desire to make a WiFi radio of your own. Stick around to see a video of his completed radio in action.

[via MightyOhm]

Continue reading “WiFi Radio Plays Your Tunes In Style”

RFID-based HTPC Controller Gets A Wireless Refresh

RFiDJ_Refresh

[roteno] recently wrote in to let us know that he has completed work on the RFiDJ Refresh, a follow up to his 2009 project, the RFiDJ.

The concept is pretty simple – he has a set of RFID enabled tiles, which contain references to particular online streaming audio stations. He uses these tiles to tune into audio feeds on his HTPC by placing them on a block containing an RFID reader.

His previous implementation had the RFID reader tethered to his HTPC, which didn’t make it all that convenient to use. The newer version utilizes a 433 MHz transmitter/receiver pair in order to communicate with the PC, so it can be used anywhere through out his house. The reader and transmitter were placed in a shadow box picture frame, along with a rechargeable Li-poly battery that powers the whole setup. He also mentions that he has added a tactile interface that allows him to initiate mobile phone calls from the RFiDJ as well.

It’s a nice update to an already great project. We imagine it’s a bit more fun for [roteno] and his guests to tap a coaster on the transmitter box than fumble with a remote to change radio stations on the HTPC, but that’s just us.

Check out the videos below to see his new setup in action.

Continue reading “RFID-based HTPC Controller Gets A Wireless Refresh”

Pitch Shifter Makes Your Band Sing Higher

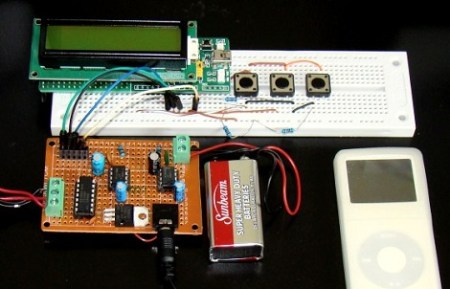
[Markus Gritsch] tipped us off about this little module he built to shift the pitch of audio playback. It uses a PIC 24FJ along with a couple of LM386 amplifier chips to manage the input and output signals. At the push of a button, audio being fed through the device can be modulated to a different key without changing the playback rate. Here it’s being used with a iPod but because this device just sits between an audio source and a signal input we wonder if you can have some fun on the cellphone with this circuit?

Check out the video after the break to hear it in action. We must compliment [Markus] on his layout. We haven’t seen the underside of that protoboard but he’s done a great job of fitting everything into a small area. You can find the schematic for the circuit by following the link at the top of this feature. He took a picture of his hand-drawn plans which saves him time from laying it out with something like KiCAD but still gives us the details that we love to see with your projects.

Continue reading “Pitch Shifter Makes Your Band Sing Higher”

CD Phonograph Brings Old-time Charm To Modern Music

phonograph

[Jozerworx] had always wanted to build a CD player that looked like an old-time Victrola Phonograph player, though he never seemed to be able to find the time to do it. With all of his other projects out of the way, he decided to finally get started on building his phonograph.

He went garage sale hunting and found the perfect base for his project – an old wooden box adorned with tarnished brass hardware. He started in on the project immediately, dismantling a cheap CD player and mounting the motor/laser assembly on the top of the box. The CD player internals were installed inside the wooden box, along with a small audio amplifier stripped from a portable iPod speaker.

A brass horn was fashioned out of an ornament, in order to complete the phonograph feel, but also to act as a passive amplifier. He then mounted a series of switches on the top of the box to allow him to control the CD player’s basic functions.

[Jozerworx] says that it sounds decent, though there are some things he would change. He plans on switching out the audio amplifier and possibly the speakers at some point in the future. He is also still keeping his eye out for a larger, and more effective horn.