DIY MP3 Player Shows That No Hack Is Ever Obsolete

wacken_death_box

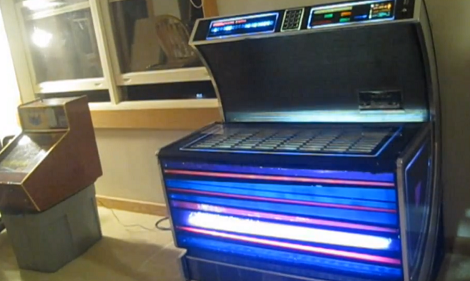
[Ole Wolf] wrote in to tell us about a project he has been working on for several years now. The Wacken Death Box serves as a reminder that once you start a DIY project, it’s probably a good idea to finish it in a reasonable amount of time, lest it risk becoming obsolete.

His Death Box is an MP3 player that he takes along on his annual trip to the Wacken Open Air Festival. His goal was to construct a portable amplified music player that could be powered from either a car battery or charger. A Via EPIA Mini-ITX computer serves as the brains of the device, blaring his tunes from a set of car loudspeakers via a two-channel 100W amp.

[Ole Wolf] used the music player for a few years, improving it as he went along. He does admit however, that with the continually dropping prices of MP3 players, he decided to bring a small portable unit along with him to the 2010 festival, leaving his box at home.

Given the fact that far smaller and more portable devices make his music box seem clunky and obsolete in comparison, you might ask why he even keeps it around. We think that every hack has its place, and while you won’t be strapping the Death Box on your back for your morning jog, it fits quite well in a variety of situations. This rugged music box would be an appropriate choice to use in your workshop, at the beach, or even on a construction job site – places where you might not want to use your comparatively fragile iDevice.

Kequencer 2.0 Is Cheaper And Easier To Build — Still Awesome

[Rich Decibels] decibels received so much interest in his original sequencer build that he decided to make another one that was a bit easier and less expensive to replicate. The original design, called the Kequencer, featured a nicely finished look for the user interface. For the Keyquencer 2.0 he decided that adding a lid to the enclosure meant not spending quite as much for controls (nice looking knobs tend to increase the cost of potentiometers).

A rectangle of protoboard serves as the panel face for the device. It looks like he painted it black on top so that it doesn’t distract from the neatly organized parts layout. He used point-to-point wiring to make most of the hookups, but he did create a board layout which will help to guide you when the number of wires starts to get out of hand. This was made after the fact and he regrets not having it for the initial build. Check out the demonstration video embedded after the break to hear how the second iteration sounds.

Continue reading “Kequencer 2.0 Is Cheaper And Easier To Build — Still Awesome”

Sequencer Built On A Cycle II FPGA Board

[Matt’s] finishing up his computer science degree. As part of a class assignment he programmed his own sequencer which runs on a Cyclone-II FPGA development board. We’ve embedded a video below the fold that shows you what it can do. The buttons and LEDs offered on the board actually allowed him to create a nice user interface. Each slide switch has a surface mount LED above it, giving feedback for which beats in the loop are on and off. There’s also a bank of momentary-push buttons seen in blue above. [Matt] uses these to tweak settings like the pitch that is stored for each slide switch. He even puts on a light show with the VGA output.

We’ve seen this Altera board before, used to drive a falling sands game. The hardware will run you around $200 but that’s not bad considering all of the fun things you can do with it.

Continue reading “Sequencer Built On A Cycle II FPGA Board”

Bluetooth Headset Battery Swap Keeps Going And Going…

bluetooth_headset_battery

[Reginaldo] purchased a cheap Bluetooth headset adapter, and while it worked well with all of his devices, he was disappointed to find that the battery life didn’t quite live up to the manufacturer’s claims. Advertised as capable of operating for 10 hours, he discovered that the device would typically die after only 7. He wanted more from the headset, so he took things into his own hands and replaced it with a much larger battery (Google Translation).

His goal was to keep the modifications as cheap as possible, so he repurposed a lot of items he had sitting around the house. He used a battery out of an old cell phone, with a capacity over six times greater than that of his original headset battery. He built a charging circuit using a MCP73863 microchip, specifically designed for managing Li-Ion/Li-Poly batteries. The Bluetooth headset was dismantled and repackaged in the shell of a cheap “audio amplifier” that he had on hand, along with the new battery and charging circuit. A nifty Hackaday logo was included on the outside of the new battery case, and the project was deemed complete.

[Reginaldo] reports that he is quite happy with his battery retrofit. The new power brick only takes about half an hour longer to charge, but can now be used for approximately 44 hours before requiring a recharge – not too shabby!

Using Your PC As A Simple Signal Generator

dc_offset_circuit

[Debraj] needed a simple signal generator for a project he was working on, but didn’t have one handy. He found that the easiest and cheapest way to get clean, reliable signaling was by using something that was already sitting on his desk – his PC.

He found that the tone generator built into Audacity was quite useful, at least for generating waveforms at less than 20 KHz or so. Upon plugging his scope into his sound card’s audio jack, he observed that the PC had good frequency fidelity, though it required an additional DC offset as most cards are built to remove that offset from the waveform.

Using a LM358 as a non-inverting summing amplifier, he was able to apply a steady DC offset and generate usable signals for his micro controller projects. A schematic for his offset circuit is available on his site, should you wish to build one of your own.

[Debraj] also notes that though Audacity is a cheap free way to generate simple signals, any number of complex signals can be generated using MATLAB if you happen to own a copy.

Solar-powered MP3 Playing Speaker

solar_speakers

[Valentin] bought a small battery-powered cube speaker with a built-in amp some time ago, but didn’t have much patience for replacing or recharging the batteries. It sat on the shelf for awhile until he decided to revive an old MP3 player he had sitting around.

He gutted a pair of solar garden lamps, retaining the solar panels, the built-in charging circuits, as well as the included rechargeable batteries. The MP3 player was disassembled, and its components were built into the speaker enclosure. The player’s buttons were relocated to the outer shell of the speaker box with a few pieces of wire, allowing him to easily control his music without having to build in a method for opening the case. Both the speaker and the MP3 player are powered by the batteries salvaged from the solar lamps, which is why he opted to mount both of the solar panels on the the side of the speaker enclosure rather than just one.

We like it even though the speaker looks a bit rough at the moment, especially where the MP3 player’s buttons were transplanted. After a few minutes of touch-up work however, it’ll look great.

If you’re interested in some more solar hacks, check out this solar-powered junkbot, these solar toys for kids, and this solar-powered WiFi repeater we featured in the past.

Headphones Use Standard-sized But Proprietary Rechargeable Batteries

Here’s something we haven’t run across before. We’re familiar with proprietary battery shapes (we’re looking at you, digital camera manufacturers), or custom recharge connections (look of death directed toward cellphone manufacturers), but using electrical tricks to force AAA brand loyalty is a new one. It seems that’s exactly what is happening with [OiD’s] wireless headphones which were manufactured by Phillips.

The headphones take AAA sized batteries and can use either disposable or rechargeable varieties. There is a warning label advising that only Phillips brand rechargeables should be used, and sure enough, if you try a different brand the performance suffers both in charging time and in battery life. The original batteries are labelled as Nickel Metal Hydride at 1.2V and 550 mAh, which falls within common specs. But [OiD] noticed that there is an extra conductor in the battery compartment that makes contact with the sides of the battery case. Further inspection reveals that a reverse-biased diode makes contact through this conductor with a portion of the battery which has not been painted. This is not true with other brands, allowing the circuit to distinguish between OEM and replacements.

[OiD] shorted out that connection and immediately saw a performance boost from his replacement batteries. It’s hard to know exactly what’s going on here without a full schematic for the circuit, but we’d love to hear your speculation on this setup in the comments. Is this a low tech version of the identity chips that camera batteries sometimes hide?