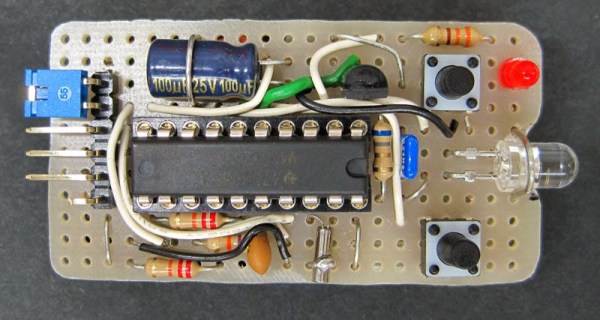
For reasons we both agree with and can’t comprehend, most ‘prosumer’ SLR cameras don’t have mechanical shutter releases. Instead, IR LEDs are brought into the mix, the Canon RC-1 remote trigger being the shutter release of choice for people who didn’t choose Nikon. [Vicente] cloned the Canon RC-1, but he didn’t do it to save money; there’s a lot to learn with this project, and making his own allows him to expand it with more features in the future.
Studying the function of the Canon RC-1, [Vicente] found that some compromises needed to be made. The total power emitted by an IR LED is usually a function of its beamwidth; a smaller beamwidth means more photons reaching the IR receiver in the camera. This also means the remote must be aimed at the camera more accurately. In the end, [Vicente] decided on a higher power LED with a tighter beamwidth that’s just slightly below the optimum wavelength for the receiver. It’s all an exercise in compromise, but other components could see similar performance.
With the LED selected, [Vicente] moved on to building the actual controller. He chose an MSP430 microcontroller for its low power consumption, driving the LED with a watch battery and a transistor. Put together on a piece of protoboard, it’s actually pretty close to a TV-B-Gone. With everything soldered up, it’s good enough to trigger his camera’s shutter from about 5 meters away. Future improvements include cleaning up the code, making the timing more accurate with a crystal, and implementing low power mode on the MSP430.

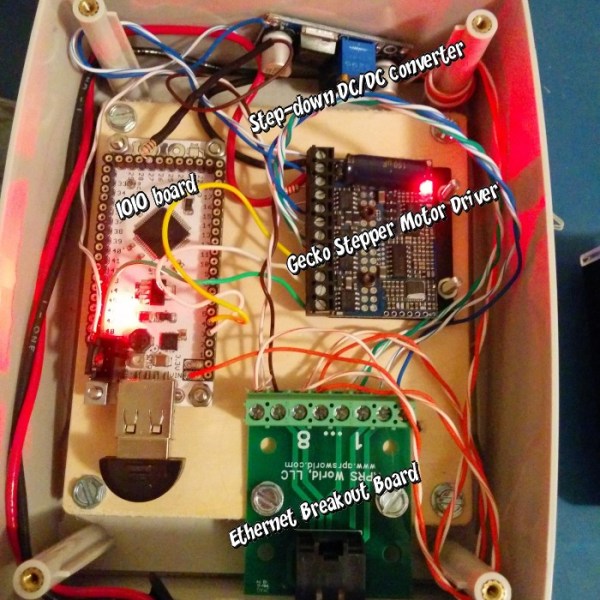
 [Ben]’s camera consists of the