View-Master Video Player!

view master 3d video player

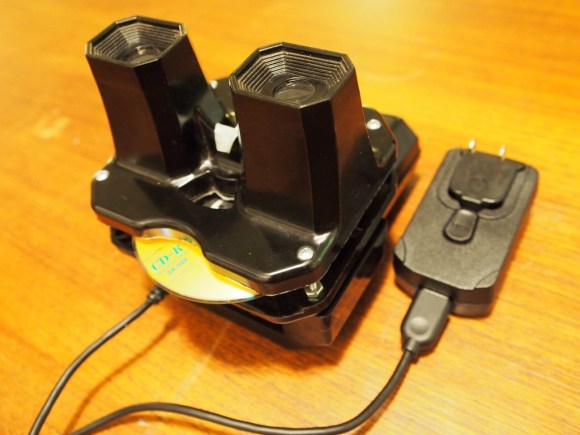
[Alec] just sent us this great project he’s been working on. Converting an antique View-Master from the early 50’s into a modern 3D video player, capable of reading Mini-CDs.

Most View-Masters don’t have much space for tinkering, let alone adding a Raspberry Pi, two displays and a CD drive, so [Alec] really lucked out when he found this model — complete with light and D-cell battery pack. Tons of space! He originally looked into getting some cheap digital photo frame LCDs from China, but soon realized the effort involved with making those work just wouldn’t be worth it, so instead he picked up some 0.9″ OLED displays from Adafruit. He still forgot to check if they had drivers for the Raspberry Pi though, and ended up on another detour of modifying FBTFT drivers to make it all work.

After that headache he got to the fun part — cramming all the hardware inside. He picked up a cheap laptop CD drive off of eBay, and discovered that using the 80MM Mini-CD standard, the discs would just fit inside of the View-Master, sticking out just a little bit, kind of like the original photo wheels!

Quite a bit of fiddling later, he managed to assemble the entire thing in layers, without damaging the external shell of the View-Master. Since it is an antique, it was important for him that his hack be reversible — and for the most part, it is! Stick around after the break to see a short video explanation!

Continue reading “View-Master Video Player!”

InFORM The Morphing Table Gets Even More Interactive

inform2

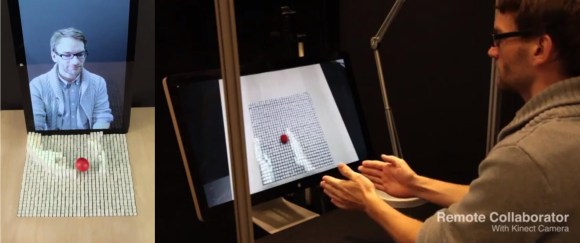
Remember last week’s post on the inFORM, MIT’s morphing table? Well they just released a new video showing off what it can do, and it’s pretty impressive.

The new setup features two separate interfaces, and they’ve added a display  so you can see the person who is manipulating the surface. This springs to life a whole new realm of possibilities for the tactile digital experience. The inFORM also has a projector shining on the surface, which allows the objects shown from the other side to be both visually and physically seen — they use an example of opening a book and displaying its pages on the surface. To track the hand movements they use a plain old Microsoft Kinect, which works extremely well. They also show off the table as a standalone unit, an interactive table — Now all they need to do is make the pixels smaller… 

Stick around after the break to see some more awesome examples of the possibilities of this new tactile-digital interface. There are also some great clips near the end of the video showing off the complex linkage system that makes it all work.

Continue reading “InFORM The Morphing Table Gets Even More Interactive”

Flying RC Toaster

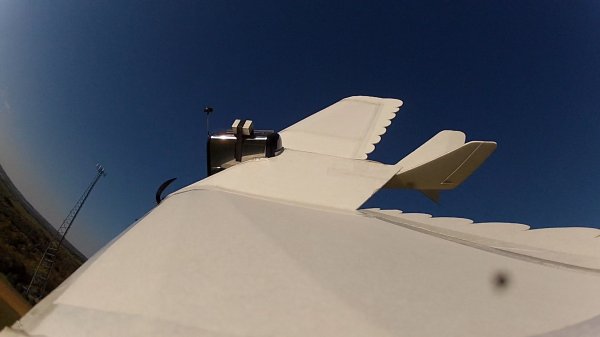
Do you remember that screen saver from the 80’s of flying toasters? Well the guys over at Flite Test just made a real flying toaster.

The first challenge was converting a toaster to run off batteries, which [David] accomplished by splitting the elements in the 110V toaster into 4 segments, and running them off of 6-cell LiPo — when the toaster is on, it draws almost 700W. The next question was — how much of an effect does air flow have on a toaster’s ability to toast? As it turns out, not that much! They tested the system by driving down the street holding a toaster out of the passenger window of the car, and while they got some strange looks, they also successfully toasted the bread.

The next step was making a plane capable of carrying the extra batteries, and a bulky, not-so-aerodynamic toaster. This was probably the easiest part, as they have made a flying 20kg cinder block before. Needless to say, making a toaster capable of flight was not much of a challenge.

Our favorite part of the video is the test flight, where [Josh] wears a POV visor system to, wait for it… watch the bread toasting. Check it out after the break!

Continue reading “Flying RC Toaster”

3D Printering: A Makerbot In Every School Follows The Oregon Trail

printering

Gather ’round, children and I’ll tell you a tale of how everyone from the ages of 16 to 40 has played Oregon Trail.

Back when Apple was just starting out, [The Steves] thought it would be a good idea to get the Apple II into the hands of schoolchildren across the United States. They did this with educational pricing, getting Apple IIs into newly created ‘computer labs’ in schools across the country. These new computers – from my experience, anyway – were used as a replacement for the old Selectric typewriters, and on rare occasions a machine that played the MECC classics like Oregon Trail.

Fortunately, a few students were bright enough and had teachers who were brave enough to allow BASIC programming, PEEKs and POKEs. This was the start of a computer revolution, a time when grade schoolers would learn a computer wasn’t just a glorified word processor or dysentery machine, but something that would do what you told it to do. For those kids, and I’m sure a few of them are reading this, it was a life changing experience.

Now it appears we’re in the midst of a new revolution. If this horribly named column isn’t enough of a clue, I’m talking about 3D printing. Yesterday, Makerbot announced they were going to fill in for Apple in this physical revolution by trying to get a Makerbot into every school in the country.

Continue reading “3D Printering: A Makerbot In Every School Follows The Oregon Trail”

BITX, A Return To Hackers’ Paradise

bitx

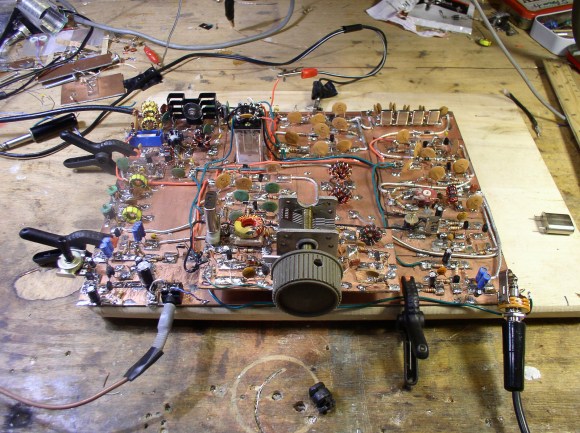
[Bill Meara] has finished up his radio. It both looks and sounds great. It was only a few weeks ago that [Bill] posted a guest rant here on Hackaday. The Radio he mentioned building in the rant is now complete. The transceiver itself is a BITX, a 14MHz Single Sideband (SSB) radio designed by Ashhar Farhan VU2ESE. Ashhar designed the BITX as a cheap to build, and easy to tune up transceiver for radio amateurs in India.

By utilizing parts easily sourced from scrapped TV sets, the BITX can be built for less than 300 Indian Rupee – or about $4.70 USD. In [Bill]’s own words, “Five bucks and some sweat equity gets you a device capable of worldwide communication.” He’s not kidding either. [Bill’s] first QSO was with a ham in the Azores Islands of Portugal.

[Bill] built his radio using the “Manhattan” building style, which we’ve seen before. Manhattan style uses rectangular pads glued down onto a copper ground plane. It makes for a more flexible design than regular old dead bug style building. Looking at all those components may be a bit daunting at first, but plenty of support is available. [Bill] has an 18 part build log on the soldersmoke website. There also is an active yahoo group dedicated to the BITX.

Ask Hackaday: Can You Hack An Appliance Into A Spy Device?

crackinGoodTeapot

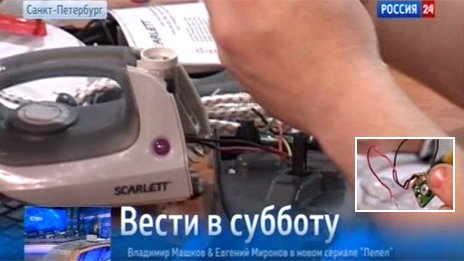
A story surfaced a few days before Halloween on Russian news site Rosbalt (yep, that’s in Russian), claiming Russian authorities intercepted Chinese-made electric irons and kettles: each equipped with microphones and WiFi. You can read a summary in English on the BBC’s website. The “threat” imposed by these “spy appliances” is likely the result of gross exaggeration if not downright fear mongering against Chinese-made products. It’s not worth our (or your) effort to speculate on what’s really happening here, but the situation does present a fun exercise.

Say you wanted to spice up your pen testing by altering a small home appliance: how easily could you build it? Let us know in the comments which appliance would serve as the best “host” for the modifications and what features you would include. Could you manage all the components listed in the article–a microphone, WiFi (any chance of cracking unsecured networks?), plus some vague indication that it “spreads viruses?” There’s a video below with a few glimpses of the electronics in question, but unless you speak Russian it probably won’t offer much insight.

Continue reading “Ask Hackaday: Can You Hack An Appliance Into A Spy Device?”

Examining Vintage Printer Server Hardward For Apple II

II-easy-print-reverse-engineering

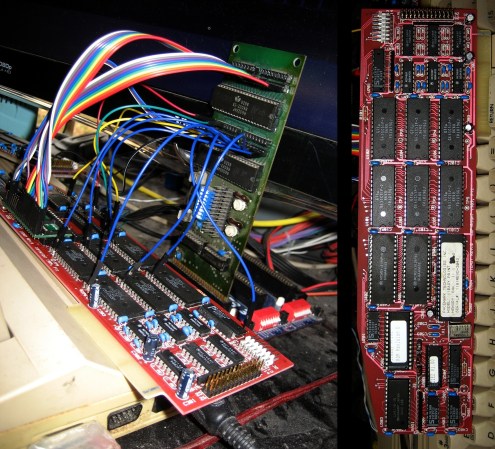
Need to share a printer between several Apple II computers? Of course you don’t, but back in the day this would have been a really awesome piece of hardware to own. It’s a Pacemark iiEasy Print (we’re not sure on the capitalization of the name so talk amongst yourselves). It is an automatic buffer and switch that you can have now-a-days for just a couple of Hamiltons. [David] doesn’t mention where he “acquired” his specimen, but all the details about his adventures reverse engineering the card are shared in detail.

First off, we have to mention his unorthodox bench tools. To the untrained eye it would appear that he has attached the iiEasy Print to a Commodore 64; and that eye would be right. [David] says he uses the C64 something like an Arduino (if that’s even possible). The green card is plugged into the C64 memory bus, connecting to the DIP socket breakout board on the left and the chip select pins for most of the other IC’s on the original board. The gist of this setup is that it’s simple to use the “passthrough” DIP socket to monitor what the 6502-like processor is doing, while mapping the memory with the help of the chip select signals.

What did he learn from all this? Quite a lot but you might as well click that link above and hear it from his own mouth.