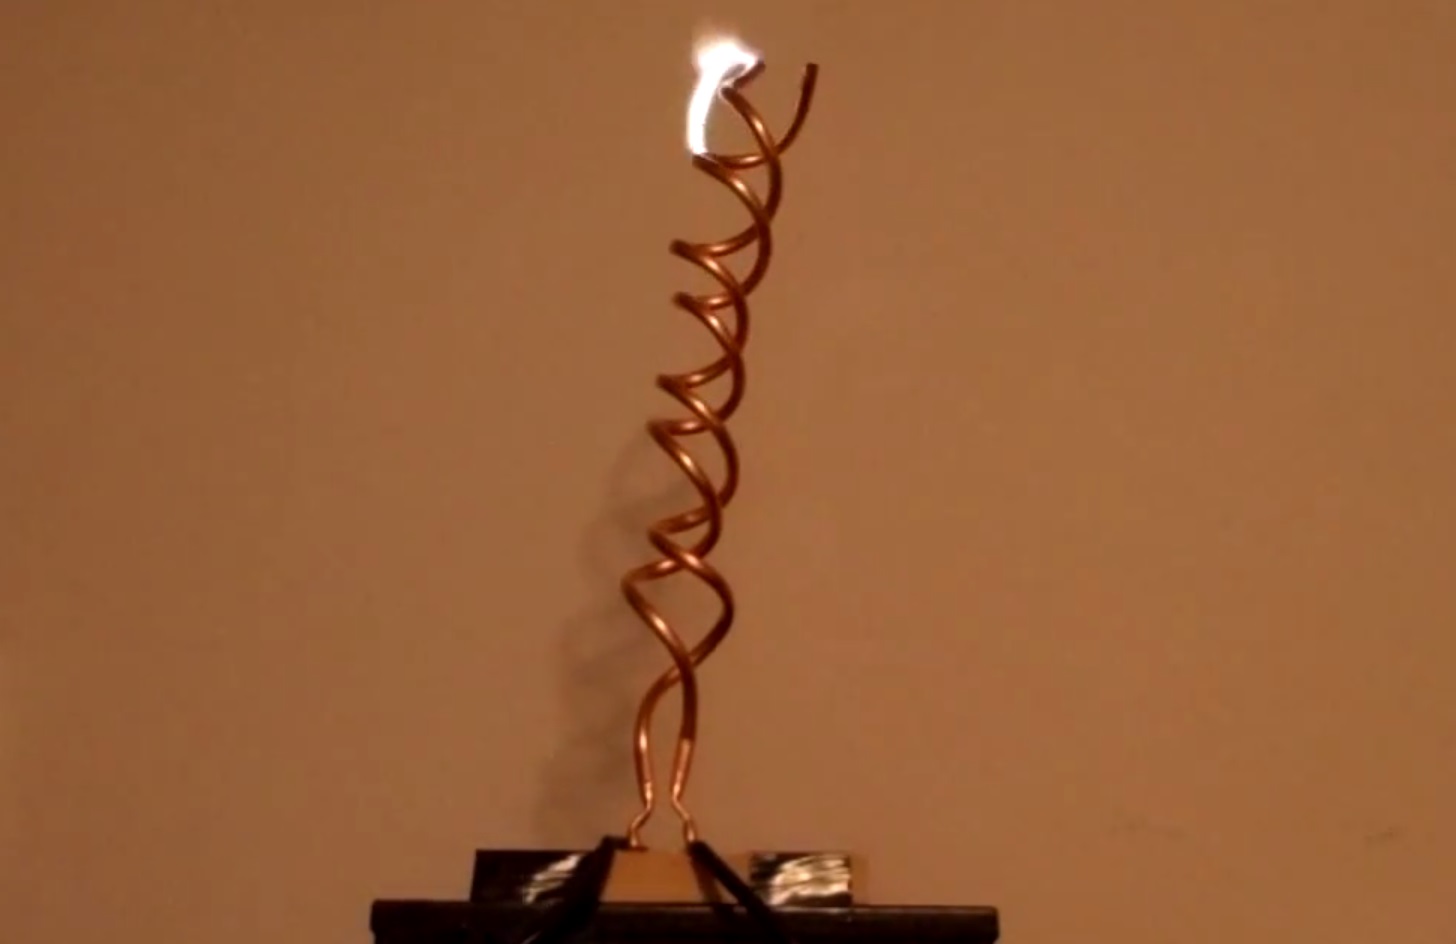
Halloween Knock Box

knock_box_top

[Kyle] has been an avid reader of HaD for a long time. In fact, he was inspired by a Halloween knock box from 4 years ago! He saved the link and finally this year, he went ahead and made his own.

So what is it anyway? Well, as the name implies, when you knock on it, it knocks back. And if you knock on it a special number of times, it’ll play a secret tune… It is a great little item to have at any Halloween event — and kids love it!

Design and function of the box is basically the same as the original, with a few modifications — most notably, swapping out the original PICAXE for an ATtiny85 microcontroller. [Kyle] even managed to find the lego skeleton and chains available on eBay. He’s put together a very thorough blog post on it and shared all the code and schematics — so if you’re looking for a last minute Halloween project, this might be it!

Stick around after the break to see the knocking in action!

Continue reading “Halloween Knock Box”

Alas, Poor Yorick! I Tweeted Him

yoreck the talking skull

You know Halloween is coming around when the tweet reading skulls start popping up. [Marc] wanted to bring the Halloween spirit into his workplace, so he built “Yorick”. In case you’re worried, no humans were harmed (or farmed for parts) in the creation of this hack. Yorick started life as an anatomical skull model, the type one might find in a school biology lab. Yorick’s skull provided a perfect enclosure for not one but two brains.

A Raspberry Pi handles his higher brain function. The Pi uses the Twitter API to scan for tweets to @wedurick. Once a tweet is found, it is sent to Google’s translate server. A somewhat well-known method of performing text to speech with Google translate is the next step. The procedure is simple: sending “http://translate.google.com/translate_tts?tl=en&q=hackaday” will return an MP3 file of the audio. To get a British accent, simply change to google.co.uk.

The Pi pipes the audio to a speaker, and to the analog input pin of an Arduino, which handles Yorick’s lower brain functions.  The Arduino polls the audio in a tight loop.  An average of the last 3 samples is computed and mapped to a servo position. This results in an amazingly realistic and automatic mouth movement. We think this is the best part of the hack.

It wouldn’t’ be fair for [Marc] to keep the fruits of his labors to himself, so Yorick now has his own Livestream channel. Click past the break to hear Yorick’s opinion on the Hack A Day comments section! Have we mentioned that we love pandering?

Continue reading “Alas, Poor Yorick! I Tweeted Him”

Light Up Earrings

light up earrings

Unfortunately [ch00f’s] been too busy to write for Hack a Day lately, but he has finished off an awesome little project — Christmas LED earrings!

As with all his projects, there is a brilliant write up that covers everything — even for the stuff that didn’t work. But what we really have to admire about this project in particular is the scale at which he was working. The tiny battery squished in between the two boards? A mere 19mAh. Which is actually enough to power the earrings for a few hours, but is only the size and thickness of a few microSD cards!

The second thing that really popped out at us was the boards themselves, there’s just no room for a programming header! To work around this [ch00f] actually made the PCBs in 3 segments, programmed it, and then cut off the programming header section! If that’s not enough ingenuity, how about this – He also included hall effect sensors on-board to turn them off while charging! Not to mention an intricate wood box to charge them in…

Stick around after the break to see the great demo video, it even has some classy music from the 1930’s which really sets the mood.

Continue reading “Light Up Earrings”

Halloween Doorknocker Decoration Hack

halloweenDoorHack

If you’re new to hacking, Halloween is a great excuse to get started, and [Chuck] has put together an inexpensive animated Halloween decoration that you can show off on your front door. After scoring a $5 plastic Halloween doorknocker from Wal-Mart, [Chuck] gathered together a small pile of components and then set about breathing some life (death?) into its scary but motionless face.

Though he opted to use a Digispark, you should be able to use any Arduino that is small enough to stuff inside the plastic head. [Chuck] cut some holes in the eyeballs and glued in two RGB LEDs, then cobbled together a quick-and-dirty mount in the mouth area to hold a small servo. The lights and the servo are wired to the Digispark, which turns the lights on and instructs the servo to slam the ring against the door. It’s is battery powered and currently has only two settings: on or off. This should be good enough to scare the kids for this year, but [Chuck] has plans to add a much-needed motion sensor and sound via a Bluetooth connection. 

As simple as this build is, it could be just the thing to get you in the holiday spirit, or to introduce the young hacker in your home to the world of electronics and coding. Check out the short video of the doorknocker after the break, then swing by [Chuck’s] website for detailed build instructions and his Github for the source code. If you’re having trouble finding this doorknocker at Wal-Mart, [Chuck] recommends a similar one on Amazon. Don’t stop now! Make some Flickering Pumpkins too, or if you want a challenge, hack together your very own Pepper’s Ghost illusion.

Continue reading “Halloween Doorknocker Decoration Hack”

Pepper’s Ghost – Halloween Ghosting

Peppers Ghost is a classic technique for making ghosts appear in pictures, video, and even in front of live audiences. In this week’s Halloween themed Instructable, learn how to recreate the effect at home.

It’s really quite simple. By positioning a clear piece of lexan at a 45 degree angle to your “ghost” object, and having the audience (or camera) looking at the lexan at the opposite 45 degree angle, you can produce a very simple ghost effect. This is a great trick for producing some scary ghosts in your haunted house.

But wait. Isn’t this a bit too simple? This is Hack a Day isn’t it? How about making a real moving hologram, isn’t that a bit more of our speed?

Well, this is the exact same technique that is used to make real holograms — just replace that object with a projected image or video! We’ve covered it a couple of times before, explaining the Tupac hologram, and showing off a cool leap motion controlled globe hologram.

Our challenge to you is to make a moving hologram Halloween decoration. After all, you can get pico projectors for less than $100 these days, so why not give it a try? There’s a few more ideas and techniques for positioning the lexan in the video after the break.

Continue reading “Pepper’s Ghost – Halloween Ghosting”

DIY Pressure Plate Switch For Your Haunted House

Pressure Plate

Yes, its Halloween time again and the hacks are going to be crawling out of the woodwork for the rest of the month. [Rich Osgood] is off to a good start promising one hack every week until Halloween. Judging from this first project, a DIY pressure plate switch, we think there’s going to be a common theme to follow. [Rich] constructs his pressure plate for almost no cost using cardboard, tinfoil and duct tape. It couldn’t be easier, so make lots of these if your haunting project requires pressure plate triggers to activate any spooks. Judging by the cardboard construction it’s likely they will fail after multiple uses, but you can switch one out quickly requiring only two hookup wires and a bit of tape.

Hopefully we aren’t stealing [Rich’s] thunder by recommending using Xbee wireless remote sensors to covertly monitor guests or trigger spooktacular scares.

We will be keeping an eye out for [Rich’s] follow-up Halloween hacks. Join us after the break to watch the tutorial video on making homemade pressure plates.

Continue reading “DIY Pressure Plate Switch For Your Haunted House”

LEDs Turn The Heat Up On Flameless Pumpkin Lights

led-peter

When tea lights just won’t do, why not move up to a 5 channel LED candle simulator?

Halloween is fast approaching. Peter’s local hackerspace, The Rabbit Hole had a meeting to carve pumpkins and talk Halloween hacks. After seeing how poorly a tea light illuminated a medium size pumpkin, this hack was born. We’ve seen LED jack-o’-lantern hacks before, but this one was worth a second look.

In true hackerspace style, [Peter] used what was available to him. A PIC12F508 is the heart of the project. The 12X508/9 series has been around for at many years, and is still a great chip to work with. We remember using the ‘C’ version of this chip to bypass region locks on original PlayStation systems. [Peter] created a simple circuit with two basic modes. In “value mode” the 508 drives LED’s directly from its I/O pins. This limits the total output to 60mA. In “premium mode”, some 2N3904 NPN transistors are brought in to handle the current.  This allows the PIC to drive up to 5 LEDs.

Candles can be tricky to simulate with LEDs. [Peter] used 5 independent 16 bit linear feedback shift registers to generate pseudo random bit streams. The effect is quite impressive. A “wind simulation” completes the illusion of a real flame. Continue reading “LEDs Turn The Heat Up On Flameless Pumpkin Lights”