How much effort do you put into conserving energy throughout your daily routine? Diligence in keeping lights and appliances turned off are great steps, but those selfsame appliances likely still draw power when not in use. Seeing the potential to reduce energy wasted by TVs in standby mode, the [Electrical Energy Management Lab] team out of the University of Bristol have designed a television that uses no power in standby mode.
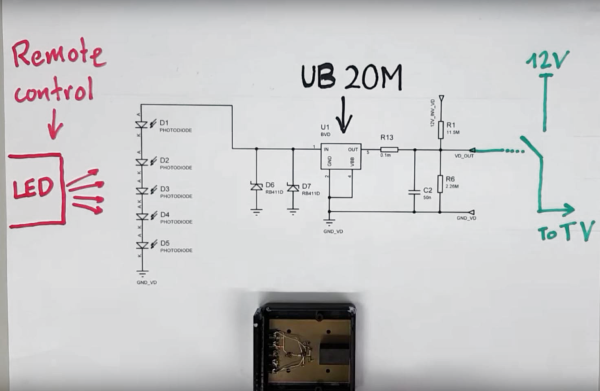
The feat is accomplished through the use of a chip designed to activate at currents as low as 20 picoamps. It, and a series of five photodiodes, is mounted in a receiver which attaches to the TV. The receiver picks up the slight infrared pulse from the remote, inducing a slight current in the receiving photodiodes, providing enough power to the chip which in turn flips the switch to turn on the TV. A filter prevents ambient light from activating the receiver, and while the display appears to take a few seconds longer to turn on than an unmodified TV, that seems a fair trade off if you aren’t turning it on and off every few minutes.
Continue reading “Hacked Television Uses No Power In Standby Mode”


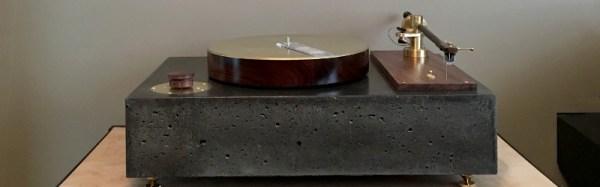
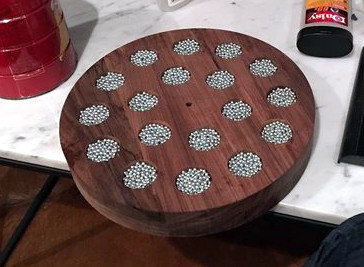 The platter is machined from a piece of rosewood, weighted and balanced with lead shot, and laminated between two sheets of brass. It sits on a bearing aided by a ring of opposing magnets, and is belt driven by a two-phase induction motor. The base of the turntable is cast as a single piece of concrete, the idea being that the extra weight will aid the damping of vibrations. The tonearm is machined from a piece of wood, and its pivot from brass. The tonearm bearing is a ballpoint pen, a surprising yet inspired choice .