Upcycle Old Speakers With C.H.I.P.

Sometimes you get a piece of hardware that’s so cool you can’t help but fix it back up. There are a lot of companies after that sweet, sweet Raspberry Pi money, and the $9 US Dollar C.H.I.P. is a very interesting contender for the space. We have been especially enjoying the stream of neat hacks and example projects they’ve been putting out.

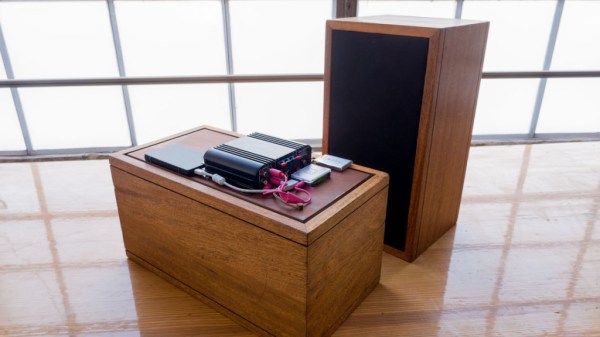
In this case, [Peter] wanted to get a pair of walnut speakers up to modern standards. Already suffering from a glut of audio equipment in his personal space, he decided to sweeten the deal by adding support for his library of music.

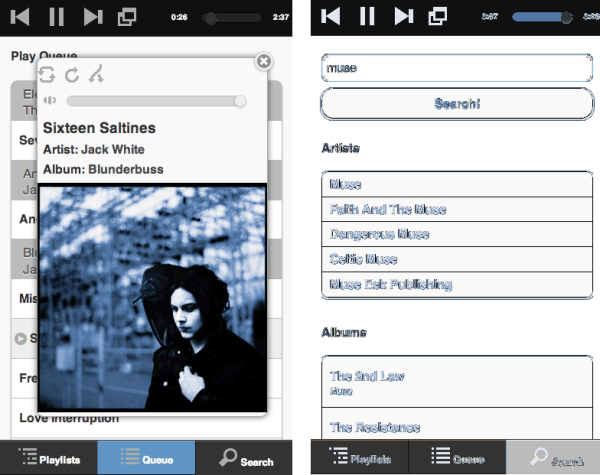
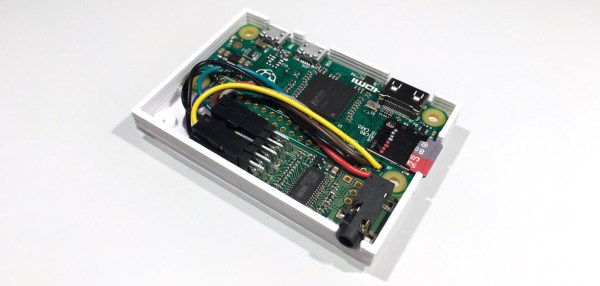
The first step was ordering a new set of drivers to replace the aged 40-year-old ones occupying the set. After he got them installed, he added C.H.I.P., a power supply, an amplifier, and a 500GB hard-drive. The controlling software behind the installation is the venerable mpd. This way he can control the speakers from any device in his house as long as he had an interface installed for the daemon.

We’re glad these speakers didn’t end up in the garbage behind a goodwill somewhere, and they do look good.

Audio Streaming On The Cheap With An RPi Zero

The minuscule size of the Raspberry Pi Zero makes it perfect for hacks where size is a factor. For example, a small, standalone device for getting streaming audio into your speakers. The RPi Zero doesn’t have an audio output on board, so PolyVection paired it up with their PlainDAC to build a minimal audio streaming device.

Their build uses a few lines from the GPIO header to drive an I2S digital to analog converter. The DAC is a PCM5142 from Texas Instruments that provides high quality sound output, and contains a built in programmable DSP.

The hardware fits into a 3D printed case, coming in at 68 mm by 48 mm. There’s no WiFi inside, but this can be added with an external USB device for wireless streaming. The DAC used is supported by the Linux kernel, so a simple configuration is all that’s needed to pipe audio out.

Once you have a device like this assembled, you can install a server like Music Player Daemon to remotely control the device and cue up internet radio channels.

Learning Python With Tron Radio

[5 Volt Junkie] has built his share of Arduino projects, but never anything with Python, and certainly never anything with a GUI. After listening to Internet radio one day, a new idea for a project was born: a Raspberry Pi with a small touchscreen display for a UI and displaying soma.fm tracks. It’s finally finished, and it’s a great introduction to Python, Pygame, and driving tiny little displays with the Pi.

Playing soma.fm streams was handled by mpd and mpc, while the task of driving a 2.8″ TFT LCD was handled by the fbtft Linux framebuffer driver. This left [5 Volt Junkie] with the task of creating a GUI, some buttons, and working out how to play a few streams. This meant drawing some buttons in Inkscape, but these were admittedly terrible, so [5 Volt Junkie] gave up and turned on the TV. Tron Legacy was playing, giving him the inspiration to complete his Tron-themed music player.

The result of [5 Volt Junkie]’s work is a few hundred lines of Python with Pygame and a few multicolor skins all wrapped up in a Tron theme. It looks great, it works great, and it’s a great introduction to Python and Pygame.

Continue reading “Learning Python With Tron Radio”

Fubarino-Contest: 1980’s CD Player With MPD

fubarino-cd-shelf-player

[Ronald] had to scramble to get his submission in, but we’re glad he did. His demo video shows the display of a 1980’s CD player working with Music Player Daemon. It’s really just the original display itself that works, but the project is not yet finished. However, is far enough along to show our URL when a track reaches the 22:00 mark.

The display is driven by an ATmega32 chip which uses a USB connection to receive commands from the computer running MPD. [Ronald] had troubles figuring out how to send int values over USB so he hacked his own protocol that just uses the LSB of each byte coming over the bus. After the break you can see the video, and read the description which he included with his submission. There is also a code package available here.


This is an entry in the Fubarino Contest for a chance at one of the 20 Fubarino SD boards which Microchip has put up as prizes!

Continue reading “Fubarino-Contest: 1980’s CD Player With MPD”

Classic 80’s Stereo Receiver Enjoys A Second Life As RadioduinoWRT

radio2
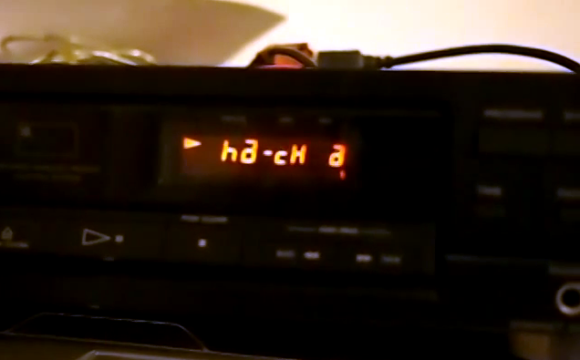
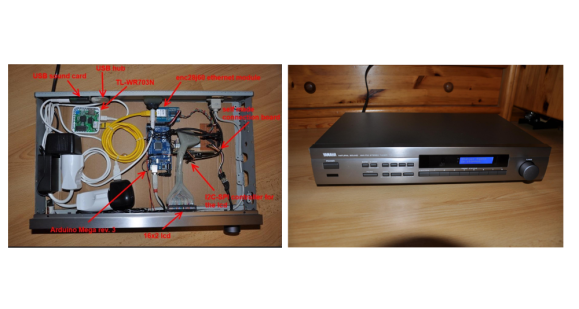
[Raffael] had an old Broken Yamaha natural sound receiver lying around. Rather than throw it out, he built himself a slick web radio. He calls it RadioduinoWRT. [Raffael] started by removing all the internals – though he kept the front panel controls.  He then added an Arduino Mega to handle the front panel controls, including a 16×2 character LCD module. The Arduino also takes commands via IR remote. An enc28j60 Ethernet module allows the Arduino to communicate with a the brains of the operation, a TL-WR703N mini router.

A micro USB hub expands the single USB port on the WR703, allowing both a USB sound card and a 4 gig USB stick to be mounted. We’d like to add that the TL-WR703 is a must in this application – the amazon link [Rafael] provides brings up the TL-WR702 as a top link. Only the TL-WR703 has a USB host connection.

The real magic is in [Raffael’s] software setup. The WR703 is running OpenWRT.  He added modules for the USB sound card, as well as expanding the file system onto the USB stick. Once that was complete [Raffael] added Music Player Daemon (MPD) and MPC, a console app to drive MPD. Lighttpd, a light web server provides an interface for the Arduino as well as a web front end to the entire radio.All this allows [Raffael] to control his radio in several ways. He can log in via any web browser on his network. He can use the front panel controls. He can use an IR remote. Since he is running MPD, any client (there are literally hundreds out there) will also drive the radio.

While a low-end USB sound card in a home stereo application does make our inner audiophile cringe a bit, the quality does seem to be pretty good. [Rafael’s] design would make it simple to swap out a higher quality USB sound card if the need arises.

Continue reading “Classic 80’s Stereo Receiver Enjoys A Second Life As RadioduinoWRT”

Raspberry Pi As A Spotify Server With MPD Control

The Raspberry Pi has been very popular as a streaming music player. Sure, the only audio out option on the board is an analog stereo jack, but you can use a USB audio device to improve upon that if you wish. [Wouter van Wijk] wanted to use his RPi as a Spotify server. It’s a bit tricky to get everything configured for this, so he decided to give back by publishing a ready to use Spotify server image for the Raspberry Pi.

The project is call the Pi MusicBox. Like some of the RPi Pandora setups we’ve seen he included the ability to use the hardware as an AirPlay device too. To connect to the Spotify service he uses the Mopidy package. It can also play tracks from local storage (including the home network). It’s even capable of mixing the two sources in the same queue. Possibly the best part is that it can be controlled with any Music Player Daemon (MPD) client like the smart phone screenshots seen above.

If you’re interested, check out his GitHub repo for the project.

A Simple Touch Interface For Music Player Daemon And More

mpd-controller

[Andrew] recently got the authorization to install Linux on his work PC, and he was looking for a way to control his music without relying on keyboard shortcuts to do so. Additionally, he wanted an unmistakable visual cue when he received messages in Pidgin, so he decided to build an external input/notification box.

The control box, quite literally, is a cardboard box in which [Andrew] crammed some components he got way back when from the crew at Seeed Studio. A Seeeduino serves as the brains of his control panel, interfacing with his PC over USB. He uses a set of 4 touch sensors and a potentiometer to control the MPD, allowing him to easily switch tracks, pause his music, control the volume, and lock his computer with a simple touch. A side-mounted RGB LED lights green to show that the system has received his commands successfully, pulsing a bright blue whenever a message arrives via Pidgin.

While the case isn’t exactly pretty, it is small, recycled, and takes up very little desk space. [Andrew] says that it works great, and he has made his code available on github if anyone is interested in using it.