Laser cutters are CNC power tools, which means an operator uploads a job digitally and then pushes START to let the machine do all the work while they lie back in a hammock sipping a margarita, occasionally leaping out in a panic because the sound coming from the machine changed slightly.
Like other power tools, laser cutters are built around doing one thing very well, but they require an operator’s full attention and support. The operator needs to handle all the other things that go on before, during, and after the job. It’s not too hard to get adequate results, but to get truly professional and repeatable ones takes work and experience and an attention to detail.
People often focus on success stories, but learning from failures is much more educational. In the spirit of exploring that idea, here are my favorite ways to fail at laser cutting and engraving. Not all of these are my own personal experience, but they are all someone’s personal experience.
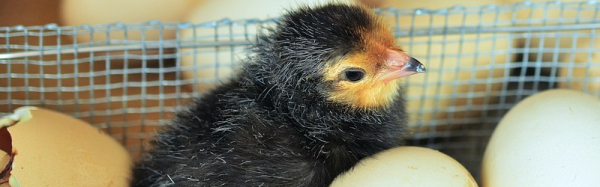
If you’ve had a child in the last few decades, you’ve had a choice to make: if you want to know the sex of the baby ahead of time. With ultrasound you can find out or–popular these days–you can have the result sealed and have a baker create a reveal cake. Apparently, researchers at the Dresden University of Technology and the University of Leipzig wanted to do the same trick with unborn chickens.
You might wonder why anyone cares (we did). Apparently, chickens that are bred for egg laying don’t produce roosters suitable for food use. This leads to about half of the chicks being “culled” (a less ugly euphemism than gassed or shredded) and used in–among other things–animal feed. Worldwide, billions of chicks are culled each year and that’s not counting other similar situations like male turkeys and female ducks.
Seb Lee-Delisle has built a career around large installations that use powerful lasers and high-end projects to make people happy. It’s a dream job that came to fruition through his multi-discipline skill set, his charismatic energy, and a mindset that drives him to see how he can push the boundaries of what is possible through live interaction.
His talk at the Hackaday | Belgrade conference is about his Laser Light Synth project, but we’re glad he also takes a detour into some of the other installations he’s built. The synth itself involves some very interesting iterative design to end up with a capacitive touch audio keyboard that is lit with addressable LEDs. It controls a laser that projects shapes and images to go along with the music, which sounds great no matter who is at the keyboard thanks to some very creative coding. As the talk unfolds we also hear about his PixelPyros which is essentially a crowd-controlled laser fireworks show.
See his talk below and join us after the break for a few extra details.
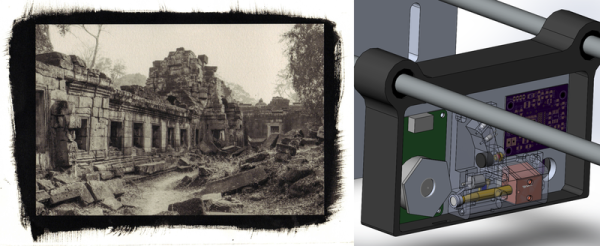
There is a family of old photographic chemistries based on iron compounds which, like the blueprint, are exposed using UV light. Ironically, the digital camera revolution which has made everything else in our photographic lives much easier, has made it harder to experiment around with these alternative methods. [David Brown] is making a UV photographic printer to change that.
[David]’s application has a lot in common with PCB printers that use a UV-sensitive resist, only [David] needs greyscale, and it might also be nice if it could work with wet paper. This makes it a more challenging project than you might think, but we like the cut of [David]’s jib.
Like some of the other UV exposer projects, [David]’s uses a rotating mirror to scan across the to-be photograph’s surface. Unlike the other ones that we’ve seen, the exposer hangs from two linear rails. Other printers move the paper underneath a stationary scanning head, which seems a mechanically simpler arrangement. We’re excited to see how this goes.
Plenty of materials take the heated edge of a laser beam quite well, but many others don’t. Some release toxic fumes; others catch fire easily. For all the materials that don’t cut well (PVC and FR4, we’re looking at you!) and for those that do (hello, acrylic and Delrin) they’re each reacting to the heat of the laser beam in different ways. Lucky for us, these ways are well-characterized. So let’s take a look at how a laser cutter actually cuts through materials.
If you’ve played around with laser diodes that you’ve scavenged from old equipment, you know that it can be a hit-or-miss proposition. (And if you haven’t, what are you waiting for?) Besides the real risk of killing the diode on extraction by either overheating it or zapping it with static electricity, there’s always the question of how much current to put into the thing.
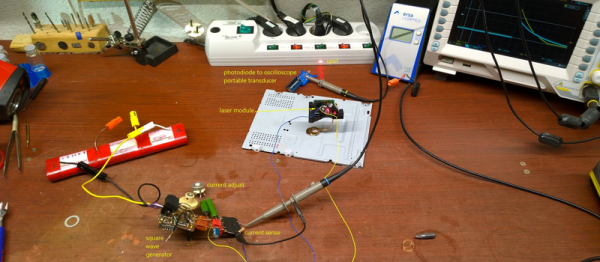
[DeepSOIC] decided to answer the latter question — with science! — for a DVD-burner laser that he’s got. His apparatus is both low-tech and absolutely brilliant, and it looks like he’s getting good data. So let’s have a peek.
Laser Detector on 3D Printer Scrap
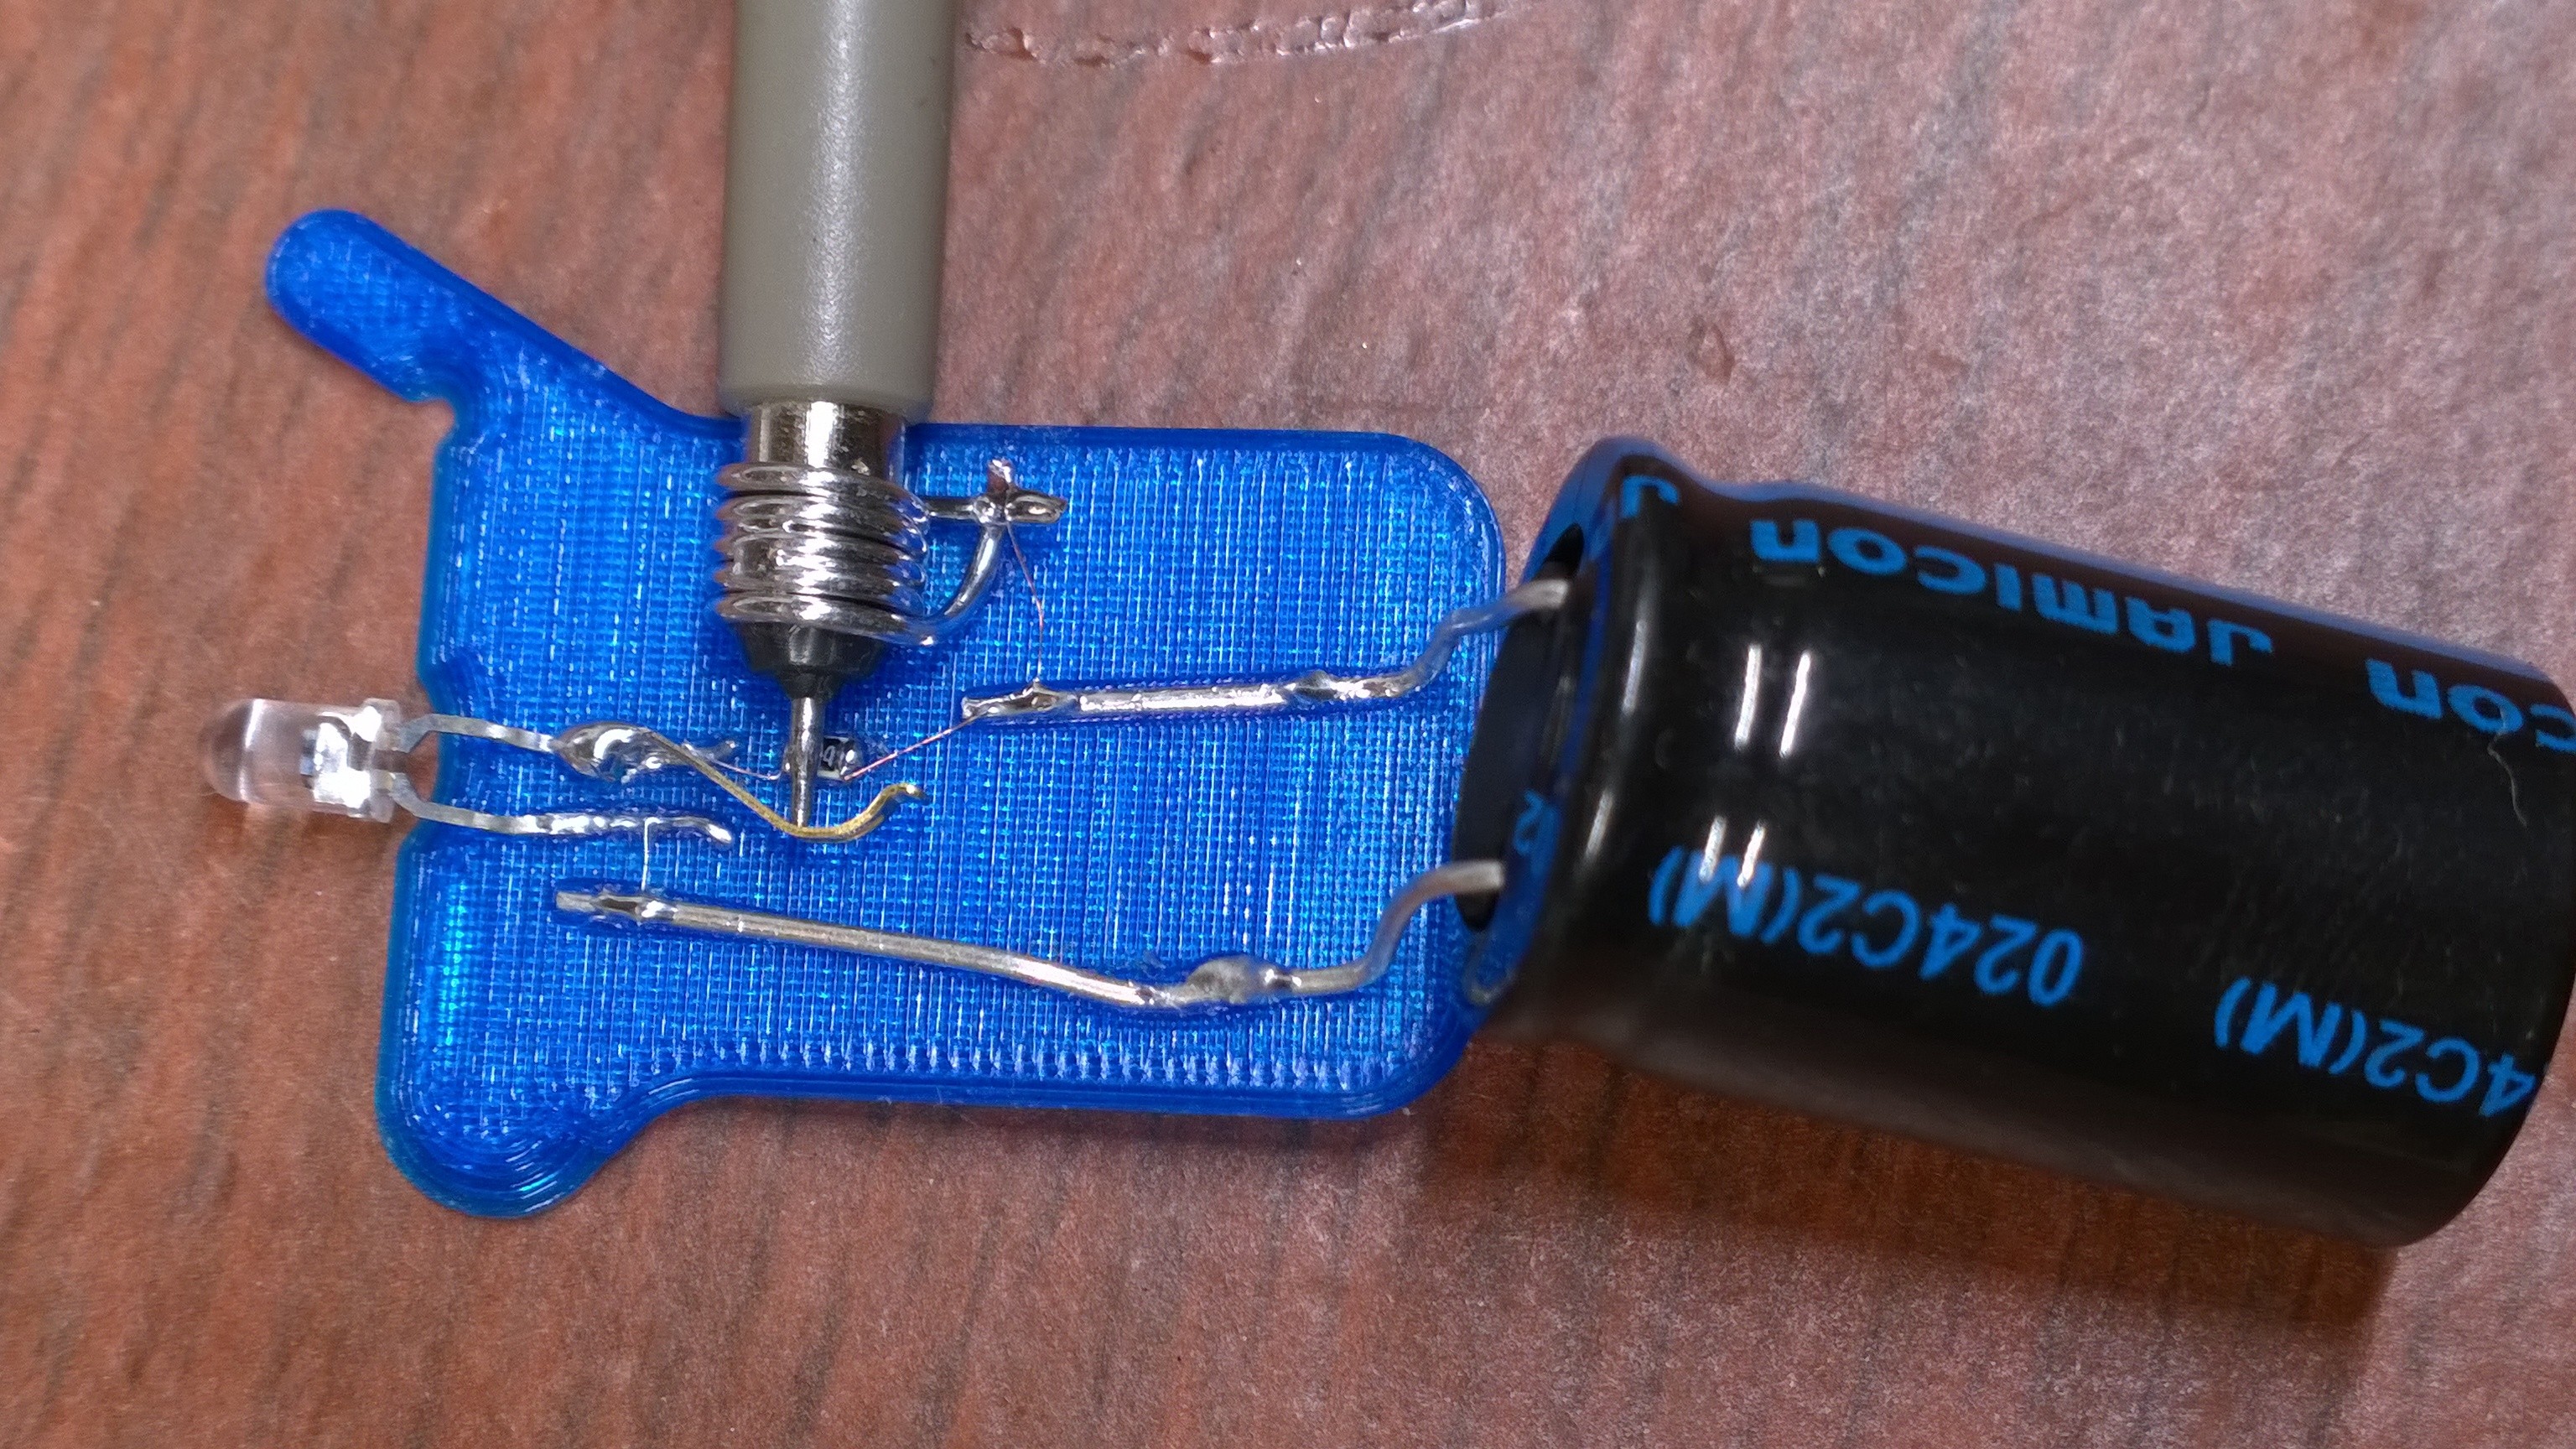
First up is the detector, which is nothing more than a photodiode, 100k ohm load resistor, and a big capacitor for a power supply. We’d use a coin-cell battery, but given how low the discharge currents are, the cap makes a great rechargeable alternative. The output of the photo diode goes straight into the scope probe.
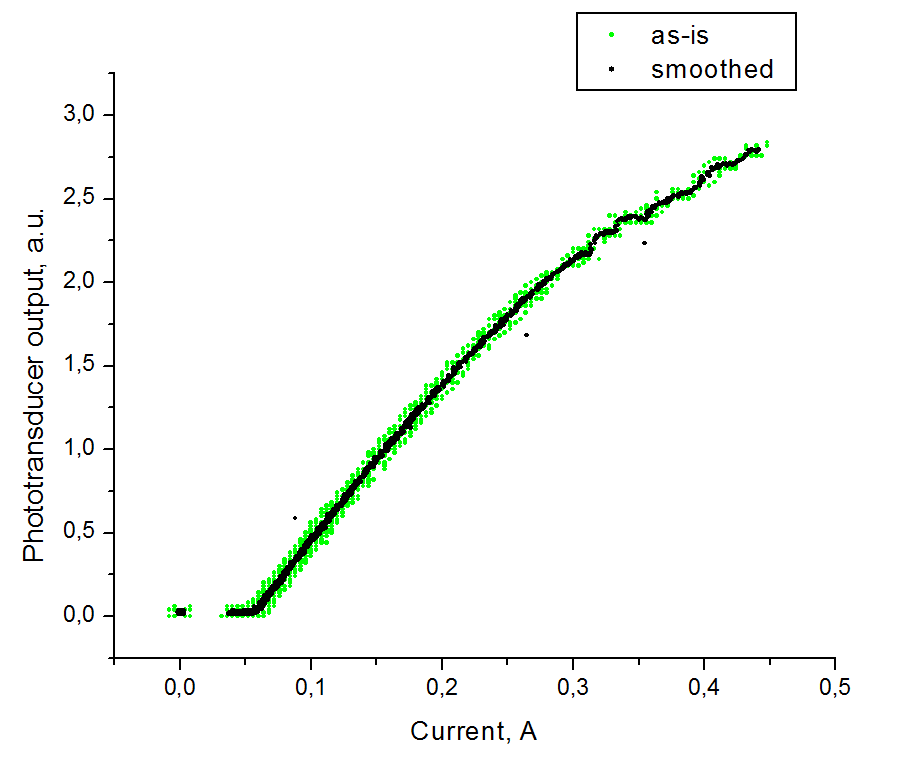
He then points the photodiode at the laser spot (on a keyboard?) and pulses the laser by charging up a capacitor and discharging it through the laser and a resistor to limit total current. The instantaneous current through the laser diode is also measured on the scope. Plotting both the current drawn and the measured brightness from the photodiode gives him an L/I curve — “lumens” versus current.
Look on the curve for where it stops being a straight line, slightly before the wiggles set in. That’s about the maximum continuous operating current. It’s good practice to de-rate that to 90% just to be on the safe side. Here it looks like the maximum current is 280 mA, so you probably shouldn’t run above 250 mA for a long time. If the diode’s body gets hot, heatsink it.
If you want to know everything about lasers in general, and diode lasers in particular, you can’t beat Sam’s Laser FAQ. We love [DeepSOIC]’s testing rig, though, and would love to see the schematic of his test driver. We’ve used “Sam’s Laser Diode Test Supply 1” for years, and we love it, but a pulsed laser tester would be a cool addition to the lab.
What to do with your junk DVD-ROM laser? Use the other leftover parts to make a CNC engraver? But we don’t need to tell you what to do with lasers. Just don’t look into the beam with your remaining good eye!
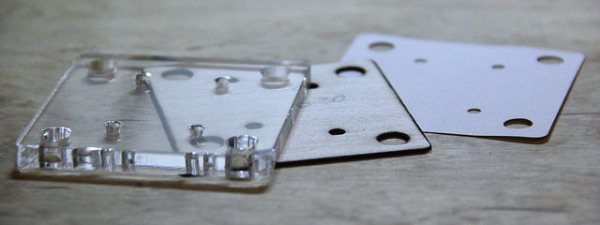
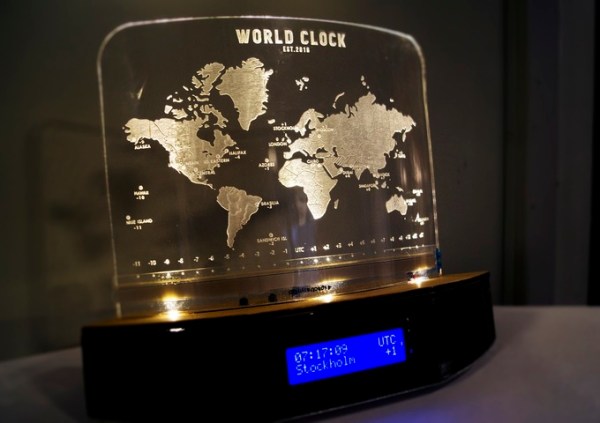
[Markus] is attending the Royal Institute of Technology in Stockholm. For his Advanced Prototyping class he had to make something using rapid prototyping technology — i.e. 3D printers, laser cutters, and breadboards. He chose to make a fantastic looking clock.
He started by designing the entire thing in CAD. The base is 3D printed on a Ultimaker. The world clock display is a piece of laser engraved acrylic which he heated up and curved to fit. Using an Arduino and a 16×2 LCD matrix he created a simple clock program with the ability to show different time zones. The way you select them is very clever.