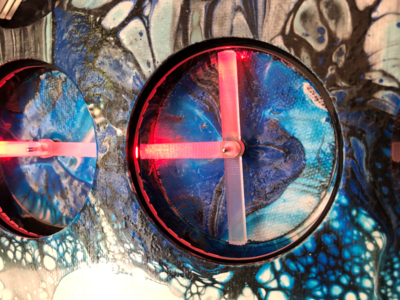
Tuning Up The ThinkGeek Star Trek Intercom Panel

On Star Trek, all Kirk and friends had to do was snap the button on the always conveniently located intercom panel, start talking, and the intended recipient would immediately respond no matter where they were in the ship. How did it work? Who knows. In spite of, or perhaps even because of, the lightly-explained nature of the technology, the cherry-red wall intercoms still hold a certain charm for fans of the groundbreaking show.

A viewer sent [Fran Blanche] a scaled down replica of the intercom from ThinkGeek, and while it certainly looks fairly close to the original prop, it has a couple of annoying design elements. When triggered by the side-mounted motion sensors, the panel will play either the iconic swoosh of the automatic doors or the “Red Alert” sound effect. It’s a cute idea for a kid’s bedroom maybe, but not exactly ideal for somebody who regularly records YouTube videos.

Peak 23rd century technology

So the first order of business was to cut the motion sensors out of the circuit and replace them with a push button. [Fran] draws up a quick diagram to explain how these sensors work, and shows that they can easily be bypassed with a momentary switch since they normally bring the line high when triggered. She then converted the indicator light on the right side of the panel into a button to enable the alert sound effect, which is more accurate to how it worked in the show anyway.

The other issue, and perhaps the most egregious to Star Trek fans, is that the “Red Alert” indicator on the top of the panel didn’t actually flash like it did in the show. To design and build this panel and not put a few LEDs behind that piece of frosted plastic seems a bit like producing a Matchbox car and forgetting to make the wheels spin. With a couple of red LEDs and a bit of new wiring, the oversight was quickly rectified.

While it might not be perfect, at least ThinkGeek actually produced a functional product this time. It could have ended up like one of their April Fool’s “products” that never get put into production, forcing a desperate Trekkie to begrudgingly build his own version.

Continue reading “Tuning Up The ThinkGeek Star Trek Intercom Panel”

Start Your Day With The Mountain That Rises

Like many of us, [Zach Archer] enjoys the comfort of his darkened room so much that he has trouble getting up and facing the day. To make things a little easier for himself, he decided to put together a custom alarm clock that would fill his mornings with the glorious glow of LEDs; and since he finds the mountains an inspirational sight he decided to wrap the whole thing up in a 3D printed enclosure that resembles snow capped peaks.

But even Bob Ross himself couldn’t have imagined a snowy mountain range that featured an integrated e-ink screen. The big 4.2″ panel is connected to a custom designed PCB by [romkey], which was graciously donated for this project. An ESP32 runs the show, providing a convenient web interface to control not only the clock, but various aspects of the mountain’s internal LEDs such as fade in time and total duration.

[Zach] says he originally printed the mountains in PLA, but the heat generated by the LEDs eventually started to cause things to warp. Switching over to translucent PETG not only solved the heat problem, but made for a very effective LED diffuser. Rather than complex animation patterns, he’s found that smoothly transitioning between different shades of blue and green seems to work best for him in the mornings.

This isn’t the first time we’ve seen somebody use LEDs to get them out of bed in the morning, but we do appreciate the aesthetic that [Zach] has achieved here between the design of the mountains and the impressive artwork on the e-ink display. Then again, we’re also quite partial to this version that looks like a warp core, so our tastes do run the gamut.

Making Your Own Caving Headlamp

An important distinction between equipment used for caving, climbing, biking, and other outdoor activities is the level of stress that’s generally applied. For instance, while climbing helmets are built to withstand the impact of sharp rocks, they’re not made to protect a biker’s head from suddenly hitting the ground. Likewise, while camping headlamps may be able to survive a light rainfall, they’re probably not made to shine at the 800 lumens after being submerged underwater.

[LukeM] built himself a caving headlight, after being “fed up with what was available on the market”. While his project is a bit older, it’s still pretty helpful for any newer hobbyists looking to try their hand at building a custom headlamp. Many cavers have to carry around a few primary – one main light for general visibility and a secondary light for focusing on specific objects. These are typically worn on the helmet, attached somehow to prevent the light source from falling off mid-climb. From tricky operations, varying distances, cost, and ease of battery replacement, there are a number of reasons why a caver might want to build their own customizable head lamp.

The result is rugged, waterproof, reliable, bright enough to supplement flashes in caving photos and also dim enough for general use (30-700 lumens). It has options for wide and narrow beams, displays a neutral to warm color, and is relatively upgradeable without too much trouble. At the same time, it’s also fairly compact, with all of the components packed inside of a short section of 3″x2″ aluminum tubing, protected at the back and front by aluminum and acrylic backings. The LEDs used are four Cree XP-E R2 bin LEDs and a hipFlex driver from TaskLED with programmable settings for max output, thermal protection temperature, warning voltage, and lighting modes. I’m personally already smitten with the level of customizability of this build.

On top of all of that, it’s been cave tested and approved!

Add LEDs To Your Stained Glass

Stained glass is an art form that goes back many centuries, with the churches and cathedrals of Europe boasting many stunning examples from the mediaeval masters of the craft. You do not however have to go to York or Chartres cathedrals to experience stained glass, for it remains a vibrant and creative discipline with many contemporary practitioners. One thing the stained glass of today has in common with that of yesteryear though is that it remains static, being composed of pieces of glass held together by metal strips. This is something that [Frank Zhao] has addressed as he has evolved a technique that allows him to incorporate LEDs into static stained glass, making for a particularly eye-catching effect.

It’s likely that we join many readers in not knowing the intricacies of making a piece of stained glass, so his is a fascinating write-up for its step-by-step run-through. His stained glass cat has pieces of glass edged with copper tape, which he then solders together. Driving the LEDs is not something that should be alien to us, but his method of using the copper-and-solder stained glass joints as conductors for them by creating strategically placed cuts is very effective. The final effect is of a homogeneous piece without the cuts being particularly visible , but with a pleasing array of lights on the cat’s tail. Those of us for whom stained glass production is new have learned something of the technique, and stained glass artists have seen their craft do something completely new.

Stained glass hasn’t featured here too often, the closest we’ve come is this striking fake stained glass Iron-Man themed panel a few years ago.

Mike Harrison Knows Everything About LEDs

Driving an LED and making it flash is probably the first project that most people will have attempted when learning about microprocessor control of hardware. The Arduino and similar boards have an LED fitted, and turning it on and off is a simple introduction to code. So it’s fair to say that many of us will think we have a pretty good handle on driving an LED; connect it to a I/O pin via a resistor and that’s it. If this describes you, then Mike Harrison’s talk at the recent Hackaday Superconference (embedded below) will be an education.

Mike has appeared on these pages multiple times as he pushes LEDs and PCB techniques to their limits, even designing our 2017 Superconference badge, and his many years of work in the upper echelons of professional LED installations have given him an unrivaled expertise. He has built gigantic art projects for airports, museums, and cities. A talk billed as covering everything he’s learned about LEDs them promises to be a special one.

If there’s a surprise in the talk, it’s that he’s talking very little about LEDs themselves. Instead we’re treated to a fundamental primer in how to drive a lot of LEDs, how to do so efficiently, with good brightness and colour resolution, and without falling into design traps. It’s obvious that some of his advice such at that of relying on DIP switches rather than software for configuration of multi-part installations has been learned the hard way.

Multiple LEDs at once from your driver chip, using a higher voltage.

We are taken through a bit of the background to perceived intensity and gamma correction for the human eyesight. This segues neatly into the question of resolution, for brightness transitions to appear smooth it is necessary to have at least 12 bits, and to deliver that he reaches into his store of microcontroller and driver tips for how to generate PWM at the right bitrate. His favoured driver chip is the Texas TLC5971, so we’re treated to a primer on its operation. A useful tip is to use multiple smaller LEDs rather than a single big one in the quest for brightness, and he shows us how he drives series chains of LEDs from a higher voltage using just the TI chip.

Given the content of the talk this shouldn’t come as a shock, but at the end he reminds us that he doesn’t use all-in-one addressable LEDs such as the WS2932 or APA102. These are  the staple of so many projects, but as he points out they are designed for toy type applications and lack the required reliability for a multi-thousand LED install.

Conference talks come in many forms and are always fascinating to hear, but it’s rare to see one that covers such a wide topic from a position of experience. He should write it into a book, we’d buy it!

Continue reading “Mike Harrison Knows Everything About LEDs”

Replica Marshmello Helmet Is A Tidy Halloween Build

As the saying goes – you don’t need a stylized, bedazzled helmet to have a successful career in EDM, but it helps. Marshmello is the latest in a long line of musicians to sport bespoke headgear, and [MikeTheSuperDad] undertook the construction of a replica for Halloween.

The build starts with a piece of concrete form tube as the base of the helmet. This is combined with 3D printed components to create a grid in which to place WS2812B LED strings. These are controlled by an Arduino Pro Mini, which is responsible for handling the animations. Further 3D printed parts are used as templates to cut out the characteristic eyes and mouth, as well as to cover the top. Plastic sheeting is then used over the top of everything to diffuse the LEDs and provide the final look, with black mesh behind the eyes and mouth making them properly stand out.

Marshmello should be lauded for creating a helmet with a distinctive visual style, while remaining easy to replicate, unlike popular Daft Punk builds of years past. Building a replica could serve as good practice before starting out on your own unique build. Video after the break.

Continue reading “Replica Marshmello Helmet Is A Tidy Halloween Build”

Icosahedron Glows With The Best Of Them

Glowables come in all shapes and sizes, and we’re always keen to see the multitude of different ways hackers find to put great masses of LEDs to good use. [cabrera.101] wanted to get in on the action, and whipped up a rather flashy icosahedron.

The build uses high-density 144-LED-per-meter strips for the edges, with 60-LED-per-meter strips used for the tubes that connect to the stainless steel ball in the centre. An Arduino Mega controls the Neopixel strips, with the wiring carefully planned out to ensure all LEDs have adequate power and signal to operate correctly. Not one to skimp on the juice, [cabrera.101] outfitted the rig with a 5V, 60A power supply – something that would have seemed ridiculous in 1992, but barely raises an eyebrow today.

It’s a build that would make a perfect whatchamacallit for a science fiction film. The reflections of the edge lights on the central sphere are particularly scintilliating. If you’re new to the realm of glowables, it’s easy to start – there are plenty of tools to help, too. Video after the break.

Continue reading “Icosahedron Glows With The Best Of Them”