Coin-based Rube Goldberg Helps Bring In Donations

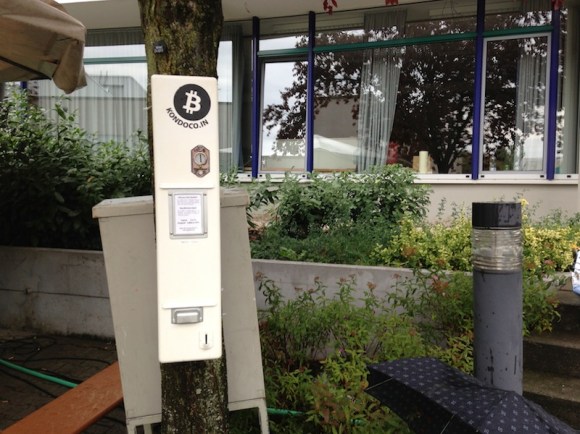
This kiosk was conceived as an interactive poster to help raise donations for a German relief organization. Instead of just providing a coin jar, the piece puts on a little show of transporting a two-Euro coin from the slot at the top to the repository in the base. Along the way many of the parts move, telling a story in that Rube Goldberg sort of way.

What is surprising to us is how much this looks like one of our own projects — at least up to the point that the display is painted. The link above shows off some pictures from the development stages. The prototype shapes up on an oddly shaped scrap of plywood with the coin’s path plotted out. After the particulars of a trip from point A to point B were established the empty spaces were filled in to add visual interest. If you take a gander at the back of the plywood you get an eyeful of protoboard and draped wires. A camera, Mac Mini, and Dropbox were included in the mix to share an image of the donor on the group’s Facebook page (with the donor’s consent of course).

The piece had a month-long home in the Hamburg airport earlier this year. See what that looked like in the video clip after the break.

Continue reading “Coin-based Rube Goldberg Helps Bring In Donations”

Retrotechtacular: 1983’s Answer To Information Overload

We can’t say we ever really thought that the problem with the early 1980’s was too much information in the hands of the people. But this promotional video for the Sceptre Videotex Terminal claims that it is the solution to the information overload of the time. The entire video is embedded after the break.

You use your TV as a display, connecting the hardware to a phone line and using a keyboard for navigation. Perhaps our favorite bit is when the announcer informs us that the secret behind the system is its “vast sources of information”. These include the Miami Herald, the Associated Press, the Wall Street Journal, and Consumer Reports. Just remember that at the time you’d need to hit the local library to access all of those resources. Also, searching them wasn’t a possibility.

But wait, this wasn’t just conceived for news. The system — which was backed by Night-Ridder (a huge Newspaper conglomerate) and AT&T — boasted commerce and banking abilities as well as education services. It’s the vision of the Internet which Ma Bell would have preferred to be in place today.

Continue reading “Retrotechtacular: 1983’s Answer To Information Overload”

Building A Giant Game Of Life Spinner

We see a lot of projects related to Conway’s Game of Life, but this one is Hasbro’s Game of Life. The board game company recently commissioned a giant game spinner as part of a museum exhibit. Here’s the build log that shows how it was pulled off.

The first thing to note is that [Jzzsxm] does this for a living. His company was hired to build several exhibits related to board games for a children’s museum in Springfield, MA. But don’t let that stop you from offering to help at your own local museum. We know some hackers love doing that kind of work.

The scale of the project is what makes the build really interesting. It starts with a design which can be cut out with a CNC router. First the spinner frame and numbers are cut out of MDF to verify the code. From there the design is cut in two pieces out of HI-MACS, a durable solid-surface material. Pegs for spinning the dial are milled from more HI-MACS stock. The clicker mechanism uses a steel rod as a pivot point. On the underside of the table it has opposing springs to hold it in place no matter which way the thing is spun. [Jzzsxm] mentions that it sees a lot of abuse from the young patrons, but seems to be holding up just great!

[via Reddit]

How To Design Your Own LED Driver

If you find yourself in need of a driver for a high power string of LEDs this is a must read. [Limpkin] just designed this driver as a contract job. He can’t show us the schematic, but he did share some tips on how to build an LED driver around a MAX16834 chip.

As you move to higher power designs the barriers to success pile up rather quickly. Using a chip like the MAX16834 really helps to simplify the task as it can be used as a boost or buck converter, it includes functionality that allows for dimming, and it’s a constant currents solution. There are board design issues that need to be accounted for in these designs. [Limkin] included links to a few calculators that will help you determine trace width based power levels used with the driver. He also recommends using copper pours on both sides of the board connected with vias to help dissipate heat. To that end he used an IR thermometer for feedback during testing.

It’s too bad he doesn’t have any photos of the device at work. If you build something similar please take some pictures and tip us off about it.

Building A Casting Furnace With Heat Exchanger

This completely DIY casting furnace turned out just great thanks to all the work [Biolit11] put into it along the way. He wanted to replace his older furnace with one that was more efficient, and to that end he built a heat exchanger into the design. This way the exhaust will preheat the intake air.

The furnace itself started with the shell of an old electric water heater. Excluding the design process, the majority of the build involved mold making. For circular parts he’s using quick tube, the paperboard forms used for pouring concrete footings. For more intricate parts he shaped polystyrene. They are layered in place and high-temperature cement is poured to form the permanent parts. After it hardens the polystyrene can be removed in chunks.

The heat exchanger is the part to the left. It includes several wide, flat pipes made of cement for removing the exhaust. Around those pipes a snaking metal chase carries the intake air which picks up the heat as it passes over the exhaust pipes.

For his first run with the new furnace he melted down a bunch of scrap aluminum and poured ingots.

[Thanks DC3]

Building A Coal Forge

We don’t get to see Blacksmith hacks around here too often. But even if they were rolling in on a weekly basis we think this one would be considered the special expanded edition with full-color centerfold. The sixty-five images in this coal forge build log are all commented and just begging to steal your attention for part of the afternoon.

The build mostly involves fabricating a system for injecting air into the forge and providing a mechanism for evacuating the waste ash. [BillDaCat] starts with a 3″ pipe as the ash dump, adding a latching door used to empty it when full. He then welds together a metal trough with a slotted bottom to hold the fiery fury, attaching the ash dump below. He uses a plasma cutter to add an opening in the upper portion of the ash dump for a blast gate.

If you’re excited about his build you should also check out the metal pour and the induction furnace.

[via Reddit]

How Not To Dim EL Panels, TRIACs!

We’ve all been there: an exciting brilliant idea, scratched onto a napkin, hastily plugged into a breadboard, all for naught.  Even the best ideas sometimes suffer from a heavy dose of reality.  [Ch00f] over at ch00ftech recently had a similar experience dimming an EL panel of his using a TRIAC and some clever waveform manipulation. Instead of tossing the parts across the room in a fit aside and moving on he goes into a detailed analysis of what went wrong.

This method differs from the way most EL drivers dim output loads, instead of chopping the output like a PWM controlled LED the TRIAC snips the ends of the waveform and makes an ugly but less powerful output. The issue with this method is that when you cut the waveform during non-zero crossings it causes massive current spikes. These can wreak havoc on a cheap EL inverter and generally cause headaches all around.  [Ch00f ] speculates that his woes may be due to the fact that EL wire is a capacitive load, causing voltage to fall out of phase with the current. This is one of those engineering problems with a thousand and one answers, we can’t wait to see what he comes up with.

Check out the writeup for all the “deets” (as [ch00f] would say) as it is a pretty good primer on TRIAC operation. If there isn’t enough glowy wire in this post you can also check out this sound reactive panel or an informative guide on EL or even more from [ch00f] in general.