An Automatic Label Dispenser For Quicker Stickers

If you have any kind of business, chances are it involves stickers at some point in the process. More accurately it involves you peeling the backs off of sticker after sticker, slowly wasting time and working your way toward a repetitive stress injury. Why do that to yourself when you could have a machine do it for you?

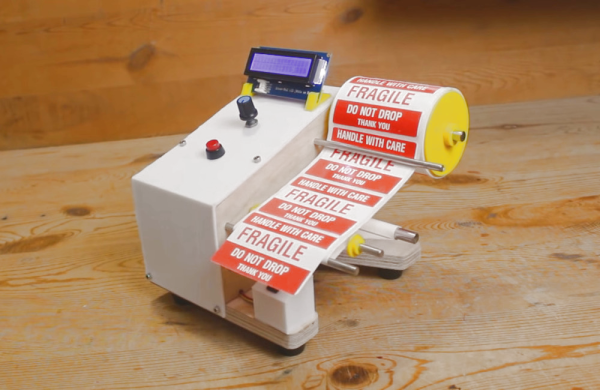
That’s exactly the thinking behind [Mr Innovative]’s automatic label dispensing machine. All he has to do is load up the roll of labels, dial in the length of each label, and away the machine goes, advancing and dispensing and taking up the empty paper all at once. In fact, that’s how it works: the take-up reel is on the shaft of a NEMA-17 stepper motor, which gets its instructions from an Arduino Nano and an A4988 motor driver. Our favorite part is the IR sensor located underneath the sticker that’s ready to take — the machine doesn’t feed another until it senses that you’ve taken the previous sticker. We stuck the demo and build video after the break.

Our other favorite thing about this build is that [Mr Innovative] seems to have used the same PCB as his freaky fast bobbin winder.

Continue reading “An Automatic Label Dispenser For Quicker Stickers”

StickerBOM For KiCad

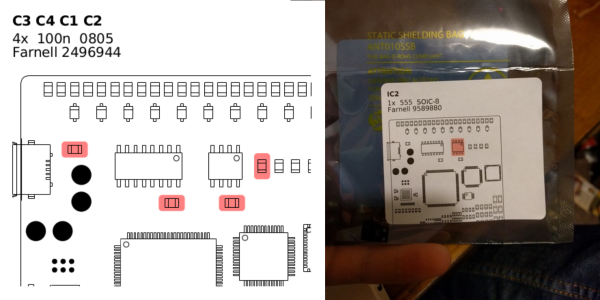
When boards were larger and components mostly through hole, designers could put a lot of information on the silk legend – reference designator, values, additional text and so on. But with surface mount components becoming smaller and board real estate at a premium, modern boards do not have a lot of information marked on the silk layer. If you are building and distributing a short run of kits, perhaps for a round of beta testing, then [Adam Greig]’s StickerBOM python script for KiCad can be really handy. StickerBOM is a KiCad BOM exporter designed for people stuffing boards by hand. It generates a PDF for printable sticky labels, where each label reflects one BOM line from a supplier. You then stick these labels on the bags from your supplier, and they show you where the parts go.

The labels get printed with the reference designator, quantity, component value, package, vendor and part number. It also adds a drawing of the PCB with the relevant parts highlighted for easy location identification. To use it, schematic symbols must have the supplier field and part number added. The script can be run from the command line, or from the BOM manager in eeschema. The script is set up for Avery L7164 labels, but this setting can be changed. It’s still work in progress so there’s a couple of bugs to be aware of. It cannot process the bottom layer of the board, and the result is only as good as the data you provide. And if you have a large board with components spread all over, the resultant graphic printed on the label may not be ideal.

We are hoping this, and other scripts such as the Part generator and Cost spreadsheets or the script for mechanical CAD export, get added to future releases of KiCad. The KiCad version 5 Developer’s road map document already has some really nice feature additions in the works.

Glowing Super Bowl Helmets

glowing-football-helmets-adafruit

These geeky Superbowl decorations glow thanks to the EL panel hack which [Becky Stern] created. It’s almost impossible to make out in this image, but the EL panels have been applied to the surface of the helmet. On the San Francisco helmet you can just make out the black connector and cord at the bottom of the F.

El panels are a lot like EL wire (but they’re flat) in that the phosphors are excited when connected to a high voltage AC supply. You can cut the panels into shapes without a problem. The technique used here is to create a black vinyl mask to go over the top of the panel. This makes cutting the panel a lot easier.

The mask sticker is made on a vinyl cutter. [Becky] is a master at using the vector tool as you can see in the video after the break. She outlined each team logo with paths to create a file which the cutter can use. From there it took several tries to get the sticker just right as the curve of the helmet distorts the logos just a bit. Once it was dialed in she stuck the vinyl on the El panel and cut around the perimeter.

The Adafruit team sure loves to use electroluminescent accents.

Continue reading “Glowing Super Bowl Helmets”

Toner Transfer For Resist And Silk Screen Using Printable Vinyl

This toner transfer method uses a different material than we normally see. The red sheet being peeled back isn’t toner transfer paper. It’s printable vinyl used for both the resist and the silk screen.

The application process is almost the same as any other toner transfer PCB fabrication material. The printable vinyl stick is first adhered to a piece of paper before feeding it through a laser printer. It is acceptable to clean the vinyl with alcohol before printing if you think there may be a finger print or other oil on its surface. After printing it is carefully aligned with the board and ironed on.

[Mincior Vicentiu] thinks there are a few big benefits to this material. It seems that as you heat the toner it expands and hardens, but the vinyl actually softens to make room for this. We can imagine that this helps alleviate the smudging that sometimes occurs when ironing toner that is simply printed on paper. The other advantage is that the vinyl peels off quite easily after ironing, where as you need to soak paper in water and carefully massage it off of the toner.

[via Dangerous Prototypes]

Hack A Day Store Now Open

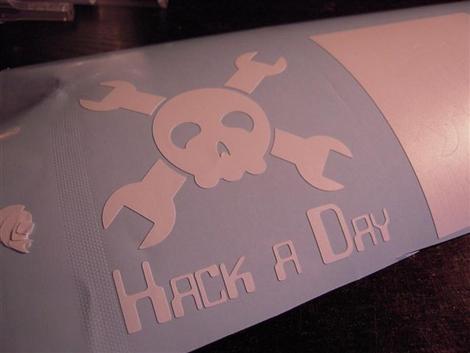
Since the beginning of the universe we’ve been getting requests for stickers, shirts, coffee mugs, etc.  Well, several of the writers have the ability to produce this stuff in their homes. The boss liked that and gave us his blessing to start selling Hack a Day stuff.

In the interest of keeping the cost as low as possible, right now the store is located inside of my personal online store. The only products we have right now are stickers, since I make them myself. Though if enough of you pester him, maybe [Devlin] will make up a batch of those Hack a Day badges.

Please be patient with the store. It is fairly untested and tossing this many people at it at once is somewhat frightening. If you have any problems at all, please contact me (caleb@) and I’ll take care of it. You can get to the store by clicking the new button on the right of the screen, labelled “store”. You can see a few more pictures after the break.

Note: Thos of you who are outside of the US, please just contact me directly. I have to figure out your shipping outside the system. Don’t go fill out an order.

Continue reading “Hack A Day Store Now Open”