Building The Most Offensive Video Game Ever

[youtube=http://www.youtube.com/watch?v=4pZ70teW678&w=470]

[Autuin] created the most offensive video game ever. Inside a small cocktail arcade cabinet, he installed his own video game that recreates the experiences of the Space Shuttle Challenger and her crew on their last flight.

The build started off by picking up an old cocktail version of Space Zap from The Hackery, a neat little recycling place that turns old computers, monitors, and even old arcade machines into something useful again. After [Autuin] lugged his arcade machine back to his home base at Free Geek Vancouver.

After drooling over the 30-year-old circuitry, [Autuin] disassembled the old machine and installed a mint condition 19″ VGA monitor where an ancient black and white CRT once resided. The control panels replete with their comically large buttons were refurbished and connected to an Arduino and the whole shebang hooked up to a slightly outdated computer.

The real magic happened when [Autuin] coded his game. He created a few sprites from NASA archival footage and made a game where a shuttle takes off and is controllable by each player. As the most offensive video game ever, the space shuttle blows up shortly after launch, declaring ‘game over’ for both players.

[Autuin] will be showing off his new arcade game with a new bezel and cabinet graphics during Vancouver’s Eastside Culture Crawl this November. The game will probably be updated by then; we suggested editing the ‘time to explosion’ to T+73 seconds, but [Autuin] said he’s thinking of ways to make it even more awful.

Excavate Your Basement Using RC Equipment

basement excavation

Although it could be debated as to whether or not this is a “hack,” since the equipment used is built for excavation, the scale of it seems deserving of a mention. In the linked article, [Joe] is quoted as saying, “the common misconception here is that the RC’s are not here to excavate my basement, but rather the basement excavation project is here for the RC’s.”  This could be a motto for most makers/hackers in that projects are frequently not done for the resulting product, but for the experience of making something your own.

According to [Joe], he excavates 2 – 3 cubic yards per year with his little RC vehicles.  Living in Canada as a rancher and farmer, he’s required to be near his home to feed his hungry animals even during the cold winter months. During this time, there can be very little to do. After sometimes working 16 hour days during the summer, he needed something to keep him occupied close to home. Be sure to check out the excavation video after the break, or check out the original article for even more pictures and video! Continue reading “Excavate Your Basement Using RC Equipment”

Only You Can Kick A Child’s Balls Into Space

We had a lot of fun with that title. Of course when you’re talking about launching a thousand ping pong balls into space there’s no end to the puns which can be made. But this is actually a fantastic initiative to get people of all ages excited about science and near-space experiments. [John Powell] offers school children the opportunity to send an experiment into space. He’s Kickstarting the next launch, which is scheduled to take place in September. This way each entrant can fly their project for free, then get the results and a certificate back once the weather-balloon-based hardware is recovered.

There is one size restriction for the program. Each experiment must fit inside of a ping pong ball. But you’ll be surprised what can be accomplished. [John] reports that the most simple, yet interesting project is to place a small marshmallow inside the ball. As it rises through the atmosphere it will grow to fill the entire ball, then be freeze-dried by the the extreme temperatures. Some are not so low-tech. There’s an image of a tiny PCB holding a DS1337 and some sensors. It’s an atmospheric data logger that will provide plenty of information to analyze upon its return.

[via Hacked Gadgets]

Know Thy Enemy: Open Vias In BGA Footprints

[Andrew Zonenberg] has crossed a line in his electronic hobby projects. The Ball Grid Array (BGA) is a type of chip footprint which most hobbyists leave to the professionals. But he’s learned the skills necessary to use them in his projects. Recently he ran a test batch to show off his soldering process and illustrate one of the errors a novice might make.

For those that are unfamiliar, the BGA footprint is notoriously difficult to accurately solder because it consists of a large grid of tiny points covering the bottom of the chip. There’s no way to get in there with an iron, so soldering depends on accurate placement of solder paste and chip, as well as a near-perfect reflow cycle. Often times it’s difficult for the professionals too. Many blame the heat-failure of Xbox 360 on the complications of the BGA connects for one of the console’s chips.

For this experiment [Andrew] wanted to show what happens if you include vias in the BGA footprint. It’s fine to do so, as long as they’re capped. But if a standard via is included, capillary action ends up pulling the solder down into the via instead of making a connection with the chip. The image above is a cross-section of one such uncapped via, seen on the far right.

[Thanks George]

Visualizing Heat With Schlieren Photography

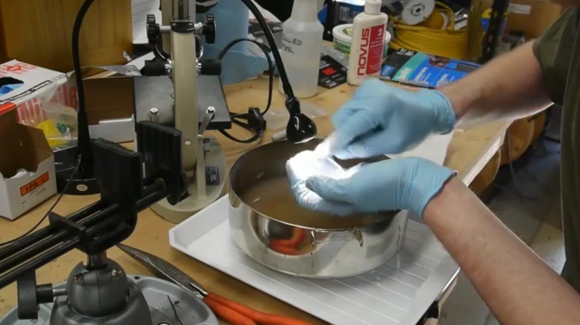
[Kevin] wanted to check out the air patterns present when his 3D printer is in action. This is useful research; slight differences in temperature can affect the quality of his prints. Instead of something like a thermometer, [Kevin] decided to use Schlieren photography to visualize the air around his 3D printer.

If you’ve ever seen very old-school pictures of supersonic research, you’ve seen Schlieren photography. It’s a way of visualizing the density of transparent objects using only mirrors, lenses, and a point light source. The resulting pictures are usually black and white, although some amazing color pictures exist of bullets traveling through the air next to soap bubbles and candles.

The process of creating a Schlieren photograph is actually pretty easy. [Kevin] pointed a light at a used a 4-inch parabolic mirror placed behind his printer. A knife edge is placed at exactly twice the focal length of the mirror, and after putting a camera behind this knife edge, differences in the density of the air are visible.

From [Kevin]’s video of his Schlieren setup (available after the break), you can see the air is extremely turbulent around his print. That might have been obvious given the presence of a cooling fan, but it’s still very, very cool to look at.

Continue reading “Visualizing Heat With Schlieren Photography”

Measuring How Components React To Extremely Cold Temperatures

[Shahriar Shahramian] is playing with some liquid nitrogen in order to see how various components react to extremely low temperatures. After the break you will find forty-one minutes of video in which he conducts and explains each experiment. This does have practical applications. If you’re designing hardware for use in space you definitely need to know how the hardware will be affected. We’ve actually seen test rigs built for this very purpose.

During the presentation he doesn’t water down the concepts observed, including the equations governing each reaction to temperature change. If you’re in the mood for a little bit lighter faire you should check out some of the liquid nitrogen cooking hacks like this super-cold cocktail pops project.


Continue reading “Measuring How Components React To Extremely Cold Temperatures”

Building A Steam Punk Style Time And Weather Display

This is [Pierre Cauchois’] digital weather display. Since weather displays are ubiquitous in this day of smart phones in every pocket he went out of his way to give it a unique look. He started with a wooden voltmeter case, swapping the ancient display for a modern LCD screen.

He used Gadgeteer components for the retrofit. The images for the LCD are stored on an SD card and displayed on demand. Since the digital bezel will be the same no matter what the time or environmental conditions [Pierre] used the power of the .NET framework that drives the system. He made up an image using magenta for all of the dial openings. This way a sprite can be used just for the changing numbers, weather icon, and graphing area.

Looking at all that went into coding the project we think the Gadgeteer components are perfect for those that are well-versed in upper-level languages and don’t really want to deal with low-level microcontroller issues.

[Thanks George]