Arduino Vs. Phidgets Vs. Gadgeteer

A few days ago, we saw a dev time trial between the Arduino and Phidgets, a somewhat proprietary dev board that is many times more expensive than an Arduino. The time trial was a simple experiment to see which platform was faster to prototype simple circuits. As always in Hackaday comments, there was a ton of comments questioning the validity and bias of the test. Not wanting to let a good controversy go to waste, [Ian Lee] tossed his hat into the ring with the same dev trial with the Gadgeteer.

The Gadgeteer has the same design philosophy as Phidgets: modular components and a unique software system -the Gadgeteer is based on .NET Micro Framework – that allows you to get up and running quickly. Unlike Phidgets, the Gadgeteer is priced competitively with the Arduino, and the mainboard is priced within an order of magnitude of a single ATMega chip.

[Ian] pulled off three projects with the three development platforms: blinking a LED, moving a servo, and building a pedometer with an accelerometer. For each trial, the time taken and the price of all components were added up. Here’s the relevant graph:

Continue reading “Arduino Vs. Phidgets Vs. Gadgeteer”

Gas Sensor Suite Built With Gadgeteer Modules

gadgeteer-gas-sensor-suite

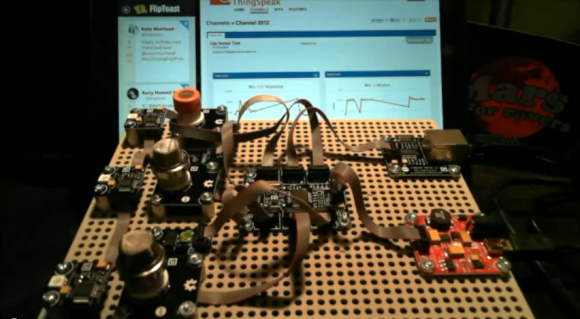
[Blake] just finished a gas sensor suite built from Gadgeteer parts. The three sensors are the cylindrical towers along the left hand side of the assembly. The one at the top (with the orange ring) is an alcohol sensor. The middle one senses ammonia and the lower sensor measures air quality. Also rolled into the mix are temperature and humidity sensors.

You can collect a lot of data with this type of setup. To keep it organized [Blake] used the ThingSpeak interface. Using the NIC in the upper right he uploads the measurements for real-time graphing. The setup is explained in detail in the video after the break, including a test with some cleaning ammonia.

We haven’t tried out the Gadgeteer system for ourselves yet. But you’ve got to admit that the ribbon cable connector system the family of parts uses really helps to keep a rather complicated setup like this one nice and tidy.

Continue reading “Gas Sensor Suite Built With Gadgeteer Modules”

Gadgeteer Plant Monitor Wants It Wet And Photogenic

gadgeteer-plant-monitor

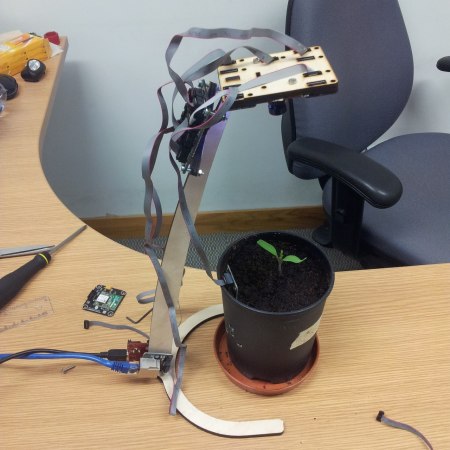
[Christian] is growing a tomato plant on his desk and wanted to capture some time-lapse images of its progress. To that end he built a rig that monitors moisture levels and snaps images at regular intervals.

The hardware he’s using is part of the Gadgeteer family. These run a .NET micro framework and are modular which makes for easy assembly. A laser-cut plywood stand helps to position the camera module for the best shots. Its takes a picture of the seedling once every ten minutes. There is a quartet of RGB LEDs surrounding the lens. They help illuminate the subject for each picture. But [Christian] also mentions that the red LEDs provide light the plant needs to grow (we raise an eyebrow at that claim, but in truth we have no idea if red LEDs make plants grow or not). There is also a moisture sensor which you can see inserted in the soil.

The images and moisture readings are all pushed to a server. There is an Ethernet board near the base of the rig. It uses POST to send the image, which is saved by a server-side script. The moisture data is sent via a GET command.

Building A Steam Punk Style Time And Weather Display

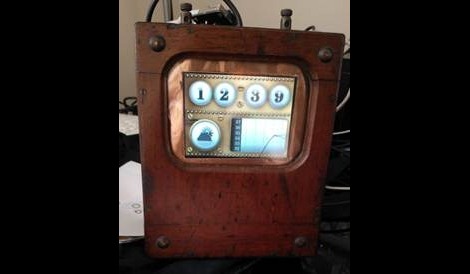
This is [Pierre Cauchois’] digital weather display. Since weather displays are ubiquitous in this day of smart phones in every pocket he went out of his way to give it a unique look. He started with a wooden voltmeter case, swapping the ancient display for a modern LCD screen.

He used Gadgeteer components for the retrofit. The images for the LCD are stored on an SD card and displayed on demand. Since the digital bezel will be the same no matter what the time or environmental conditions [Pierre] used the power of the .NET framework that drives the system. He made up an image using magenta for all of the dial openings. This way a sprite can be used just for the changing numbers, weather icon, and graphing area.

Looking at all that went into coding the project we think the Gadgeteer components are perfect for those that are well-versed in upper-level languages and don’t really want to deal with low-level microcontroller issues.

[Thanks George]

Printing Mounting Boards And Boxes For Hobby Projects

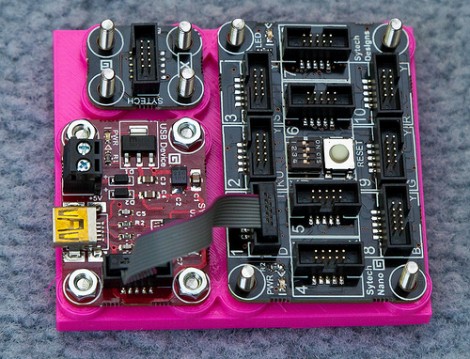
That’s a great base board for these Gadgeteer components. [Rob Miles] has been designing and printing mounting boards and enclosures for several of his projects. He just got into printing parts with the Ultimaker last week, and we’d say he’s found his stride. The board pictured here features nubs that act as stand-offs, and on the underside there are countersunk spaces for the bolt heads used as fasteners.

He started designing with Autodesk 123D but the interface didn’t really suit his working style. He switched over to FreeCAD and that experience fit him like a glove. He starts out with the sketch view to draw his parts, then extrudes that into the 3D model for further refinement before having the printer turn the digital into the real. This is the third board he produced in just one day of experimenting, but he is also showing off an enclosure he made for his thermal printer.

If you’re not working with boards that have nice mounting holes like these, don’t fret. We’ve seen 3d printed mounting systems that cradle the board, like these Raspberry Pi enclosures.

[Thanks Peter]

Turning The Wii Classic Controller Into A Gaming Rig

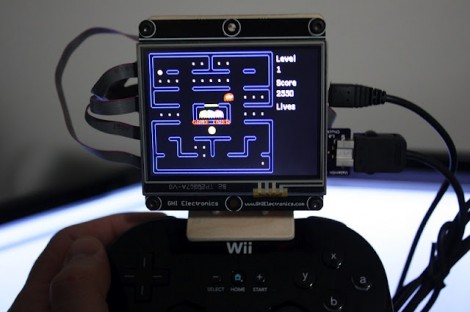
A bit of clever design lets you mount a screen and gaming hardware right on this controller. [Valentin Ivanov] had already been using the Wii Classic Controller Pro as an input for his Gadgeteer-based projects. He wanted a way to marry the project board, display, and controller into one single unit.

We’re huge fans the design because it doesn’t require any alteration of the controller. Instead, five carefully designed pieces were cut from some thin plywood. They lock together into an assembly that embraces the top of the controller while providing plenty of mounting options for the prototyping hardware thanks to a large grid of holes. A couple of pieces of bronze rod lock the mounting bracket in place by keying into the screw holes in the bottom of the controller.

In the image above you can see Mini Pacman running on the rig. It’s now nearly portable, only relying on a barrel jack for power but we’re sure a battery pack could stand in if necessary.

Bossy Calendar Tells Visitors When To Go Away

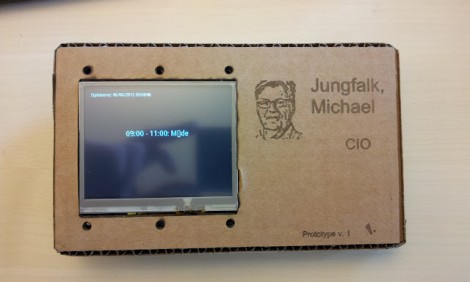
So here’s the scenario. You’re the boss and everyone needs to kiss up to you speak with you about important project details. You need a receptionist, or a creative employee who will build a calendar display the lets people check if you’re free to chat. It works by querying a Microsoft Exchange server for the guy’s calendar. The hardware within doesn’t deal directly with the full Exchange API, but relies on a server-side script that feeds it info on request. This is a nice touch since you can do a lot of filtering on the server and keep it simple with the embedded electronics

Speaking of embedded hardware, this uses Gadgeteer modules. You probably don’t remember, but these are Microsoft’s electronic modules aimed at C# and .NET programmers. It uses the main board, and LCD, USB host, and Wifi modules. This is the first project we remember seeing since the hardware was announced.

We wonder if this will change the boss’ behavior? Will he start scheduling creatively so that he gets more time without interruption?