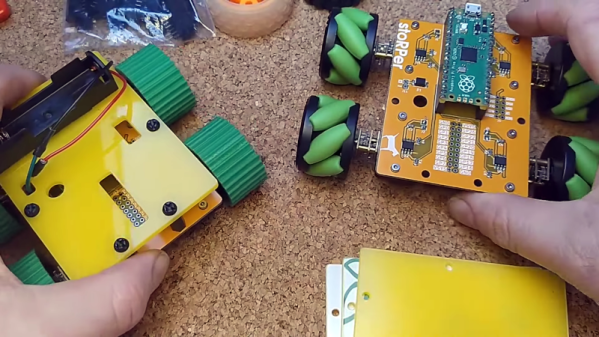
PiEEG Offers Affordable Brain-Computer Interface

One day in the future, we may interact with our electronic devices not with physical input or even voice commands, but simply by thinking about what we want to do. Such brain–computer interfaces (BCIs), combined with machine learning, could allow us to turn our ideas into reality faster and with less effort than ever before — imagine being able to produce a PCB design simply by thinking about how the completed circuit would work. Of course as an assistive technology, BCIs would be nothing less than life-changing for many.

Today BCIs are in their infancy, but that doesn’t mean there isn’t room for hackers and makers to experiment with the concept. [Ildar Rakhmatulin] has been working on low-cost open source BCIs for years, and with the recent release of his PiEEG on Crowd Supply, thinks he’s finally found an affordable solution that will let individuals experiment with this cutting edge technology.

Implemented as a shield that can be connected to a Raspberry Pi 3 or 4, the PiEEG features 8 channels for connecting wet or dry electrodes that can measure biosignals such as those used in electroencephalography (EEG), electromyography (EMG), and electrocardiography (ECG). With the electrodes connected, reading these biosignals is as easy as running a Python script. While primarily designed for neuroscience experimentation, [Ildar] says the device is also useful for learning more about signal processing, filters, and machine learning.

Continue reading “PiEEG Offers Affordable Brain-Computer Interface”

A picture of the bottom of the Pi 4 PCB, showing the three points you need to use to tap into the Pi 4 I2C bus going to the PMIC

Dead Raspberry Pi Boards, PMICs, And New Hope

Since the Raspberry Pi 3B+ release, the Pi boards we all know and love gained one more weakpoint – the PMIC chip, responsible for generating all the power rails a Pi needs. Specifically, the new PMIC was way more vulnerable to shorting 5V and 3.3V power rails together – something that’s trivial to do on a Raspberry Pi, and would leave you with a bricked board. Just replacing the PMIC chip, the MxL7704, wouldn’t help since the Raspberry Pi version of this chip is customized – but now, on Raspberry Pi forums, [Nefarious19] has reportedly managed to replace it and revive their Pi.

First off, you get a replacement PMIC and reflow it – and that’s where, to our knowledge, people have stopped so far. The next step proposed by [Nefarious19] is writing proper values into the I2C registers of the PMIC. For that, you’d want a currently-alive Pi – useful as both I2C controller for writing the values in, and as a source of known-good values. That said, if you go with the values that have been posted online, just having something like a Pi Pico for the I2C part ought to be enough.

[Nefarious19] reports a revived Pi, and this is way more hopeful than the “PMIC failures are unfixable” conclusion we’ve reached before. The instructions are not quite clear – someone else in the thread reports an unsuccessful attempt doing the same, and it might be that there’s a crucial step missing in making the values persist. However, such an advancement is notable, and we trust our readers to take the lead.

A week ago, [Mangy_Dog] on Hackaday Discord brought up fixing Raspberry Pi boards – given that the Raspberry Pi shortages are still an issue, digging up your broken Pi and repairing it starts making sense budget-wise. It’s no longer the ages where you could buy broken Pi boards by the hundred, and we imagine our readers have been getting creative. What are your experiences with fixing Raspberry Pi boards?

A Pi Pico soldered onto a custom breakout PCB, with an SD card connected to it using prototyping wires

RP2040 Runs Linux Through RISC-V Emulation

We’re used to running Linux on CPUs where it belongs, and the consensus is that RP2040 just isn’t up for the task – no memory controller, and nowhere near enough RAM, to boot. At least, that’s what you might believe until you see [tvlad1234]’s Linux-on-RP2040 project, reminding us there’s more than one way to boot Linux on a CPU like this! Just like with the “Linux on AVR” project in 2012 that emulated an ARM processor, the pico-rv32ima project emulates a RISC-V core – keeping up with the times.

Initially, the aforementioned “Linux on AVR through ARM” project was picked as a base – then, a newer development, [cnlohr]’s RISC-V emulator, presented itself and was too good to pass up on. Lack of RAM was fully negated by adding an SD card into the equation – coupled with a small caching layer, this is a crucial part for the project’s not-so-secret sauce. A fair amount of debugging and optimization later, [tvlad1234] got Linux to run, achieving boot times in 10-15 minutes’ ballpark – considering the emulation layer’s presence, this is no mean feat.

At this point, the boot process stalls as you enter a login shell. If Linux on RP2040 is within your area of interest, feel free to pick up the effort from here, as the project is fully open-source – you only need a Pi Pico board and a throwaway SD card! Now, if pairing a RP2040 with some classic software is your definition of an evening well-spent, you can’t go wrong with DOOM! However, if you’d rather play with something else *nix-like, we’ve seen someone port Fuzix onto the RP2040 before.

Fish Tank Dosing Pump Built Using Pi Pico

When you’re maintaining a fish tank, it’s actually quite important to get all your basic chemistry right. Mismanage things, and you’ll kill all the helpful bacteria in the tank, or kill your fish when things get too alkaline or too acidic. To help him get things just right, [yojoebosolo] built a custom dosing pump to maintain his fishtank.

The pumps themselves are small peristaltic pumps sourced from AliExpress. They can be had for under $10 if you look hard enough. Two of these are assembled into a PLA housing. Meanwhile, the brains of the operation is a Raspberry Pi Pico. It’s charged with running the pumps to a regular schedule, ensuring that just the right amount of chemicals are delivered when they are needed. It delivers 2 mL of Kalkwasser solution into [yojoebosolo’s] reef tank every ten minutes.  The pumps are switched on and off with a simple 5V relay.

If you’ve got a delicate and complex fish tank that demands only the best, building your own dosing pump may be the way to go. Off-the-shelf versions can be expensive, after all, so sometimes it makes sense to roll your own. Video after the break.

Continue reading “Fish Tank Dosing Pump Built Using Pi Pico”

Dobsonian Telescope Adds Plate Solver

The amateur astronomy world got a tremendous boost during the 1960s when John Dobson invented what is now called the Dobsonian telescope. Made from commonly-sourced materials and mechanically much simpler than what was otherwise available at the time, the telescope dramatically reduced the barrier to entry for larger telescopes and also made them much more portable and inexpensive.

For all their perks, though, a major downside is increased complexity when building automatic tracking systems. [brickbots] went a different way when solving this problem, though: a plate solver.

Plate solving is a method by which the telescope’s field of view is compared to known star charts to determine what it’s currently looking at. Using a Raspberry Pi at the center of the build, the camera module pointed at the sky lets the small computer know exactly what it’s looking at, and the GPS system adds precise location data as well for a quick plate solving solution. A red-tinted screen finishes out the build and lets [brickbots] know exactly what the telescope is pointed towards at all times.

While this doesn’t fully automate or control the telescope like a tracking system would do, it’s much simpler to build a plate solver in this situation. That doesn’t mean it’s impossible to star hop with a telescope like this, though; alt-azimuth mounted telescopes like Dobsonians just need some extra equipment to get this job done. Here’s an example which controls a similar alt-azimuth telescope using an ESP32 and a few rotary encoders.

A Smart Home That CAN Do It All

In an ideal smart home, the explosion of cheap WiFi and Bluetooth chips has allowed hundreds of small wireless devices to control the switches, lights, and everything else required for a “smart home” at a relatively low price. But what if you don’t want hundreds of internet-connected devices in your home polluting the wireless spectrum and allowing potential security holes into your network? If you’re like [Lucas Teske], you might reach for something wired and use cheap and (currently) available Raspberry Pi Picos to create PicoHome.

The unique twist of PicoHome is that it uses a CAN bus for communication. One of [Lucas’] goals was to make the boards easily swappable when hardware failed. This meant board-to-board communication and protocols like I2C were susceptible to noise (every time a relay triggered, the bus would lock up briefly). The CAN bus is designed to work in an electrically noisy environment.

There are two parts to the system: pico-relay and pico-input. The first connects to a 16 relay board and can control 16 different 24v relays. The second has 16 optoisolators to read from 12v-24v switches and various buttons throughout the house. These can be placed in a giant metal box in a central wiring location and not worry about it.

The firmware and board files are all released under an Apache 2.0 license, but the CAN2040 library this project relies on is under GPL. We covered the CAN2040 library when it was first released, and it’s lovely to see it being used for something entirely unexpected.

Continue reading “A Smart Home That CAN Do It All”

Mechanical Keyboard As Travel Saxophone

Those who play larger musical instruments, things like drums, piano, harp, tuba, upright bass, or Zeusaphone, know well the challenges of simply transporting their chosen instrument to band practice, a symphony hall, or local watering hole. Even those playing more manageably-sized instruments may have similar troubles at some point especially when traveling where luggage space is at a premium like on an airplane. That’s why [jcard0na] built this electronic saxophone, designed to be as small as possible.

Known as the “haxophone”, the musical instrument eschews the vibrating column of air typical of woodwind instruments in favor of an electronic substitute. Based around the Raspberry Pi, the device consists of a custom HAT with a number of mechanical keyboard switches arrayed in a way close enough to the layout of a standard saxophone that saxophonists will be able to intuitively and easily play. Two pieces of software run on the Pi to replicate the musical instrument, one that detects the player’s breaths and key presses, and another that synthesizes this information into sound.

While [jcard0na] notes that this will never replicate the depth and feel of a real instrument, it does accomplish its design goal of being much more easily transportable than all but the most soprano of true saxophones. As a musical project it’s an excellent example of good design as well, much like this set of electronic drums with a similar design goal of portability.