Troubleshooting Household Light Timers

timer-repair

When [Todd Harrison’s] Christmas lights stayed on well past the pre-defined shut off time, he knew there was something wrong with the timer. He took the device into his workshop and spent some time diagnosing and repairing the device, a process he recorded for all to see.

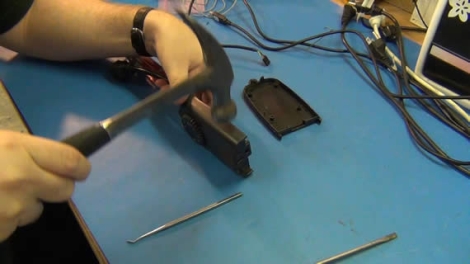
After busting the screw-less timer open with a hammer, he inspected the PCB for any apparent signs of damage. After seeing what looked like a damaged transistor, he desoldered it from the board for testing. After the transistor passed his tests with flying colors, [Todd] assumed that the fault had to be in the relay which the transistor was responsible for switching.

Sure enough, the relay had shorted out, and upon cutting it open he found that the contact points were fused together. He separated and sanded the contacts down, enabling him to get the timer working – at least for the time being.

Part of [Todd’s] goal with this video was to show off different methods of desoldering, including a manual solder sucker (my favorite), desoldering braid, and a purpose built desoldering iron. If you’re in the market for some desoldering tools, but don’t know what to buy, [Todd] is more than happy to offer his advice.

Continue reading to see a video of [Todd’s] troubleshooting process.

Continue reading “Troubleshooting Household Light Timers”

Network Monitoring Panel Built From The IT Department Junk Heap

network-monitoring-panel

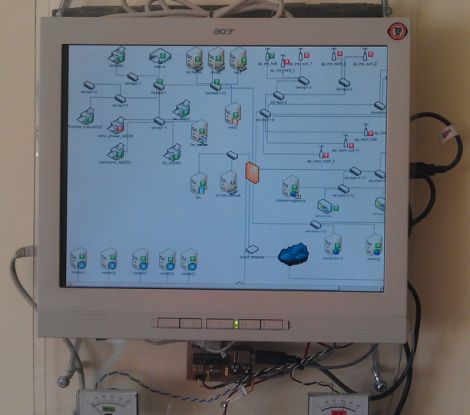
One of the benefits of working in IT is that there is typically a healthy supply of miscellaneous, half-functioning equipment to mess around with. [Vittore] had an old laptop with a busted LCD sitting around (Google Translation), so he figured he might as well get it to do something useful. With a spare desktop LCD panel and some software tweaking, he built himself a slick network monitoring panel that hangs in his office.

He stripped the laptop down to the bare essentials, and mounted it along with an LCD screen in a plexiglass enclosure. He has Nagios running a server in his office, and with the help of a few plugins, he created a simple web interface that show him the topology of his entire network. The panel itself runs a live version of Debian, which he configured to load up his Nagios web page each time it is started.

While having the ability to view the status of every network-connected device in an instant is great, he didn’t stop there. While browsing around online, he found diagram for a simple USB-based performance monitor that uses a PIC to drive a pair of VU meters. He hooked the meters up to a router monitored by Nagios, so he can watch office’s bandwidth usage in real time.

If you’re interested in seeing how it was built, be sure to check out the Flickr photo set put together by [Vittore’s] co-worker [Matthew].

Replacing Solder Tab Batteries

There’s a ton of devices out there that have batteries in them but most people never think about it. That’s because they use rechargeables that are sealed inside and topped off with external chargers. [Todd Harrison] has a couple of them, including a cordless shaver and a Christmas light timer. He’s had these for years and the batteries have gone south. They’re not meant to be consumer-replaceable, but that did stop him from cracking them open and swapping out the solder-tab batteries himself.

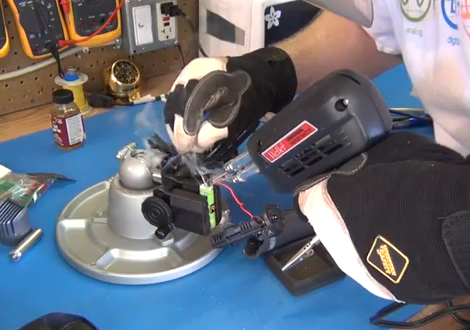
The batteries themselves won’t be all that hard to source. The shaver just takes a NiMH AA cell. But since they’re not meant to be replaced [Todd] needed to do some soldering. Here you can see he’s using a solder gun to make the connection between the new battery and one of the solder tabs. He uses the gun instead of an iron because he needs to heat the joint quickly, and must avoid heating the rest of the cell which could rupture. As a safety precaution he’s wearing gloves and a full face-shield.

Check out the video after the break to see this, as well as the coin cell replacement in the lighting controller.

Continue reading “Replacing Solder Tab Batteries”

Fixing That Broken Laptop Power Jack

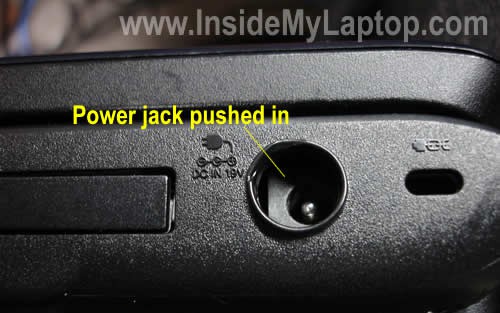
It seems that there’s a whole range of Toshiba Satellite laptop computers that suffer from a power jack design that is prone to breaking. We see some good and some bad in this. The jack is not mounted to the circuit board, so if it gets jammed into the body like the one above it doesn’t hose the electronics. But what has happened here is the plastic brackets inside the case responsible for keeping the jack in place have failed. You won’t be able to plug in the power adapter unless you figure out a way to fix it.

We’d wager the hardest part of this repair is getting the case open. Once inside, just cut away all of the mangled support tabs to make room for the replacement jack. The one used here has a threaded cuff that makes it a snap to mount the new part to the case. Clip off the old jack and solder the wires (mind the polarity!) and you’re in business.

Anyone know why we don’t see more of the magnetic connectors (MagSafe) that the Apple laptops have? Is it a patent issue?

[Thanks Dan]

Adventures In Resurrecting A No-name IP Webcam

webcam-repair

As many of us do, [Steaky] serves as a kind of on-call help desk for his family. His father in law recently contacted him because his pan and tilt webcam died, and he wanted to see if it could be fixed. Never turning down a challenge, [Steaky] decided to give it a shot.

He ended up having to disassemble it since the camera was completely unresponsive, and what he found inside piqued his interest. The no-name camera sported an ARM microprocessor at its core, and it seems that some of its pins were damaged due to a poorly designed case. He figured resoldering the pins would do the trick, but that wasn’t the end of his adventures.

As he dug deeper into the device, he found that the camera essentially killed itself, reading and writing data to the wrong places due to the damaged pins on the processor. After plenty of searching around, he was able to find a somewhat compatible firmware image, though not everything worked properly.

His father in law was so impressed with his work that he asked for the camera back, even though [Steaky] hadn’t fully repaired it yet. While he bid the camera goodbye, we’re pretty sure he’d be more than happy to reclaim it for a few days if any of our readers had some additional insight or resources that might help him finish the job.

Simple Earphone Repair Saves A Big Chunk Of Cash

shure_earphone_repair

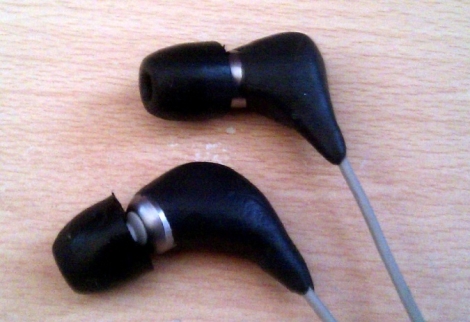
[Spode] has been rocking out with a pair of Shure E4C earphones for about six years now, and he has no intentions of buying another set any time soon. The earphones cost him £200, so when the right channel started acting up, he decided to fix them rather than toss them in the trash bin.

His first attempt was successful, but just barely so. He ended up damaging the earphone case pretty badly, and in time the same problem reappeared. Undeterred, he opted to fix them once again, but this time around he did things differently.

Upon disassembling them, he found that his repair job had become frayed over time. [Spode] desoldered both drivers from the wires and cut them back a bit to expose some nice clean (and structurally sound) cable. He spent a little more time carefully soldering things back together to mitigate the chances of having to repair them again before replacing both earphone shells with a bit of black Sugru.

Having saved himself £200, [Spode] is quite happy with the repair. We probably would have tied an underwriter’s knot in each cable before soldering them to the drivers in the name of strain relief, though the Sugru should help with that.

Recovering A Corrupted EEE PC BIOS

recovering_eeepc_bios

[Jeremy] had an ASUS EEE PC 1000HE netbook on his hands which had succumbed to a corrupted BIOS. In most situations, people replace a motherboard when the BIOS is damaged beyond repair, but considering the price of motherboards, especially those built for portable devices, he simply refused to go that route.

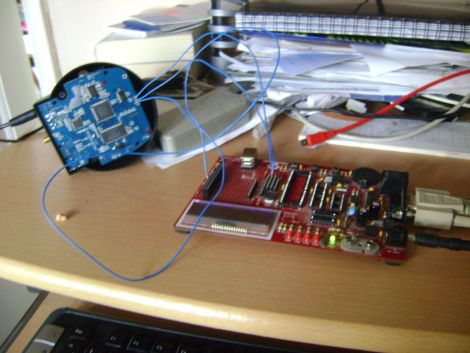
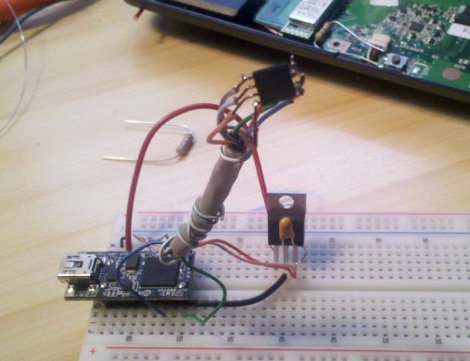
Instead, he took it apart and did a little investigation to find out what SPI flash chip ASUS used in the netbook. With that information in hand, he put together an SPI flash programmer using a breadboard and a DLP-USB1232H USB to UART module. He couldn’t program the flash chip in-circuit, so he had to desolder it and deadbugged it onto his programmer. Using a few Linux-based flashing tools, he was able to reprogram the chip with a functioning BIOS in short order, saving him from a costly motherboard replacement.

While some motherboard manufacturers have built in secondary BIOS chips to prevent the need for this sort of recovery, it’s nice to know that the process is relatively straightforward, provided you have some basic soldering and Linux skills.

This also isn’t the first time we’ve seen someone recover an EEE PC from the brink – if you’re looking for an Arduino-based alternative, be sure to check this out.