Replacing Non-standard USB Charging Ports

htc_charging_port_replacement

While many mobile phone manufacturers are moving towards the micro-USB interface as a standard, others such as Apple and HTC are still bucking the trend. Part of [arto’s] job includes repairing mobile phones, and last month he found himself faced with a pair of broken HTC handsets that needed their charging ports replaced.

Replacements for HTC’s proprietary connectors are apparently quite hard to find, and [arto] says he had to source them from an HTC repair center. With the proper parts in hand, he could finally get down to work.

The HTC Hermes handset he repaired was a breeze, as it had plenty of space available around the charging port. He said that this allowed him to replace the jack pretty easily, but the HTC Touch Dual was a mess in comparison. He started by removing the old adapter, which was done by cutting it out bit by bit. He says that he did it this way rather than desoldering, due to its proximity to other heat-sensitive components. After some careful soldering under a microscope, everything was back in working order.

While his repairs are not necessarily the things that hacks are made of, the information is still quite helpful. Broken charging ports are extremely common among smart phones, and with plenty of these older models still floating around, his pointers just might help someone save a few bucks on a replacement phone.

Repairing A Broken Salad Spinner

Behold [Quinn’s] broken salad spinner, and just when lettuce and other garden produce are hitting their peak. We were surprised to find out that she was able to get the mechanism apart to fix the broken cord. We’re sick and tired of ultrasonically welded plastic enclosures that lock out the most well-intentioned repairman. But in [Quinn’s] case there were a few plastic plugs hiding the screws that keep the two pieces of the case together.

After diagnosing that the cause of the broken cord was a gnarly metal grommet, she removed the offender and sought a replacement cord. The first material she tried was some dental floss but unsurprisingly it only lasted through a few spins. Next on the road to repair was a shoelace which did a bit better but also ended up broken. But the discovery of some parachute cord did the trick in the end and now it’s good as new if not better!

DIY Battery Reconditioner Saves Old Rechargeable Batteries From The Landfill

rechargeable_battery_reconditioner

Instructables user [msuzuki777] had amassed quite a collection of batteries over the years, but was finding that some of his rechargeable AA and AAA cells seemed to be at the end of their useful life. After reading some information at the Battery University regarding the restoration process for nickel-based batteries, he figured he might as well try building a battery reconditioner of his own.

He worked through several designs that either flat-out did not work, or had issues that limited the number of batteries he could simultaneously recondition. After reading about this rechargeable battery capacity tester we featured a few months back, he was ready to give the project one more try.

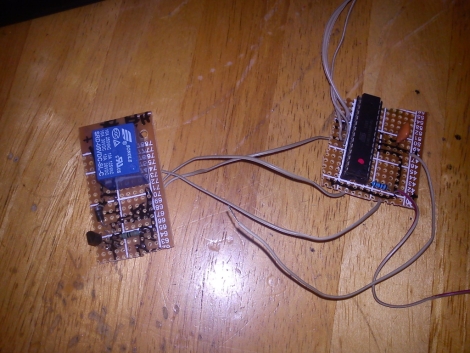
It seems that the third try was the charm, because his FET-based design worked quite well. He ended up wiring two FETs to each battery, which are connected via a relay. The batteries get discharged until the voltage drops down to 1V, at which point one FET is turned off, allowing the batteries reach their target voltage of 0.4V more slowly.

Despite the self-proclaimed messy layout of his circuit, [msuzuki777] is quite happy with the results. He has been able to recover several batteries, which is a fantastic alternative to letting them decay in a landfill.

Repaired Microwave Keypad Looks As Good As New

microwave_keypad_repair

Instructables user [Rohit] had an out-of-warranty microwave with a broken membrane keypad. Much like our friend [Alexandre] from Brazil, he found the cost of replacement parts beyond reasonable, so he had to find a way to repair it instead.

He disassembled the front cover of his microwave to get at the main controller board. Once it was detached, he removed the keypad’s cover to get a closer look at the matrix underneath. While taking notes on how the matrix was wired, he found that some keypad traces connected to other traces rather than buttons. He says that they are likely used by the microwave to detect that the keypad is present, so he made sure to short those traces out on the controller board when he wired everything back together.

He replaced the aging keypad with microswitches, but rather than mount them on the front panel of the microwave, he drilled holes for each switch so that he could mount them inside the face plate. Once everything was wired and glued in place, he re-mounted the keypad’s cover. Now the microwave looks stock but has firm, reliable, user-serviceable buttons that are sure to last quite a while.

Canon A70 CCD Replacement/repair

Looking for an underwater camera setup, [Imsolidstate] picked up a Canon A70 and a Canon water-tight housing on eBay for around $45. Unfortunately the camera arrived with a non-functioning CCD. Another trip to the online auction site landed him a replacement CCD which he set about installing.

We have this exact model of camera with a cracked LCD display. Being that we like to hack around on things we’ve pulled it apart in order to replace the screen and believe us, there’s no extra room inside that thing. The video after the break shows the teardown, and you can see what a pain it is to get the unit apart. That process in only eclipsed in difficulty by the reassembly itself.

In the end it wasn’t a problem with the CCD itself, but with the connector on the PCB that received the flat cable. It wasn’t holding the contacts tight, but [Imsolidstate] fixed that with a strategically placed piece of foam.

Continue reading “Canon A70 CCD Replacement/repair”

Breathing New Life Into A Broken IPod

ipad_nano_button_fix

[Craig] had a busted 2nd Gen iPod Nano that was well out of warranty. The play/pause button no longer worked, leaving him unable to play or pause music, nor power off the device. He didn’t want to scrap the iPod, so he figured out a way to add an external play/pause button instead.

He ordered an iPod dock connector from SparkFun and found that it had just enough space inside for the electronic components he would be adding. He consulted some online references for pinout information, then got busy cramming an ATiny13 and a pushbutton into the dock connector.

To minimize the drain on the iPod’s battery, he puts the ATiny into sleep mode when it is not being used. When the button is pressed, it wakes up the microcontroller and sends the proper signal to the iPod. Based on his estimations, it would take nearly 250 years for the ATiny to drain the iPod’s battery completely, so he’s pretty comfortable leaving the dongle attached at all times.

If you have an iPod with similar issues, he has made his source code available so you can save yours from the trash heap as well.

Reviving A Broken HSDPA Modem With A Bit Of Clever Investigation

hsdpa_modem

Hack-a-Day forum member [Necromant] was recently working on a router when he made a terrible mistake. He connected the wrong power brick to the router, causing a 2.5v over-voltage. The router itself was just fine, as it contained a good stepdown converter, but the HSDPA modem connected to the router’s USB port was not so lucky. It seems that the USB host is powered directly from the router’s power supply without any conversion – this meant his modem got a nice 7.5v zap when he used the wrong plug.

He assumed the modem was dead, so he figured there was no harm in disassembling it. He examined the modem’s circuit board and found that when plugged in, the onboard stepdown converter supplied 0 volts to the rest of the PCB. He couldn’t find any documentation for the converter online, so he employed a little bit of trial and error clever investigation to determine what sort of voltage the stepdown provided before being cooked.

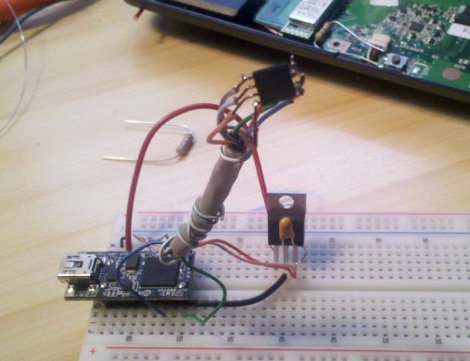
After a bit of testing with his home-built low dropout regulator, he determined that the damaged stepdown provided 3.3v to the rest of the modem (that’s a 4.2v over-voltage for those of you who are keeping track). He added a linear voltage regulator to the board in place of the old stepdown, which worked for about 15 seconds before overheating.

In the end, he decided to add a pretty hefty 3.3v stepdown converter to the modem, throwing aesthetics to the curb. The result is one ugly, but quite functional HSDPA modem.