The MessagePad; A Thoroughly Hacked Macbook Turned Tablet

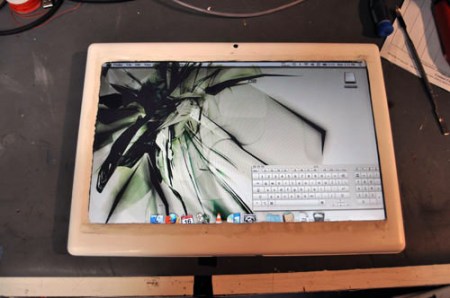
hacked macbook

Remember the times before the iPad existed? When a tablet PC was actually a full computer in a tablet form factor? Yeah, those days we were all so very optimistic about the future of tablet computing. Don’t think we don’t appreciate the new amazing toys that we’ve got around with the plethora of tablets to choose from, but we still dream of fully functional tablet computers.

[Brian] wrote in to show us his build of a fully featured tablet macbook conversion dubbed the MessagePad. Though we’ve seen a wide selection of home spun tablets before, this one has an impressive list of added features. It boasts both front and rear facing cameras, an SSD drive, a built in Teensy, and a line-in. It doesn’t matter if you believe in the dream of a full blown pc in tablet format, or if your preference would have been a Windows or Linux machine. You’ll surely love the bevy of photos he took along the way as he was hacking and slashing on this thing.

Tablet Cover From Old Hardcover Books

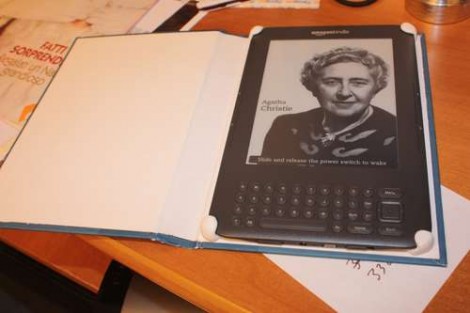
Here’s a way to look hip and destroy books at the same time. This table cover is made from an old hardcover book. It’s not difficult to do, an afternoon is all it takes, and if you follow all of the instructions we’d bet this will hold up for a long time.

It’s basically another version of the Moleskine cover for the Kindle Fire. You find a donor book (second-hand shops are packed with ’em) with a hardcover which you really enjoy. Kids books would be the most fun because of the artwork – if you can find one thick enough. With book in hand remove all of the pages. This will leave the binding a little flimsy, and since this is a project by the company which make Sugru, you can see why they used the moldable adhesive for that purpose. But check out the brackets in the picture above. They covered the Kindle in cling wrap, then molded Sugru around the corners. Once set, it can be peeled away from the plastic wrap, but will retain its shape. Nice.

Kindle Fire Cover From A Moleskine Journal

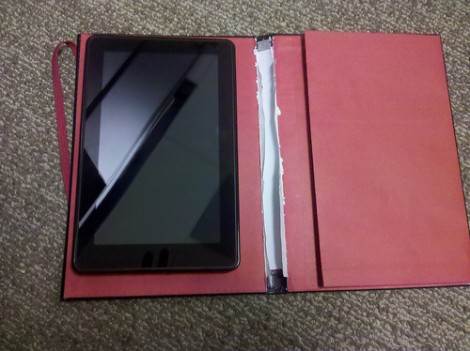
[Kevin Haw] is the proud owner of a brand new Kindle Fire. But to protect the investment he wanted a nice looking case and decided that DIY was the way to go. He ended up repurposing a Moleskine journal as a table cover.

You can do this one yourself in under an hour. Most of the pages in these journals are sewn in place and [Kevin] started by cutting the strings with a hobby knife. Once removed, he used a utility knife to separate the pages that were glued to the cover; this leaves you in the state seen above.

Obviously this unfinished look just won’t do. [Kevin] used some red duct tape duct tape to cover the unsightly spine. This adds strength, and does the job of cleaning up the area, but we might have also applied felt (or microfiber cloth) to the entire inside area for a bit more finished look. The final part is mounting the tablet which was accomplished with adhesive Velcro strips. These can be removed from the back of the Kindle Fire later on if you decided to use a different enclosure.

Dash-mounted Nook Color Is A Perfect Head Unit Replacement

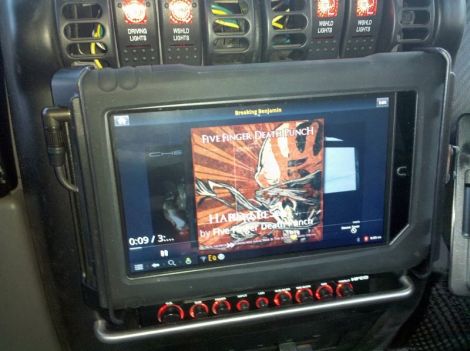
jeep-nook-mount

XDA forum member [craigbru] wanted to beef up the audio setup in his Jeep, and thought that his Nook Color would make a suitable replacement. Since he jailbroke the e-reader, the head unit upgrade lets him do just about anything you can imagine, all from the comfort of the driver’s seat.

Seeing that he would continue to go off-road with the Jeep, he wanted to construct a mounting solution that was convenient and sturdy – something we think he did very well.

The dock was constructed using a Quadratec iVault stereo mount, along with a plastic tablet mount he had on hand. Because convenience was a primary goal, he put together a quick release charging solution as well as a simple audio interface using a set of touch contacts. This allows him to connect and detach the tablet from the Jeep without having to fuss with a bunch of cables each time. He also added an audio equalizer along with a Bluetooth OBDII interface to the setup, allowing him to tweak his tunes and monitor his engine with ease.

We think it’s a great-looking setup, and we’d be lying if we said we didn’t want one as well.

[Thanks, MS3FGX]

Drill Holes In Your Tablet For Better Sound Quality

diy_tablet_speaker_grilles

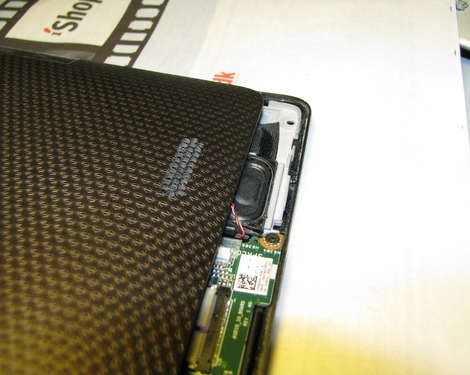
As devices get smaller and smaller, it becomes a bigger challenge for engineers to squeeze a product’s components into an ever shrinking footprint. [Bulgarien] certainly found this to be the case with his Asus Eee Pad Transformer. He was not impressed with the volume or clarity of the tablet’s audio, so he disassembled it to see if he could somehow improve its performance.

Once he got the Eee Pad apart, he noticed that the tiny speakers were mounted directly against the back of the tablet’s LCD screen, muffling the audio. He flipped the speaker over to face the back side of the tablet in hopes that it might improve the sound just a bit, but he didn’t think that was a sufficient solution. Using an old speaker as a template, he drilled through the Eee Pad’s case to create his own speaker grilles, lining the inside with a fine cloth to prevent dust from getting inside the case.

He says that the tablet’s audio is far clearer than it was originally, which makes this a pretty compelling modification for anyone that uses their Transformer on a daily basis.

Adding GPS To A Viewsonic G-Tablet

gtablet_gps

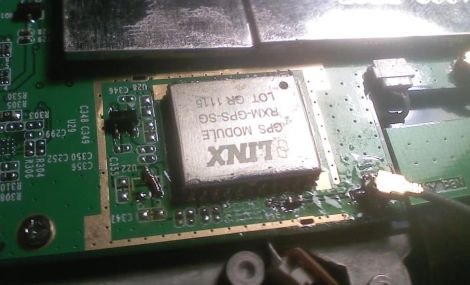
The hackers over at the xda-developers forum always seem to have something awesome brewing, and [fosser2] is no exception. He bought himself a Viewsonic G-tablet, but was a bit disappointed in its lack of a GPS module. He pried the tablet open in hopes of finding a spot where he might be able to cram one in, and was happily surprised at what he found.

It turns out that either Viewsonic had plans to include a GPS module and scrapped them, or they are planning on adding GPS to a future SKU. The tablet’s mainboard already had a spot laid out for the module, as well as the GPS antenna. He carefully soldered in a compatible module from Digikey, and then got to work adding the various other components required to get it working properly.

While the hack doesn’t require that you add a ridiculous amount of parts to the board, you had better make sure your soldering skills are up to snuff before giving it a shot. Those who can’t reliably solder SMD components should probably stay away from this one.

[via Engadget]

RoboTouch Adds Physical Game Controls To The IPad

robotouch

[ProtoDojo] wanted to play a racing game on his iPad, but he was not a big fan of using the touch interface for this particular title. Instead, he put together a pretty neat little hack that allows him to play games on his iPad using an old NES controller.

He built a set of custom conductive arms which he mounted on three micro servos. The servos were attached to the iPad screen using small suction cups in the locations where it expects to receive button presses. They are also wired to an Arduino that interprets button presses from the attached NES controller. When the Arduino senses that the D-pad or buttons have been pressed, it triggers the servos, which in turn press the virtual buttons on the screen.

In the video below, you can see that after adjusting the servo positions, the setup seems to work pretty well. You might expect to see some sort of lag with a setup like this, but we didn’t notice any. The [ProtoDojo] web site is currently down due to heavy traffic, but you should be able to find some more build details there, once it becomes functional again.

Continue reading “RoboTouch Adds Physical Game Controls To The IPad”