3D Print In Wax, Cast In Metal

What does dry ice, ethonal, wax beads, and a blender have in common? It was the first attempts at making media for this wax 3D printer that [Andreas] has been building up. Wanting to produce 3D printed objects out of metal, and finding that direct metal laser sintering machines were still out of reach of reason, he set out to find a different way.

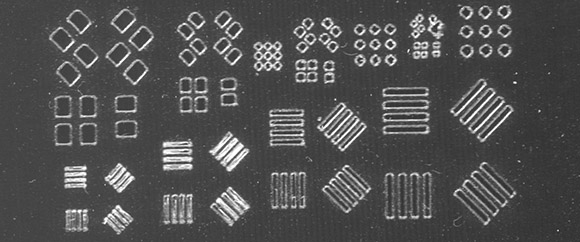
After trying a few different methods of making the powdered wax himself, he decided that it was much more time effective to just buy the stuff. Using the commercially available powered wax mixed with activated carbon, and a custom printer, the wax is blasted with a moderately high powered laser. More wax powder is applied over the freshly sintered layer, and the 3d part is built upwards. Once he has the part in wax, he can then make a mold of it and cast metal using the Lost Wax Casting method.

While the quality is not perfect, and you still need a roughly 2500$ laser setup (which was borrowed from his school) its surely a step into the future.

Join us after the break for a quick video.

Continue reading “3D Print In Wax, Cast In Metal”

A SOPA We Still Can’t Get Behind

[Brad] had an extremely productive January 18th. Considering how many websites went dark to protest SOPA, we can’t blame him. While considering what he could get done if popular Internet time sinks went dark on command, [Brad] thought of the Stop Online Productivity Avoidance box. This build will redirect all traffic to sites like reddit, hacker news, and (gasp!) hack a day to a simple web page that asks the eternal question, “shouldn’t you be working right now?”

The box has two modes: in SOPA mode, the whole Internet is at [Brad]’s fingertips. In NOPA mode, an Arduino communicates with a Python script running on the router to pull up an Internet blacklist. A simple button would be too easy to override, so there’s a ‘nuclear mode’ that shuts off these time sinks for one hour. The only way around the blacklist is to restart the router, a process that takes 15 minutes and will kill the entire Internet for the duration. Not something you’d like to do if you’re slightly bored.

All the code for the SOPA box is up on github and you can check out [Brad]’s demo of the SOPA box after the break.

Continue reading “A SOPA We Still Can’t Get Behind”

Powering An Ultrasonic Transducer

[Lindsay] has a wonderful writeup about a new toy in the shop, an ultrasonic transducer. The 28kHz, 70W bolt-clamped Langevin transducer by itself is not much use, you need a power supply, a horn to focus the energy, and a way to tune it. [Lindsay] starts off by showing how to find out the resonant frequency of the transducer, designing and building a high voltage high frequency AC power supply, and how to design a horn.

Not missing the meaning of DIY [Lindsay] casts and machines a horn for the transducer with a high level of precision as this will also tune the horn to the correct frequency. Once some brackets are machined the whole setup is put through some fun experiments in water and lemonaide, but the real purpose is to drill fine holes in glass for his home made Panaplex displays.

Join us after the break for a short video.

Continue reading “Powering An Ultrasonic Transducer”

Converting A Mill To CNC

For most of the past year, [Joel] has been working on converting a manual mill to a CNC mill with the addition of a computer, brackets and stepper motors. He’s put an amazing amount of effort into his project, and the result is awesome and much less expensive than buying and shipping an old Bridgeport mill.

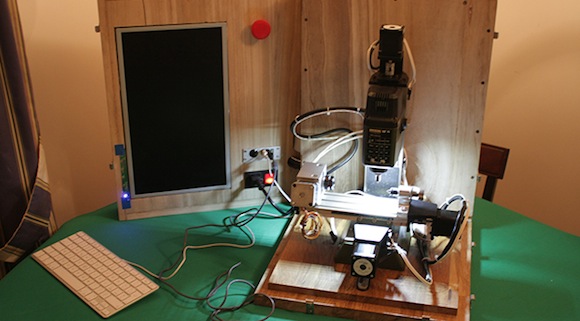
The project started with this mill from Grizzly. It’s a step above the small ‘hobby mills,’ but still very affordable at $1200 shipped to [Joel]’s driveway. The work began by fabricating an enclosure for the PC and motor drivers out of an electrical panel box. The controller box includes a touch screen, keyboard and computer running Mach3 CNC software. The computer connects to a breakout board with a trio of motor drivers providing power for the stepper motors on each axis.

After a few months (good things take time), [Joel] was ready to attach the stepper motors to the axes of the mill. He’s just put up a few videos of milling copper-clad board for PCBs and surface machining ABS, viewable after the break. For a total investment that is less than finding, buying, and repairing an old industrial mill, we’ll call [Joel]’s project a success.

Continue reading “Converting A Mill To CNC”

Make A Simple O-scope With A FTDI Board And A Couple Of ADC’s

[RandomTask] has posted a nice tutorial on how to use a FTDI serial to usb converter, and a couple analog to digital converters to make a simple software oscilloscope. Using a “Universal Serial to USB converter” and one of many FTDI break out boards, he first reprograms the chip using FTDI’s programming software to put the device into a FIFO (first in first out) mode.

From there a pair of ADC0820 8 bit digital to analog converters are wired up, and input is fed to a couple 555’s for testing. It should be noted that there is no input protection, so things like voltages above 5 volts, or negative voltages are a big no-no with this setup. It still could be very handy while working with micro controllers or other digital circuits.

Data is then sent to the computer and displayed using a VB.net program, which has some basic features like scale and triggering, but also contains a couple bonuses like Calc Freq and Calc V delta calculation.

Many people have these little serial to usb converters, and might be in need of a simple scope. If you’re one of them, then you can cobble this together pretty darn quickly, and cheaply.

DIY Ultrasonic Plastic Welding

Here’s something that may be of interest to all the reprappers, vacuum formers, and other plastic fabbers out there: ultrasonic welding of plastics. If you’ve ever wanted to join two pieces of plastic without melting them together with acetone or screwing them together, [circuitguru] is your guy.

Ultrasonic welder setups are usually reserved for companies that don’t mind spending tens of thousands of dollars on a piece equipment. There are smaller versions made for heat staking – melting plastic pillars into rivets on the work piece – and [circuitguru] was lucky enough a somewhat reasonable price.

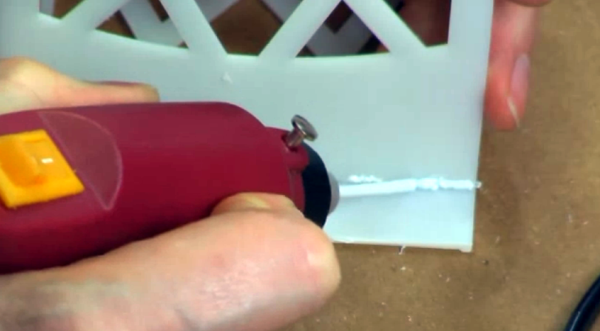
Because the heat staking gun was a handheld unit, a rotary tool drill press was put to work. The end result is a relatively inexpensive way to join two plastic parts without screws, glue, or solvents. The bond is pretty strong, too. Check out the video after the break to see [circuitguru] join two pieces of a plastic enclosure and try to tear them apart.

Continue reading “DIY Ultrasonic Plastic Welding”

Oscilloscope Clock Made Possible By Dumpster Diving

We see people driving around the night before trash collection and reclaiming items doomed to the land fill (or on their way to recycling… who knows). We’re beginning to think we need to join those ranks. Case in point is this vintage oscilloscope which [Bob Alexander] plucked from the curb in the nick of time. Here’s the kicker, when he got it home he found it still worked! He couldn’t let this opportunity go to waste, so he figured out how to turn it into a clock without losing the ability to use it as a scope.

You probably already know that it’s possible to display your own graphics on an oscilloscope. In fact, you can buy a board from Sparkfun which will turn the scope into an analog clock, and that’s exactly what [Bob] did. But he was met with two problems, the X-axis was flipped and he didn’t have an easy way to power the board.

He struggled with the voltage supply, frying his first attempt at boosting the internal 6.3V supply to use with a linear 5V regulator. His second attempt worked though, soldering a 12V regulator to the transformer. He was then on to the X-axis correction, using a rail-to-rail op-amp to invert the signal. The project finishes by adding toggle controls and buttons on the back of the case to switch between scope and clock modes, and to set the time.