Minimal MQTT: Power And Privacy

In this installment of Minimal MQTT, I’m going to cover two loose ends: one on the sensor node side, and one on the MQTT server side. Specifically, I’ll tackle the NodeMCU’s sleep mode to reduce power and step you through bridging MQTT servers to get your data securely out of your home server and into “the cloud”, which is really just other people’s servers.

If you’re just stepping into this series now, you should really check out the other three posts, where I set up a server, then build up some sensor nodes, and then flesh-out a few ways to control everything from your phone or the web. That’s the coolest material, anyway. This last installment just refines what we’ve built on. Let’s go!

Continue reading “Minimal MQTT: Power And Privacy”

Minimal MQTT: Control And Clients

So you’ve built a central server and filled your house with WiFi-connected nodes all speaking to each other using the MQTT protocol. In short, you’ve got the machine-to-machine side of things entirely squared away. Now it’s time to bring the humans into the loop! We’re going to explore a couple graphical user interfaces.

You could build a physical knob and/or LED display for every little aspect of your entire system, but honestly, this is where GUIs really shine. In this installment of Minimal MQTT, we’re going to look at human-friendly ways of consuming and producing data to interact with your connected sensors, switches, and displays. There are a ton of frameworks out there that use MQTT to build something like this, but we’re going to cut out the middle-man and go straight for some GUI MQTT clients.

Continue reading “Minimal MQTT: Control And Clients”

Minimal MQTT: Networked Nodes

Last time on Minimal MQTT, we used a Raspberry Pi to set up an MQTT broker — the central hub of a home data network. Now it’s time to add some sensor and display nodes and get this thing running. So pull out your ESP-8266 module of choice, and let’s get going.

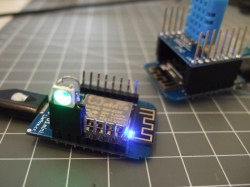
DSCF8443For hardware, we’re using a WeMos D1 Mini because they’re really cute, and absolutely dirt cheap, but basically any ESP module will do. For instance, you can do the same on the simplest ESP-01 module if you’ve got your own USB-serial adapter and are willing to jumper some pins to get it into bootloader mode. If you insist on a deluxe development board that bears the Jolly Wrencher, we know some people.

NodeMCU: Getting the Firmware

We’re using the NodeMCU firmware because it’s quick and easy to get running. But you’re not stuck with NodeMCU if you want to go it alone: MQTT has broad support. [TuanPM] ported over an MQTT library to the native ESP8266 SDK and of course there’s espduino, a port for an Arduino-plus-ESP combo. He also ported the MQTT module to NodeMCU that we’ll be using today. Thanks, [TuanPM]!

Continue reading “Minimal MQTT: Networked Nodes”

Minimal MQTT: Building A Broker

In this short series, we’re going to get you set up with a completely DIY home automation system using MQTT. Why? Because it’s just about the easiest thing under the sun, and it’s something that many of you out there will be able to do with material on-hand: a Raspberry Pi as a server and an ESP8266 node as a sensor client. Expanding out to something more complicated is left as an exercise to the motivated reader, or can be simply left to mission creep.

We’ll do this in four baby steps. Each one should take you only fifteen minutes and is completely self-contained. There’s a bunch more that you can learn and explore, but we’re going to get you a taste of the power with the absolute minimal hassle.

In this installment, we’re going to build a broker on a Raspberry Pi, which is the hub of your MQTT network. Next time, we’ll get an ESP8266 up and running and start logging some data. After that, we’ll do some back-end scripting in Python to make the data speak, and in the last installment, we’ll explore some of the useful frills and fancy bits. Let’s get started!

Continue reading “Minimal MQTT: Building A Broker”