Automated Brewing

There’s little more to making alcoholic beverages than sugar, water, yeast, and time. Of course those with more refined or less utilitarian tastes may want to invest a bit more care and effort into making their concoctions. For beer making especially this can be a very involved task, but [Fieldman] has come up with a machine that helps automate the process and take away some of the tedium.

[Fieldman] has been making beers in relatively small eight-liter batches for a while now, and although it’s smaller than a lot of home brewers, it lends itself perfectly to automation. Rather than use a gas stove for a larger boil this process is done on a large hot plate, which is much more easily controlled by a microcontroller. The system uses an ESP32 for temperature control, and it also runs a paddle stirrer and controls a screen which lets the brewer know when it’s time to add ingredients or take the next step in the process. Various beers can be programmed in, and the touchscreen makes it easy to know at a glance what’s going on.

For a setup of this size this is a perfect way to take away some of the hassle of beer brewing like making sure the stove didn’t accidentally get too hot or making sure it’s adequately stirred for the large number of hours it might take to brew, but it still leaves the brewer in charge for the important steps.

Beer brewing is a hobby with a lot of rabbit holes to jump down, and it can get as complicated as you like. Just take a look at this larger brewery setup that automates more tasks on a much larger scale.

Continue reading “Automated Brewing”

ESP32 bus pirate

ESP32 Sets Sail As A Modern Bus Pirate Powerhouse

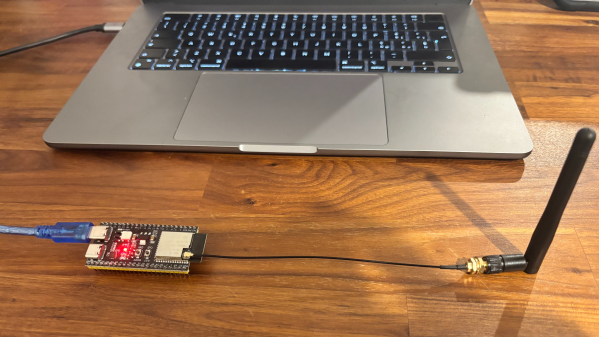
Bus Pirate is nearly a household name in the hardware hacking world. The first version came out way back in 2008, and there have been several revisions since then. You can buy pre-built Bus Pirate devices, but there’s also the option now to build our own. The ESP32 Bus Pirate project has everything you need to turn an ESP32 device into a protocol sniffing/decoding powerhouse—all on a board you may have sitting around from another project.

There are a ton of solutions when it comes to talking to different buses —I2C, UART, JTAG, you name it, there’s a purpose-built device for it. Over a decade ago, Dangerous Prototypes released the Bus Pirate, offering a Swiss Army knife of a tool to interface with this ever-expanding list of communications standards. The ESP32 Bus Pirate project is open-source firmware for ESP32s that gives them the ability to be the multi-tool that lets us communicate with a long list of protocols.

It supports a wide variety of devices, from the straightforward ESP32 S3 Dev Kit available from a long list of suppliers to the more specialized M5 Cardputer equipped with its own keyboard. The original Bus Pirate required plugging the board into a PC to use it; with this being ESP32-based, that’s no longer a limitation. So long as you can supply power to the ESP32, you can connect and control it via WiFi and a web browser. In addition to the Bus Pirate protocols, the project allows us to directly control the pins on the ESP32 board, should you want to do more with it besides interfacing with one of the supported protocols. Be sure to check out some of our other articles about Bus Pirate, as it’s been a fantastic tool for the hacker community over the years.

Digital Etch-A-Sketch Also Plays Snake

The Etch-A-Sketch has been a popular toy for decades. It can be fun to draw on, but you have to get things right the first time, because there’s no undo button. [Tekavou] decided to recreate this popular toy in digital form instead to give it more capabilities. 

The build relies on an Inkplate e-paper screen as a display, which is probably as close you can get in appearance to the aluminium dust and glass screen used in an Etch-a-Sketch. The display is hooked up to an ESP32 microcontroller, which is charged with reading inputs from a pair of rotary encoders. In standard drawing mode, it emulates the behavior of an Etch-A-Sketch, with the ESP32 drawing to the e-paper display as the user turns the encoders to move the cursor. However, it has a magical “undo” feature, where pressing the encoder undoes the last movement, allowing you to craft complex creations without having to get every move perfect on your first attempt. As a fun aside, [Tekavou] also included a fun Snake game. More specifically, it’s inspired by NIBBLES.BAS, a demo program included with Microsoft QBasic back in the day.

We’ve seen all kinds of Etch-A-Sketch builds around these parts, including this impressive roboticized version. Video after the break.

Continue reading “Digital Etch-A-Sketch Also Plays Snake”

Continuous-Path 3D Printed Case Is Clearly Superior

[porchlogic] had a problem. The desire was to print a crystal-like case for an ESP32 project, reminiscent of so many glorious game consoles and other transparent hardware of the 1990s. However, with 3D printing the only realistic option on offer, it seemed difficult to achieve a nice visual result. The solution? Custom G-code to produce as nice a print as possible, by having the hot end trace a single continuous path.

The first job was to pick a filament. Transparent PLA didn’t look great, and was easily dented—something [porchlogic] didn’t like given the device was intended to be pocketable. PETG promised better results, but stringing was common and tended to reduce the visual appeal. The solution to avoid stringing would be to stop the hot end lifting away from the print and moving to different areas of the part. Thus, [porchlogic] had to find a way to make the hot end move in a single continuous path—something that isn’t exactly a regular feature of common 3D printing slicer utilities.

The enclosure itself was designed from the ground up to enable this method of printing. Rhino and Grasshopper were used to create the enclosure and generate the custom G-code for an all-continuous print. Or, almost—there is a single hop across the USB port opening, which creates a small blob of plastic that is easy to remove once the print is done, along with strings coming off the start and end points of the print.

Designing an enclosure in this way isn’t easy, per se, but it did net [porchLogic] the results desired. We’ve seen some other neat hacks in this vein before, too, like using innovative non-planar infill techniques to improve the strength of prints.

Continue reading “Continuous-Path 3D Printed Case Is Clearly Superior”

Building A 7-Segment Shadow Clock

There are plenty of conventional timepieces out there in the world; we’ve also featured a great many that are aesthetically beautiful while being unreadably esoteric. This neat “shadow clock” from [Smart Solutions for Home] is not conventional, but it’s still a clock you could use every day.

The display is made of four seven-segment digits, which have a subtle appearance. Each segment uses a solenoid to extend it forward out of the display, or to retract it flush with the faceplate. This creates a numerical display in all one color, with the physical protrusion doing the job of making the numbers visible. This is perhaps where the “shadow clock” name comes from, though you notice the protruding segments moreso than the shadows they cast on the faceplate.

Running the show is an ESP32, paired with H-bridges to drive the solenoids that make up the 7-segment displays. The H-bridges are driven via shift registers to reduce the number of GPIO pins needed. Unlike many other ESP32 clock builds, this one uses a DS3231 real-time clock module to keep accurate time, rather than solely relying on Internet-based NTP time servers. Configuring the clock can be done via a web interface. Design files are available online.

If you think you’ve seen this recently, maybe you’re thinkig of this prototype for a very similar display by [indoorgeek]. And that’s not the only way to make shadow clocks either. After all, the term is not enforced or defined by any global horological organization. Maybe that’s a good thing! Video after the break.

Continue reading “Building A 7-Segment Shadow Clock”

Custom Bedroom Lighting Controlled By Alexa

[Arkandas] had a problem. They liked reading in bed, but their bedroom lamps weren’t cutting it—either too bright and direct, or too dim and diffuse. The solution was custom lighting, and a new project began.

The concept was simple—build a custom controller for a set of addressable LED lighting strips that would be installed in the bedroom. Specifically, in the headboard of the bed, providing controllable light directly where it was needed. The strips themselves were installed in aluminum channel with plastic diffusers to give a nice smooth light. [Arkandas] then tasked an ESP32 to control the strips, using the FastLED library to work with WS2812B LEDs, and also the Adafruit NeoPixel library for using SK6812 LEDs and their extra white channel. The ESP32 was set up to provide a web interface for direct control over the local network. [Arkandas] also made good use of the FauxmoESP library to enable the device to be controlled via Amazon Alexa, which fit nicely into their existing smarthome setup. Files are on Github for the curious.

The final build works well, creating a soft light in the habitable area of the bed that can also be readily controlled via voice commands or via web. We’ve seen the ESP32 do other great feats in this arena before, too, albeit of the more colorful variety. Meanwhile, if you’re cooking up your own smart lighting solutions, don’t hesitate to tell the tipsline!

DIY MP3 Player Inspired By The IPod

These days, the personal MP3 player has been largely replaced by the the smartphone. However, [Justinas Petkauskas] still appreciates the iPod for its tactility and portability, and wanted to bring that vibe back. Enter JPL.mp3

The build is based around the ESP32-S3 microcontroller. It’s hooked up with a PCM5102 DAC hooked up over I2S to provide quality audio, along with a micro SD card interface for music storage, and a small IPS LCD. The best feature, though? The mechanical click-wheel which provides a very tactile way to scroll and interact with the user interface. Everything is assembled into a neat 3D printed case, with a custom four-layer PCB lacing all the electronics together.

On the software side, [Justinas] cooked up some custom software for organizing music on the device using a SQLite database. As he primarily listens to classical music, the software features fields for composer/piece and conductor, orchestra, or performer.

[Justinas] calls the final build “chunky, but nevertheless functional” and notes it is “vaguely reminiscent of classic iPods.” We can definitely see the fun in building your own personalized version of a much-enjoyed commercial product, for sure. Meanwhile, if you’re cooking up your own similar hardware, we’d certainly love to hear about it.