New Pens For Old Plotters

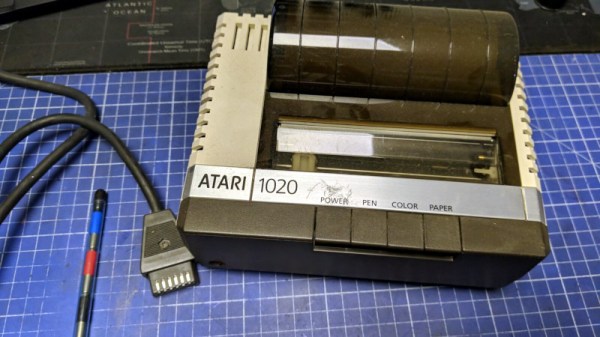
Finding consumables is an ever-present problem facing anyone working with old computer hardware. Many of these devices ceased manufacture decades ago and what old stock remains is invariably degraded by time. [Retrohax] has encountered it with the pens for an Atari plotter, a machine that uses an ALPS mechanism that appears in more than one 1980s machine. The original pens had dried out beyond the ability to refill, so he takes us through the process of finding replacements.

Sadly there are no equivalent modern pens ripe for modification, so whatever replacement he used would have to involve a little lateral thinking. He thought salvation was at hand in the form of multicolor ballpoint refills of the type where the ink is in an easily cuttable plastic tube. [Retrohax] and was able to make a 3D-printed holder for a cut-down ballpoint refill. Sadly the pressure required for a good line from a ballpoint was much higher than the original pens, so he was back to square one. Then he happened upon gel pens and tried the same trick with a gel pen refill. This gave instant success and should provide a valid technique for more than just this ALPS mechanism.

If you haven’t got a classic plotter to hand, never fear. You can have a go at making your own.

A Better, Open Hardware Keyboard

A keyboard is the most important tool in the modern desk jockey’s arsenal but, despite this fact, millions of people suffer the $10 membrane keyboards that shipped with the computer they got a decade ago. It’s a terrible way to live your life, but for those of us who are enlightened, there’s another way: mechanical keyboards. [Mário] over at the Bit Bang Theory just built his own mechanical keyboard with his own homebrew firmware and a few interesting features that aren’t found in other open hardware keyboard projects.

The ‘from scratch’ aspect of this build is somewhat of a misnomer; the key switches used in this build were taken from a Monterey K108, and the key caps were taken from a keyboard with a Portuguese layout. Once the switches were in place and soldered up, it was time for the electronics.

While most homebrew keyboards these days use a Teensy 2 thanks to some amazing firmware and development tools that have grown up around this device, there’s not a Teensy to be found inside this keyboard. The keyboard controller is built around a PIC18F4550 and uses the USB available on the chip. Naturally, there are more than a few WS2812b RGB LEDs around the edge of the keyboard that “breathe”, run a KITT-style LED chaser, or simply display a single chosen color.

There are a few neat features in this keyboard controller that aren’t readily available with other open source keyboard firmwares. There’s a keylogger, macro recorder, and a toggle macro that will activate or deactivate a (secret) internal 8GB USB storage key. Settings are saved in the internal EEPROM.

It’s a great looking build, and something we don’t see enough of around here. In any event, it’s just one step further towards eliminating the menace of cheap keyboards, and something we hope to see more of soon.

Ritewing Zephyr Build And Flight Footage

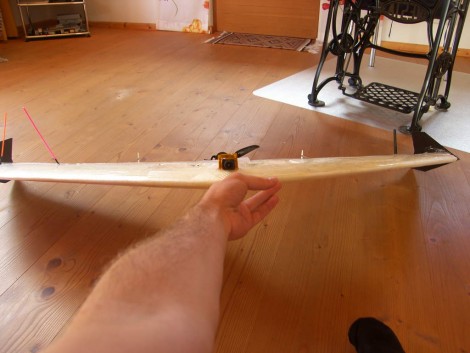
That’s a camera perched atop this aircraft’s wing. [Trappy] built the video system into his Ritewing Zephyr and his test flights in the Austrian Alps make for some breathtaking video. The foam wing is pretty easy to work with and the tool of choice here is a hot knife to cut out cavities for the electronics. The total build time came in between ten and twelve hours, but this isn’t the first time [Trappy] has worked with this model. We’re not sure what setup he’s using for control, we’d guess something head-mounted, but do take a look from the cockpit after the break. You’ll like what you see.

[Trappy] informed Hackaday that he’s planning some altitude and distance testing next weekend. The goal is to reach 15,000 feet and a range of 12 miles.

Continue reading “Ritewing Zephyr Build And Flight Footage”