3D Printed Light Pipe Turns Overly-Bright LED Into Design Harmony

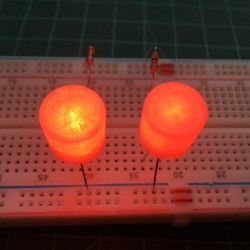
There are a number of ways to efficiently and elegantly limit an LED’s brightness, but [Tommy] found that using a light pipe or diffuser can integrate better with a device, especially when the device itself is mostly 3D printed in the first place.

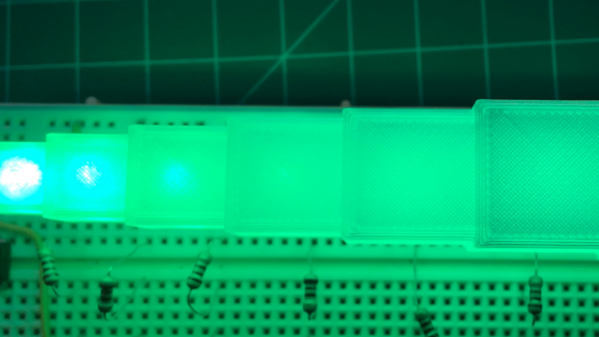
Infill has an effect on appearance. 20% infill on the left, 100% infill on the right.

For some problems the Goldilocks approach is the way to go. [Tommy] designed a small array of different LED cover options, and tested each to see what yielded the best results for his printed kit. Some of the biggest takeaways include:

  • 100% infill is best for even results (although interesting shadows happen at less than 100% infill.)
  • Interesting things happen with 7 to 11 mm of top layers of clear PLA, when illuminated from below with a 5 mm high-brightness LED. An even diffusion of light starts to give way to a circular gradient as the upper layer gets thicker.
  • LEDs emit their light mainly upward in a round pattern. Corners will always be darker, even more so if the guide is not round. This effect becomes noticeably more pronounced as the light guide grows in size, putting a practical upper limit on its effective dimensions.

[Tommy] explores these kinds of issues because he designs and builds electronic synth instruments, and they are mostly 3D printed. He explores efficiency and is always happy to share his findings about what works and doesn’t work.

Of course, the usual ways to deal with an overly-bright LED are to limit its current or control its brightness by driving it with a PWM signal. The right approach depends on the application and the scale of the design, and there are actually quite a few ways to crack this nut. Luckily, our own [Inderpreet Singh] is here to tell you all about how best to control LED brightness.

Get Twelve Charlieplexed PWM Outputs From An ATtiny85

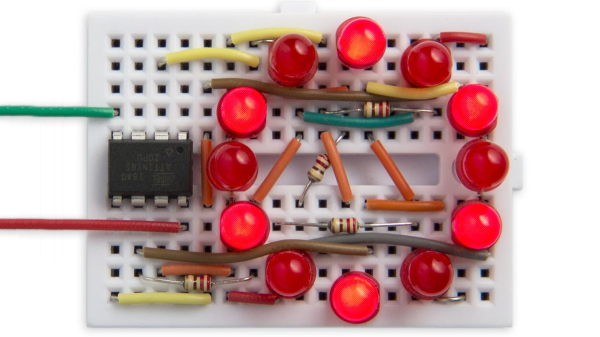
Most of us are aware that charlieplexing can drive a large number of LEDs from a relatively small number of I/O pins, but [David Johnson-Davies] demonstrates adding another dimension to that method to create individually controlled PWM outputs as well. His ATtiny85 has twelve LEDs, each with individually-set brightness levels, and uses only four of the five I/O pins on the device.

Each LED can be assigned a brightness between 0 (fully off) and 63 (fully on). The PWM is done by using one of the timers in the ATtiny85 to generate a periodic interrupt, and the ISR for the interrupt takes care of setting the necessary ratios of on and off times for each charlieplexed output. The result? Twelve flicker-free LEDs with individually addressable brightness levels, using an 8-pin microcontroller and just a few passive components on a tiny breadboard. There’s even one I/O pin left on the ATtiny85, for accepting commands or reading a sensor.

[David] really wrings a lot out of the ATtiny series of microcontrollers with his compact projects, like his Tiny Function Generator (which recently got an update.) He also demonstrated that while charlieplexing is usually used with LEDs, charlieplexing can be used with switches just as easily.

Finding The Fix For A Dimmed 27″ IMac Screen

machack27

Like many with a 27″ iMac, [Gerry’s] been experiencing some screen brightness issues. According to him, Apple’s been largely ignoring the problem and the community’s outcry, which led to [Kaos2k] poking around inside to hack together a fix. It’s a solution clearly born from trial and error; [Kaos2k’s] initial post on the issue simply recommending “applying pressure” to the panel itself, which would sometimes cause the dim screen to spring back to life.

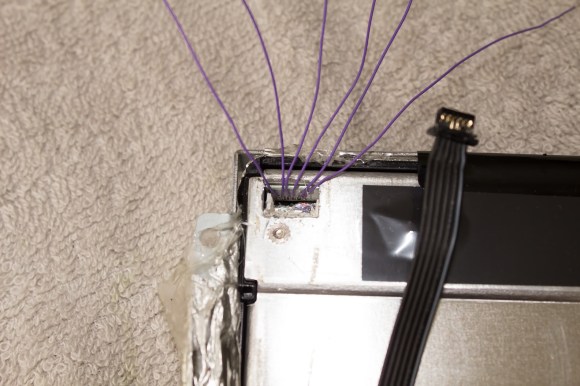
It turns out that heat (or stress, or something) from the screen causes the solder joints to weaken on the board where a 6-pin connector hooks up, dimming the screen to eye-strain levels. Some Mac users are suing over it, because the problem tends to show up just outside of the warranty window and affects a large number of people. [Kaos2k], however, provided the much needed solution for those looking to get the fix over with: just solder the cable directly to the board. Our tipster, [Gerry], has documented his experiences over at his blog, and was kind enough to make a step-by-step video of the repair, which you can see after the break.

Continue reading “Finding The Fix For A Dimmed 27″ IMac Screen”