Passive RFID Tag Cloning

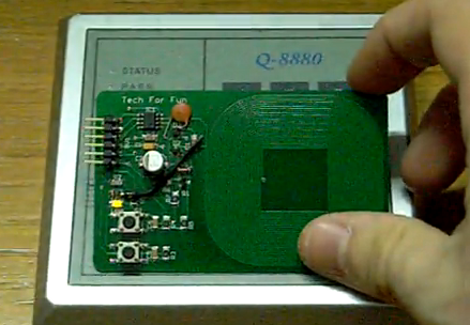
Here’s an open source RFID cloner design that is about the same size as a standard RFID key card. It doesn’t need a battery to capture key codes, just the magnetic field generated by an RFID reader. You can see the functionality demonstrated in the video after the break. By holding the bottom button as the cloner is moved in range of the RFID reader, the microcontroller goes into learning mode. Now just hold up the card you wish to clone and the LED just above the buttons will light up when it has captured the code. Now the device will act just as the original RFID tag did.

This was developed by [Ramiro], the same person who built the barebones RFID emulator we saw a few days ago. When researching that story we complete skipped over this gem. He’s posted a ton of information on the tag itself. It doesn’t look like he has any PCBs or kits left, but the schematic and code are available for download. You should check in on the design considerations section because it discusses the read/write function that isn’t built into the current version. That’s why you see some add-on components on the hardware used in the demo video.

It seems like this is a lot more user-friendly than the last RFID spoofer we looked at.

Continue reading “Passive RFID Tag Cloning”

An Arduino Board For Your Tiniest Of Projects

1inch_by_1inch_mini_arduino_board

Instructables user [dustinandrews] just took the wraps off his latest creation, a DIY Arduino Pro Mini clone.

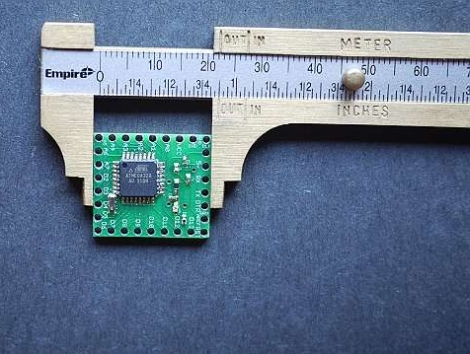
Actually, to call it an clone is technically incorrect – while he aimed to produce a tiny Arduino-compatible board, his goal was not to replicate the Mini’s design. Instead, he developed a 1” x 1” board from scratch, covering the construction process in great detail.

When you are working with components this tiny, the only reasonable way to get things done is via solder reflow. He walks through the steps he took to produce the board, which should be enough to guide those doing reflow for the first time through the process without too much trouble.

The end result looks pretty nice, and when he puts it up side by side against the Arduino Pro Mini, his board can definitely hold its own. While his design lacks an on-board power regulator and reset button, he does provide two more analog I/O pins than the Mini, along with several other enhancements.

nes_cart_building

Creating NES Cartridge Clones From ROM Dumps

Sometimes emulators just don’t cut it when you want to play a vintage game. Like it or not, some people enjoy the nostalgia of playing old games on the actual hardware for which it was designed.

[Callan] wrote in to share a method he has been using to make some of his own NES game cartridges from ROM dumps in order to play them on an honest to goodness NES console.

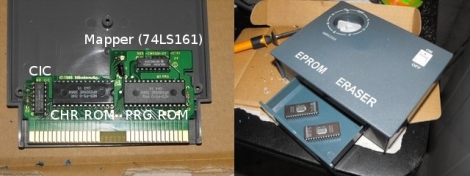
He starts out with a 190 in 1 game cartridge, where he found a neat Famicom game never released in the US. He decided he would patch the ROM he found on the multicart in order to have an English menu, and then create his very own cartridge from the image. He discusses how to identify which EPROM chips you will need in order to construct your cartridge, as well as some helpful ways of finding a donor cart that has a similar enough board to house your components.

[Callan] also provides a quick walkthrough of erasing and burning your new EPROM chips, before discussing some post-soldering troubleshooting steps you might need to take before your game will work properly.

While we can’t comment on the legality of these game clones, we still think it’s pretty awesome.

Be sure to check out his site for a far more in-depth discussion of the process if this is something that interests you.

turbografx_clone

FPGA-based Turbografx 16 Clone

[Gregory] wrote in to share his most recent project, an FPGA clone of the PC Engine/Turbografx 16 console. You may remember him from last year, when we talked about his SEGA Genesis FPGA clone. He just couldn’t leave well enough alone, and decided to resurrect yet another 16-bit machine in FPGA form.

He has been working on the project for about three months now, but he has been making very quick work of getting everything up and running. As of a few weeks ago, the project was in a pretty unstable alpha stage, but after pounding away at some bugs, he is now able to render any game he pleases.

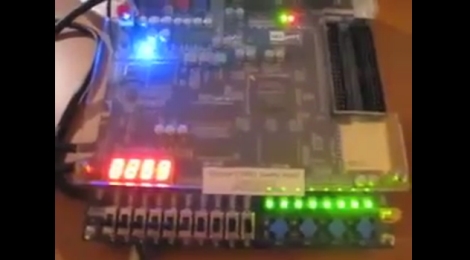
The clone uses an Altera DE1 board just like his previous builds, and he has been able to emulate all three if the main chips that make up the Turbografx logic board. He has yet to work on the Programmable Sound Generator, but that is slated for the near future. While the FPGA currently stores ROMS in its flash memory, he has plans to add the ability to load games from an SD card.

Keep reading to see a pair of videos showing his console clone in action, it’s impressive.

Continue reading “FPGA-based Turbografx 16 Clone”

Really Bare Bones Board Arduino Clone


Modern Device’s Really Bare Bones Board is an Arduino clone designed to have an incredibly small footprint. It’s barely wider than the requisite AVR and is laid out so you can reduce the size even further. Don’t need the power connector? Just snip it off. Don’t need the voltage regulator? That can be removed just as easily. The kit is only $12 and all through-hole components. [youevolve] posted a build guide that shows exactly how easy it is to assemble.

Related: Freeduino SB 2.1 review