Arduino-based Temp Control Via SMS

smsTempController

As connected as we are, reliable and affordable internet is still a luxury in the far reaches. [kohleick’s] country home is not just remote; with temperatures dropping to -30C in the winter, it’s practically Arctic. His solution for controlling the thermostat from afar was to take advantage of the GSM network and implement a SMS-based heater controller. The unit typically operates in “antifreeze mode,” but sending a simple text message prior to visiting causes the heater to kick it up to a more comfortable setting for your arrival. Daily logs report the system’s status, and an alert will trigger when temperatures fall below a set limit, thus indicating potential faults with the heater.

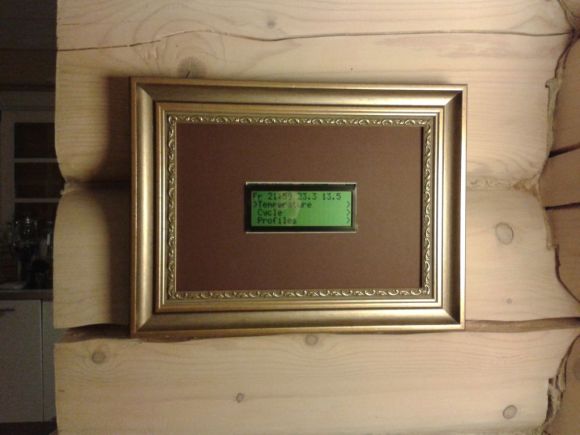
The build uses a Freeduino paired with an external GSM modem for communication and an LCD to display current status and menus, which users access via three buttons on the side of the picture frame. [kohleick] connected two temperature sensors: one directly to the Freeduino’s shield and a second outside the house. After the temperature sensors detect deviance from the set point, or upon SMS instruction, the Freeduino will crank up the heat through a 5V relay attached to the home’s boiler. Head over to the Instructables page linked above for a bill of materials, schematics, and the code. The Siemens GSM modem in this build is nothing to worry about, but be careful if you try to reproduce this project with an Arduino GSM shield, or your house might really heat up.

RC Car Controller And Receiver Replacement

This radio controlled car controller replacement is a great project to try some new things with that fancy hardware you’ve got sitting around. The hack comes in two parts, the receiver and the transmitter. They’re communicating via Bluetooth so if you only want to build one side of the hardware you should be able to make most Bluetooth devices work as the other. For instance, build the receiver for the car and control it with a Wii remote. Or use the controller to play emulator games on an Android phone.

Both pieces are Arduino based. The controller makes use of a Freeduino with a Bluetooth shield as well as a pair of analog stick breakout boards. The car side of things uses a Bluetooth Bee (a Bluetooth module that is pin compatible with an Xbee socket) and an Arduino pro. Once the hardware bits are assembled, it takes very little code to get the system up and running. Join us after the break for a quick clip of the car in action.

Continue reading “RC Car Controller And Receiver Replacement”

Microcontroller Gives You More Control Of Your Camera Lens

Here’s one way to get more control of your camera lenses. [Vladimir] built an Arduino-based pass-through ring (translated) which intercepts automatic lens controls. It’s meant for use with the Canon EOS lenses which have their own electronics allowing control of things like focus and zoom.

It seems like part of the motivation here was to uses the lenses with other brands of cameras. But [Vladimir] does also talk about the possibility of improving on some of the sensors that don’t perform well in certain climate conditions (think of how crystal oscillators will drift as temperature changes).

The machine translation is a bit rough to follow, but it seems the adapter ring still uses the settings sent in from the camera but has the Arduino clone to translate them into a format that the lens is expecting. In addition to this there is a set of buttons on that small PCB beside the lens which allow for fine tuning the aperture.

This is a lengthy writeup, but there’s two more on the way that will help fill in the gaps of how this hack works with different lens models, and some more tips on how to use it.

[Thanks Vasily]

Laser Cut Clock Reminds Us Of A Spirograph

[Brian] from Louisville’s LVL1 hackerspace sent in this laser cut gear clock that’s almost unlike any other clock we’ve seen before. [Brian] also put up a wonderful Instructable for his build.

Since LVL1 got a better laser cutter a lot of neat projects have been piling up. [Brian] based his clock around two cheap stepper motors driven by a freeduino. A chronodot was used to keep accurate time. Making the gears, though, presented a few problems. While prototyping the gear clock face, it was apparent that the numbers should be oriented along a line coming from the center of the gear. The prototype also used 100 teeth and that didn’t translate well into a clock design. [Brian] designed the minute gear with 60 teeth, and the hour gear with 144 teeth so that each tooth would equal 5 minutes.

[Brian]’s clock is functionally similar to this $2500 gem, and certainly much less expensive even after the cost of the laser cutter is taken into account. Of course, the Spirograph clock keeps track of minutes so it may be worth upwards of $5k.

Arduino Buyers Guide And The Seeeduino

seeeduino

Make has assembled a buyers guide for the many different types of Arduino devices. The Arduino is an open hardware platform designed to make prototyping easily accessible. The design allows for other people to modify, expand, and improve on the base, and many people have started producing their own versions. The guide features a lot of the hardware we’ve covered in the past like the LilyPad, Arduino Pro, Sanguino, Duemilanove, Ethernet Shield, and Freeduino.

Out of the pack, the Seeeduino (pictured above) definitely caught our eye. It’s a low profile SMD design much like the Arduino Pro. They’ve taken advantage of the space saved by the SMD ATmega168 by adding more useful headers. In addition to the ICSP, you get the pins in UART order and an I2C header. Vcc is switch selectable for 3.3 or 5volts. The reset switch has been moved to the edge plus two additional ADC pins. Our favorite feature is the new spacing on the digital pins. Arduino digital pin headers have an inexplicable 160mil gap between the banks. The Seeeduino has the standard row for shield compatibility, but has an additional row spaced at standard 100mil spacing for use with protoboard. At $23.99, it’s competitively priced too.

USB Authenticated Deadbolt Lock

The Makers local 256 sent us this USB authenticated deadbolt prject. For roughly $60 these guys built an authentication system that reads the serial number off of the chip in a USB storage device.  The actual content on the memory in the USB device is not used at all. They are using a Freeduino board to control its behavior. It has a magnetic sensor that keeps it from initiating the lock when the door is open.  They mention that they are using Transparent Aluminum as an enclosure, we assume they mean the Star Trek variety, not Aluminium oxynitride. Be sure to check out the video after the break.

Continue reading “USB Authenticated Deadbolt Lock”

Really Bare Bones Board Arduino Clone


Modern Device’s Really Bare Bones Board is an Arduino clone designed to have an incredibly small footprint. It’s barely wider than the requisite AVR and is laid out so you can reduce the size even further. Don’t need the power connector? Just snip it off. Don’t need the voltage regulator? That can be removed just as easily. The kit is only $12 and all through-hole components. [youevolve] posted a build guide that shows exactly how easy it is to assemble.

Related: Freeduino SB 2.1 review