Hackaday Links: November 17, 2013

hackaday-links-chain

If you purchased a knock-off FM transmitter and were unhappy with its broadcast range [Thiagohersan] shows how to double the range with a simple transistor amplifier circuit. He also hacked it for used without the 12V car socket.

[Patrick Herd] had a project that required him to strip about twenty Mindstorm batteries from their plastic enclosures. It’s not too tough getting into them but it does require drilling out the plastic rivets. He made a jig and used a CNC mill to automate the process.

Speaking of CNC, [Bertho] added some abstraction to distance himself from what he calls the “50+ years archaic syntax and grammar that G-code programs have”. The project is a meta-compiler for G-Code.

If you need a cold one and don’t have a HaDuino on hand you’ll thank yourself for hacking together this five-cent workbench bottle opener.

Just make sure you do all the lathe work for a custom speaker enclosure before you start pounding back those brewskis. Not only does [Shaun’s] creation look modern and stylish, but it boasts more than enough power to bump some tunes.

Here’s a project that adds LED feedback to your XBMC installation. It uses a Raspberry Pi to run the media center software, and a script to monitor it and actuate the lights on an Adafruit add-on board. At first glance you may not think much of it, but this is all the logic control you need to automate your viewing room. Who doesn’t want a home theater that automatically dims once you’ve made your viewing selection?

And finally, [08milluz] snagged some reactive electronics in the form of Disney’s Mickey Mouse ears. Apparently they glow different colors at live shows and based on where they are worn within the park. He did a complete teardown to show off the hardware within. It turns out to be controlled by an MSP430 which are known for their low power consumption. [Thanks Spikeo55]

Letting [Euler] Help Out With PCB Fabrication

drillin

Since [Alessio] has been etching his own PCBs, he’s hit upon the most tedious part of the process, and the reason homebrew SMD boards are so awesome: drilling your own boards is a pain. While [Alessio]’s CNC mill takes care of most of the work, aligning the pre-drilled boards and correcting for any scaling issues from the mask is a bit difficult. With the help of a transform matrix, though, drilling PCBs has never been easier.

While the Gcode running the mill may be accurate, the actual manufactured PCBs might not be. If the extents on [Alessio]’s board aren’t exactly aligned with the axes of the CNC mill, the drill holes end up where they’re supposed to be. To solve this problem, [Alessio] wrote a PCB drilling transformational matrix calculator. The basic idea is by drilling just a few holes, [Alessio] is able to calculate any offset required in the Gcode with the help of a little bit of linear algebra.

Snap-together PCB Mill

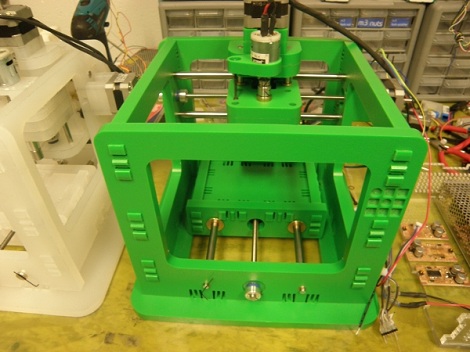
[Jonathan Ward] came up with the MTM Snap, a snap-together pcb mill as part of the Machines That Make group at MIT.

We covered [Jonathan]‘s previous work made out of half-inch plywood, but the new iteration of his PCB includes a clever snap-together mechanism instead of screws and bolts. Although the MTM Snap looks a lot like3d printers such as a reprap, the similarities end with the off-the-shelf stepper motors. Instead of using motor drivers and control electronics from a reprap, the project uses custom stepper drivers, controlled by a bare Arduino.

We’re really impressed with the results of the MTM Snap compared with what is possible on a reprap-derived milling machine like a makerbot or wolfstrap. We’re thinking that’s due to the mass of this project compared to the printed ABS parts of the ‘common’ 3d printers, but any MEs are more than happy to correct that notion.

Check out the video after the break to see the machine in action and a great view of the snap-fit mechanism.

Continue reading “Snap-together PCB Mill”

Everybody Needs One


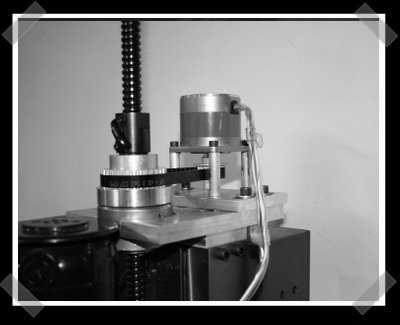
Not the hack o’ the day, but you guys might have noticed that I’ve been pretty quiet on the engadget How-To front. I’ve been spending all my spare time in my garage working on a CNC conversion for the mini mill I bought a few months ago. It features pic based microstepping controllers that handle up to 54 volts and 3amps. I settled for a modified PC power supply for now. I’ve got plans for this thing, including some stuff just for Hack-A-Day. All the mechanical and electronic work is completed; now I’m taking a breather while I wait for the actual beefy stepper motor for the Z-axis pictured above. I celebrated with a coffee stout.