Turning A Pi Into An IBeacon

beacon

Nowadays, if you want to ‘check in with Foursquare’ at your local laundromat, deli, or gas station, you need to take out your phone and manually ‘check in with Foursquare’. It’s like we’re living in the stone age. iBeacon, Apple’s NFC competitor that operates over Bluetooth 4.0 changes all that. iBeacon can automatically notify both iOS and Android users of where they are. [Kevin Townsend] over at Adafruit came up with a tutorial that turns a Raspberry Pi into an iBeacon, perfect for telling you that you’re somewhere in the proximity of a Raspberry Pi, and some other cool stuff too.

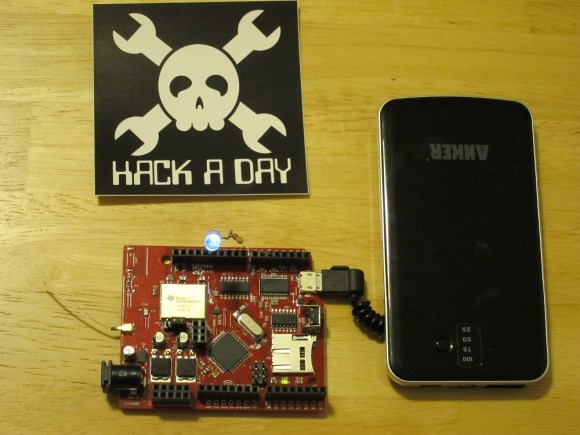
The iBeacon protocol is actually very simple. Basically, the only thing the iBeacon transmits is a 128-bit company/entity value, and an optional major and minor values (to differentiate between locations and nodes within locations, respectively). After plugging in a Bluetooth 4.0 USB dongle into the Pi, it’s a simple matter of installing BlueZ and entering the iBeacon data.

iBeacon by itself doesn’t really do anything – the heavy lifting of figuring out exactly which Panera Bread or Starbucks you’re in is left to the apps on your phone. If you’re a mobile developer, though, this is a great way to set up a very useful testing rig.

Instant Inkjet Circuits With Silver Nanoparticle Ink

Researchers at the University of Tokyo, Georgia Tech and a team from Microsoft Research have developed a low-cost method of printing circuits using an ordinary inkjet printer using a technique called Instant Inkjet Circuits.

The hack is quite literally as simple as injecting a refillable printer cartridge with a commercially available Silver Nano-particle Ink. This allows the printing of circuits onto many different flexible substrates including paper, transparent film, or basically anything you can fit in the printer. Typically if the medium is designed for printing it will work. Some exceptions to this include canvas cloth, magnetic sheets, and transfer sheets.

The researchers chose a Brother inkjet printer because they typically have nozzles that eject higher volumes of ink than other printers. The exact model they used was the Brother DCP-J140w. To maximize ink deposition, all cartridges are filled with the ink, and printed using photo mode where the C M and Y cartridges are simultaneously used to create black. No special software is required to print.

The full article is well worth the read and shows many examples of the different applications this could be used for — including instant prototyping using nothing but scotch tape.

If anyone can source some of this ink and try it out we would love to hear from you! Those that can’t may want to give the old inkjet/laser toner etch resist trick a try.

[via Power Electronics]

AVR Atmega Based PID Magnetic Levitator

[Davide] saw our recent post on magnetic levitation and quickly sent in his own project, which has a great explanation of how it works — he’s also included the code to try yourself!

His setup uses an Atmega8 micro-controller which controls a small 12V 50N coil using pulse-width-modulation (PWM). A hall effect sensor (Allegro A1302) mounted inside the coil detects the distance to the magnet and that data is used by a PID controller to automatically adjust the PWM of the coil to keep the magnet in place. The Atmega8 runs at 8Mhz and the hall effect sensor is polled every 1ms to provide an updated value for the PWM. He’s also thrown in an RGB LED that lights up when an object is being levitated!

So why is there a kid with a floating balloon? [Davide] actually built the setup for his friend [Paolo] to display at an art fair called InverART 2013!

After the break check out the circuit diagram and a short demonstration video of the device in action!

Oh yeah, those of you not impressed by magnetic levitation will probably appreciate acoustic levitation.

Continue reading “AVR Atmega Based PID Magnetic Levitator”

Logic Analyzers And X11

logic

[Andrew] recently scored an awesome HP 1670A Deep Memory Logic Analyzer, lucky dog. Even though this machine was built in 1992, it was a top of the line device back in the day and had a few very interesting features. This logic analyzer also had a few networking ports implementing FTP, NFS, TCP/IP, and the X11 protocols over a 10Base2 (“thinlan”) and 10BaseT (“ethertwist” seriously, that’s what’s in the manual) connections. The X11 protocol interested [Andrew] so he set this logic analyzer up so he could use it via his Linux box.

X Windows is simply a way to display GUI interfaces over a network. While today we usually only see X Windows apps confined to the desktop, in the bad old days of *NIXes you had to pay for, running a GUI app over a network was considered the wave of the future. The Internet replaced this idea with a palimpsest of JavaScript, but we digress…

[Andrew]’s new toy didn’t support DHCP, so after inputting the IP address manually, he checked the host file – still the same after twenty years – and connected with his Linux Mint box. The result is a remote control panel for the ‘ol girl in a garish color scheme that violates all modern sensibilities.

Fail Of The Week: Hackaday Writer’s First CNC Adventure

This Fail of the Week post focuses on a project from [Limkpin] aka [Mathieu Stephan], one of the Hackaday contributors. He wanted a CNC mill of his very own and decided to go with a kit that you assemble yourself. If it had been clear sailing we wouldn’t be talking about it here. Unfortunately he was met with a multitude of fails during his adventure. We’ll cover the highlights below.

Continue reading “Fail Of The Week: Hackaday Writer’s First CNC Adventure”

Fubarino Contest Example: A Sneaky IRC Bot

adam-fubar

You may have heard about Hackaday’s contest to win one of 20 Fubarino boards. We included an example entry from [Mike]. Here’s my example entry for the contest: An IRC search Bot powered by a Wicked Device WildFire board. We’ve all seen IRC bot’s before, but how many have you seen that can turn on an LED while running off a cell phone battery?

The IRC bot’s operation is fairly straightforward. It enters a channel and can be commanded to search.  The first two searches will return links to Google searches for the strings given.  Every third search however, will return a link to Hackaday’s search page. In the example below, “SedAwk” is an unsuspecting user, and “SearchRobot” is our bot.

SedAwk: SearchRobot: SEARCH Unicorns
SearchRobot: Search Complete! https://www.google.com/#q=Unicorns
SedAwk: SearchRobot: SEARCH Rainbows
SearchRobot: Search Complete! https://www.google.com/#q=Rainbows
SedAwk: SearchRobot: SEARCH Quadcopters
SearchRobot: Search Complete! http://hackaday.com/?s=Quadcopters
SedAwk: What the heck?

Follow along after the break to see what other tricks the bot has up its sleeve…

Continue reading “Fubarino Contest Example: A Sneaky IRC Bot”

The “Melt-O-Matic” – A Digital Melting Point Apparatus

FM43474HOHYF7GW.LARGE

A common technique in organic chemistry is to determine the melting point of a specimen. While commercial options exist, [kymyst] decided to build one with similar (or better) functionality, and managed to keep it under $100. The basis of his rig is a 60W soldering iron. He simply replaced the normal soldering tip with an aluminum heating block that holds the capillary tubes and temperature probe. Two small fans are used to quickly cool the heating block, allowing fairly quick measurement times. It should be noted that building a project like this one will mean working with wires that carry 220V (or 115V, depending on your country). Please use proper precautions.

In case organic chemistry is on your list of ‘to learns’, [kymyst] included a nice writeup of the determination of melting points. It’s a great primer for those interested in learning more.

Using this setup, [kymyst] gets readings of ±0.1 °C. He mentions the possibility of adding a webcam for determining melting point automatically, something that would make this system competitive with much more expensive hardware.

The last time we saw one of these it used a hot glue gun as the heating element.