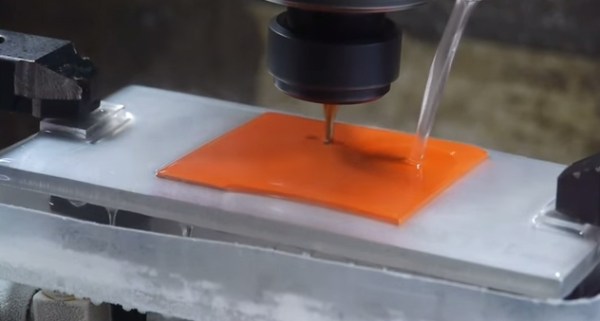
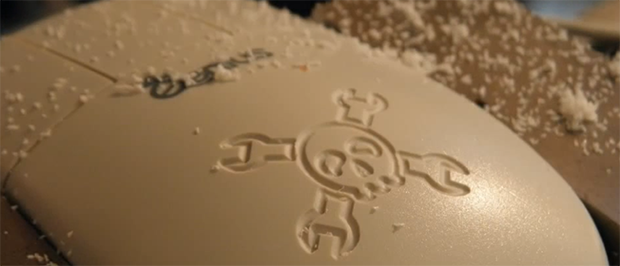
Milling Curved Objects With A G-Code Ripper

HaD Mouse

Milling and routing flat surfaces is pretty much the point of a CNC router, but how about curved surfaces? Auto leveling of hobby CNC machines and 3D printers is becoming commonplace, but Scorch Works is doing just the opposite: using a probe touch probe on a CNC machine to transform a G-Code file into something that can be milled on a curved surface.

The technique is pretty much the complete opposite of Autoleveller, the tool of choice for milling and routing objects that aren’t completely flat or perpendicular to the bed with a MACH3 or LinuxCNC machine. In this case, a touch probe attached to the router scans a curved part, applies bilinear interpolation to a G-Code file, and then starts machining.

The probe can be used on just about anything – in the videos below, you can see a perfect engraving in a block of plastic that’s about 30 degrees off perpendicular to the bed, letters carved in a baseball bat, and a guaranteed way to get your project featured on Hackaday.

Continue reading “Milling Curved Objects With A G-Code Ripper”

THP Entry: Etch-A-CNC

etchacnc
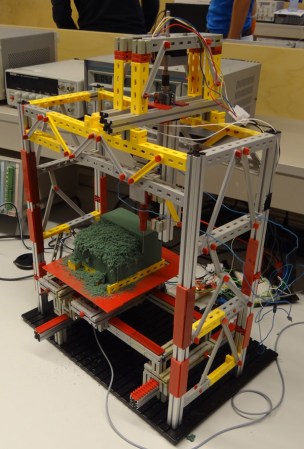
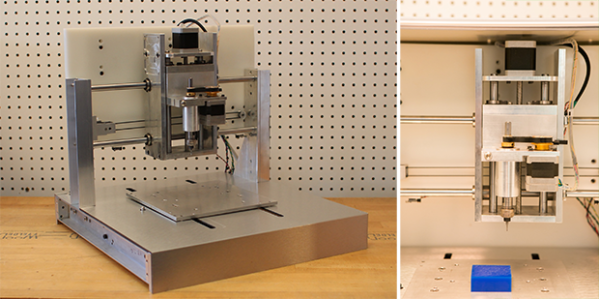
CNC machines have been around for decades, but only recently have small desktop routers, 3D printers, and laser cutters brought G code to the tabletop. Obviously, this is a teaching opportunity, and if you’re trying to get kids interested in the inner workings of machines that build things, you can’t begin with obtuse codes understood only by machines and CNC operators.

[johnyang] is building his own CNC controller based on something just about every kid is already familiar with: the Etch A Sketch. He’s retrofitted a small, travel size Etch A Sketch with an LCD, buttons, rotary encoders, and a Raspberry Pi to turn this primitive drawing toy into a machine that generates G code for a Shapeoko 2 CNC mill.

The user interface for this CNC controller is as similar to the Etch A Sketch as [johnyang] can make it – two rotary encoders draw a shape on the LCD, and G code is generated from the drawn shape. Adding a third dimension is a bit of a challenge – it looks like two buttons take care of the up and down movement of the spindle. Still, [johnyang] plans to add the definitive Etch A Sketch feature – holding it upside down and shaking it will reset the CNC to its original state.

There are a few videos of [johnyang]’s progress. You can check those out below.


SpaceWrencherThe project featured in this post is an entry in The Hackaday Prize. Build something awesome and win a trip to space or hundreds of other prizes.

Continue reading “THP Entry: Etch-A-CNC”

Finally, A Desktop CNC Machine With A Real Spindle

While cheap hobby CNC mills and routers are great machines that allow you to build things a 3D printer just can’t handle, they do have their limitations. They’re usually powered by a Dremel or other rotary tool, so speed control of the spindle via Gcode is nigh impossible. They’re also usually built with a piece of plywood as the bed – cheap, but not high on repeatability. The Nomad CNC mill fixes these problems, and manages to look good and be pretty cheap, to boot.

Instead of using a Dremel or other rotary tool to cut materials, the Nomad team is using a brushless DC motor connected to a real spindle. With a few certain motors, this allows for closed loop control of the spindle;  Sending S4000 Gcode to the mill will spin the spindle at 4000 RPM, and S6000 runs the spindle at 6000 RPM, whether it’s going through foam or aluminum. This is something you just can’t do with the Dremel or DeWalt rotary tools found in most desktop mills and routers.

Along with a proper spindle, the Nomad also features homing switches, a tool length probe, and a few included fixtures that make two-sided machining – the kind you need it you’re going to machine a two-layer PCB – possible, and pretty simple, too. The softwares controlling the mill are Carbide Motion and MeshCAM, a pretty popular and well put together CNC controller. Of course the mill itself speaks Gcode, so it will work with open source CNC software.

It’s all a very slick and well put together package. Below you can find a video of the Nomad milling out a Hackaday logo.

Continue reading “Finally, A Desktop CNC Machine With A Real Spindle”

Building A Quadcopter With A CNC Mill And A 3D Printer

Quadcopter

Quadcopters are a ton of fun to play with, and even more fun to build. [Vegard] wrote in to tell us about his amazing custom DIY quadcopter frame that uses a commercial flight control system.

Building a quadcopter is the perfect project to embark upon if you want to test out your new CNC mill and 3D printer. The mechanical systems are fairly simple, yet result in something unbelievably rewarding. With a total build time of 30 hours (including Sketchup modeling), the project is very manageable for weekend hackers. [Vegard’s] post includes his build log as well as some hard learned lessons. There are also tons of pictures of the build. Be sure to read to read the end of the post, [Vegard] discusses why to “never trust a quadcopter” and other very useful information. See it in action after the break.

While the project was a great success, it sadly only had about 25 hours of flight-time before a fatal bird-strike resulted in quite a bit of damage. Have any of your quadcopters had a tragic run-in with another flying object? Let us know in the comments.

Continue reading “Building A Quadcopter With A CNC Mill And A 3D Printer”

Cheap, Resourceful DIY Mini CNC Router/Mill Contraption

Few Hackaday Readers would disagree with the classic phrase: Necessity is the mother of invention. That statement is certainly no exaggeration when it comes to this mini 3-axis CNC Machine. The builder, [Jonathan], needed a way to prototype circuit boards that he designed. And although he admittedly doesn’t use it as much as he intended, the journey is one of invention and problem solving.

[Jonathan] started from the ground up with his own design. His first machine was a moving gantry style (work piece doesn’t move) and ended up not performing to his expectations. The main problem was alignment of the axis rails. Not becoming discouraged, [Jonathan] started on version 2. This time around the work piece would move in the X and Y directions like a conventional vertical milling machine. The Porter-Cable laminate trimmer would move up and down for the Z axis. It is clear that the frame is built specifically for this project. Although not the prettiest, the frame is completely functional and satisfactorily stiff for what it needs to do.

Continue reading “Cheap, Resourceful DIY Mini CNC Router/Mill Contraption”

Fail Of The Week: Hackaday Writer’s First CNC Adventure

This Fail of the Week post focuses on a project from [Limkpin] aka [Mathieu Stephan], one of the Hackaday contributors. He wanted a CNC mill of his very own and decided to go with a kit that you assemble yourself. If it had been clear sailing we wouldn’t be talking about it here. Unfortunately he was met with a multitude of fails during his adventure. We’ll cover the highlights below.

Continue reading “Fail Of The Week: Hackaday Writer’s First CNC Adventure”

Hackaday Links: November 17, 2013

hackaday-links-chain

If you purchased a knock-off FM transmitter and were unhappy with its broadcast range [Thiagohersan] shows how to double the range with a simple transistor amplifier circuit. He also hacked it for used without the 12V car socket.

[Patrick Herd] had a project that required him to strip about twenty Mindstorm batteries from their plastic enclosures. It’s not too tough getting into them but it does require drilling out the plastic rivets. He made a jig and used a CNC mill to automate the process.

Speaking of CNC, [Bertho] added some abstraction to distance himself from what he calls the “50+ years archaic syntax and grammar that G-code programs have”. The project is a meta-compiler for G-Code.

If you need a cold one and don’t have a HaDuino on hand you’ll thank yourself for hacking together this five-cent workbench bottle opener.

Just make sure you do all the lathe work for a custom speaker enclosure before you start pounding back those brewskis. Not only does [Shaun’s] creation look modern and stylish, but it boasts more than enough power to bump some tunes.

Here’s a project that adds LED feedback to your XBMC installation. It uses a Raspberry Pi to run the media center software, and a script to monitor it and actuate the lights on an Adafruit add-on board. At first glance you may not think much of it, but this is all the logic control you need to automate your viewing room. Who doesn’t want a home theater that automatically dims once you’ve made your viewing selection?

And finally, [08milluz] snagged some reactive electronics in the form of Disney’s Mickey Mouse ears. Apparently they glow different colors at live shows and based on where they are worn within the park. He did a complete teardown to show off the hardware within. It turns out to be controlled by an MSP430 which are known for their low power consumption. [Thanks Spikeo55]