DIY Bluetooth Home Automation

blueboard

Interested in a bit of home automation? Don’t know where to start? We just found a great Instructable on making your own bluetooth controlled relay module!

[Kyle’s] been working on this for a while, and finally at his 5th iteration he’s ready to share it with the public. It’s a project you can make from scratch, and each unit will cost approximately ~$25 in components — which can control up to two outputs. He’s included an inkscape PCB layout which you can easily etch on your own using the toner transfer method. The heart of the build is an Atmega328, which helps keep the costs down — after all, it is only controlling two outputs! Then it’s just a matter of adding the components, a bit of soldering, and uploading the firmware! 

The entire design is open source, and [Kyle] would love some feedback to continue improving upon it. The write-up is quite thorough, so if you’re interested, take a look and leave him a comment!

Building A More Nyan Planet

Video

In an effort to give salespeople something impressive to hand out, IBM recently had a bunch of very cool promotional materials printed up. It’s basically a greeting card-sized cardboard folder with a bit of text, an LCD screen, buttons, battery and display controller. This video in print device is meant to display how IBM is building a smarter planet, but [Cookie] and [Stitch] over at the Hack42 hackerspace in The Netherlands decided Nyan Cat would be a much better use of this free, portable video player. (Google translationUPDATE: Site has gone down. Here’s the Google Cache but you’ll need a browser like Chrome that can do the translation for you (we can’t figure out how to link a translation of cache).

This video card uses tech licensed from Americhip, a company that has been putting video in magazines for a few years now. By connecting the USB charging port up to his computer, the guys were able to switch the device over to USB mode where the actual video files could be read and rewritten.

By encoding a few videos to match the format of what was on the card – including some old IBM promotional material by [Jim Henson] – the team were able to get videos playing on a hackable flyer. Very cool, and if you can get your hands on some sales brochures, a free source of tiny displays.

Hackaday Links: November 17, 2013

hackaday-links-chain

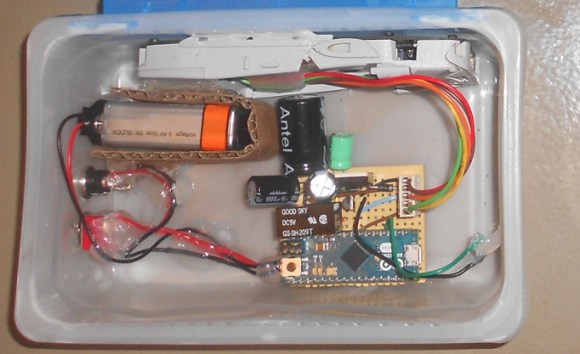
If you purchased a knock-off FM transmitter and were unhappy with its broadcast range [Thiagohersan] shows how to double the range with a simple transistor amplifier circuit. He also hacked it for used without the 12V car socket.

[Patrick Herd] had a project that required him to strip about twenty Mindstorm batteries from their plastic enclosures. It’s not too tough getting into them but it does require drilling out the plastic rivets. He made a jig and used a CNC mill to automate the process.

Speaking of CNC, [Bertho] added some abstraction to distance himself from what he calls the “50+ years archaic syntax and grammar that G-code programs have”. The project is a meta-compiler for G-Code.

If you need a cold one and don’t have a HaDuino on hand you’ll thank yourself for hacking together this five-cent workbench bottle opener.

Just make sure you do all the lathe work for a custom speaker enclosure before you start pounding back those brewskis. Not only does [Shaun’s] creation look modern and stylish, but it boasts more than enough power to bump some tunes.

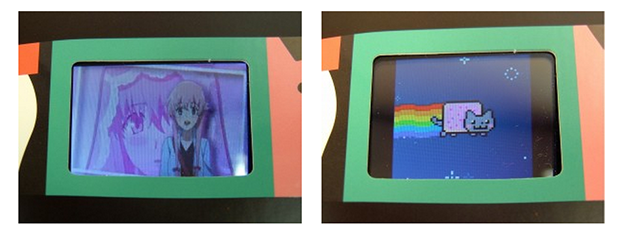
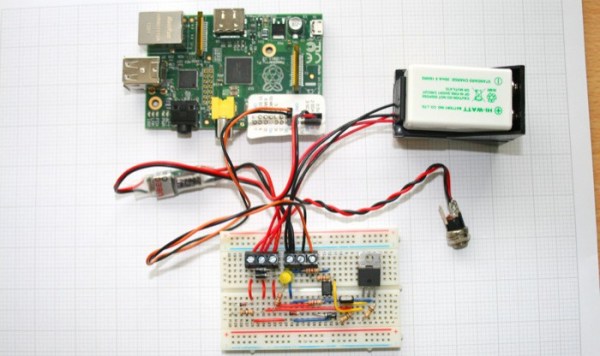
Here’s a project that adds LED feedback to your XBMC installation. It uses a Raspberry Pi to run the media center software, and a script to monitor it and actuate the lights on an Adafruit add-on board. At first glance you may not think much of it, but this is all the logic control you need to automate your viewing room. Who doesn’t want a home theater that automatically dims once you’ve made your viewing selection?

And finally, [08milluz] snagged some reactive electronics in the form of Disney’s Mickey Mouse ears. Apparently they glow different colors at live shows and based on where they are worn within the park. He did a complete teardown to show off the hardware within. It turns out to be controlled by an MSP430 which are known for their low power consumption. [Thanks Spikeo55]

Retropie Gaming Table

rasp pi gaming table

[Jody] just finished the write up on this awesome coffee table he’s been working on. It’s an all-in-one gaming table that makes use of Retropie.

When they finally got rid of the kids’ train-play-set table, they needed something to replace it. Eager to use his new collection of tools (including a 3D printer and a laser cutter!), [Jody] decided to build this thing from scratch. He admits he isn’t a very skilled woodworker, but we think he did an excellent job!

The screen is an old laptop LCD that [Jody] took apart and refitted into the nice wood frame you see above. He’s added speakers with 3D printed grills, and the whole thing turns on and off when the screen is lifted, all thanks to a pantry door switch he installed. In the side compartments he has wireless keyboards, mice, and xBox 360 controllers to play the games with. He and his son have already put many hours into the classic Cave Story, first released back in 2004.

There’s a great build log on his site, so if you’re interested in making your own, check it out!

Arduino-Based Power Failure Alert System

arduinoPowerFailBox

When the power went out at his parents’ shop and ruined the contents of their fridge, [Lauters Mehdi] got to work building a custom power failure alert system to prevent future disasters. Although some commercial products address this problem, [Lauters] decided that he could build his own for the same cost while integrating a specific alert feature: one that fires off an SMS to predefined contacts upon mains power failure.

The first step was to enable communication between an Arduino Micro and a Nokia cell phone. His Nokia 3310 uses FBus protocol, but [Lauters] couldn’t find an Arduino library to make the job easier. Instead, he prototyped basic communication by running an Arduino Uno as a simple serial repeater to issue commands from the computer directly to the phone, and eventually worked out how to send an SMS from the ‘duino. [Lauters] then took the phone apart and tapped into the power button to control on/off states. He also disconnected the phone’s battery and plugged it into an attached PCB. The system operates off mains power but swaps to a 1000mAH 9V backup battery during a power outage, logging the time and sending out the SMS alerts. A second message informs the contacts when power has been restored.

Head over to [Lauters’s] project blog for schematics and photos, then see his GitHub for the source code. If you want to see other SMS hacking projects, check out the similar build that keeps a remote-location cabin warm, or the portable power strip activated by SMS.

Google Glass? How About This Home-brew Solution?

[Codeninja] has been sending us some great hacks over the years, and we’ve just learned that his attention has been on building wearable computers lately! He’s currently on his third iteration of a Google Glass-like prototype, which features a motorized element which allows for the retraction of the screen.

There’s not too much info on his blog about them, but we do know he’s using a Raspberry Pi, a few small servos, and a pico LCD screen. Most of the frame is 3D printed, and it also features a hidden camera, accelerometers, and a few environmental sensors.

He’s uploaded an animated gif of the mechanism that moves the display away from his eye, and it looks straight out of some science fiction movie — check it out after break!

Continue reading “Google Glass? How About This Home-brew Solution?”

Battery Backup For RasPi Keeps Your Data Safe

We’ve all raised a clench fist in anger over lost data, and it’s usually the result of unjustified optimism and lack of planning. [George] shared his solution that prepares for the worst: a circuit that provides backup power to a RasPi and its hard drives. [George’s] Pi setup runs as both an Apple Time Machine server and a website backup server, and a power outage could corrupt the data stored on the Pi’s attached hard drives.

Rather than turn to commercial solutions, however, [George] wanted to take advantage of the Pi’s low power consumption and create an inexpensive custom circuit that would safely and automatically power down the devices upon loss of power. To detect a power failure, the build connects one of the Pi’s GPIOs to an opto-isolator, which—through a zener diode—connects to the 12V wall adapter: though [George] welcomes suggestions for alternative methods of safely identifying a mains power loss. The rest of the circuit serves as a trickle charger for the two attached 9V batteries and as a regulator to supply the correct voltage to the RasPi. Power MOSFETs connected to a GPIO handle the delayed power off.

You can view (and edit!) the circuit online here and find the relevant source code on [George’s] website. If you want to build your own RasPi file server, try cramming all the parts into an old optical drive enclosure.