Some design techniques and concepts from the injection molding world apply very nicely to 3D printing, despite them being fundamentally different processes. [Teaching Tech] demonstrates designing shadow lines into 3D printed parts whose surfaces are intended to mate up to one another.
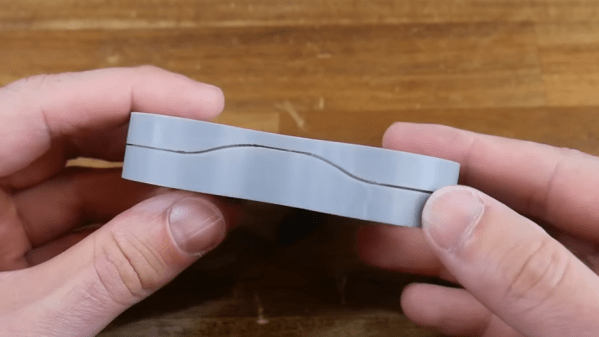
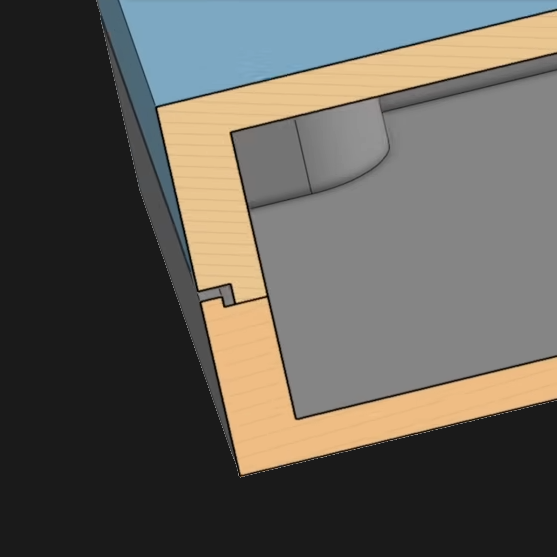 This is a feature mainly seen in enclosures, and you’ve definitely seen it in all kinds of off-the-shelf products. Essentially, one half of the part has a slight “underbite” of a rim, and the other half has a slight “overbite”, with a bit of a standoff between the two. When placed together, the combination helps parts self-locate to one another, as well as providing a consistent appearance around the mating surfaces.
Why is this necessary? When a plastic part is made — such as an enclosure in two halves — the resulting surfaces are never truly flat. Without post-processing, the two not-quite-flat surfaces result in an inconsistent line with a varying gap between them.
By designing in a shadow line, the two parts will not only self-locate to each other for assembly, but will appear as a much more consistent fit. There will be a clear line between the two parts, but no actual visible gaps between them. Watch the whole thing explained in the video, embedded below.
This isn’t the only time design techniques from the world of injection molding have migrated to 3D printing. Crush ribs have been adapted to the world of 3D printed parts and are a tried-and-true solution to the problem of reliably obtaining a tight fit between plastic parts and hardware inserts.
Continue reading “Enhance Your Enclosures With A Shadow Line”


