Scratch-built Desk Adjusts So You May Sit Or Stand

custom-height-adjustable-battlestation

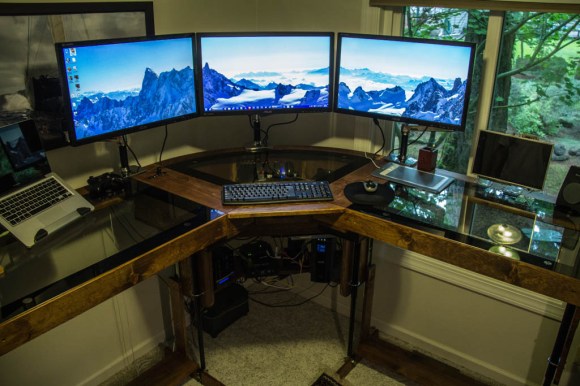
Knowing that this desk was built from scratch is pretty impressive. But the motorized legs that raise and lower the desk to any height really puts the project over the top.

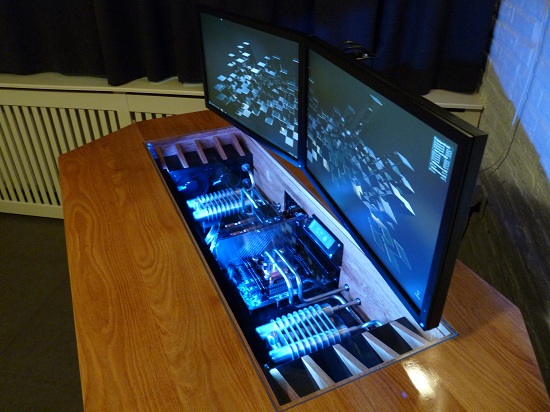
Surprisingly this started off as a computer case project. [Loren] upgraded his hardware and couldn’t find a case that would organize it the way he liked. His desk at the time had a glass top and he figured, why not build a new base for the glass which would double as a computer case? From there the project took off as his notebook sketches blossomed into computer renderings which matured into the wooden frame seen above.

Much like the machined computer desk from last December this uses motorized legs to adjust the height of the desk. These cost about $50 each, and he used four of them. If you consider the cost of purchasing a desk this size (which would not have been motorized) he’s still not breaking the bank. This battlestation is now fully functional, but he does plan to add automated control of the legs at some point. We think that means that each has an individual adjustment control which he wants to tie into one controller to rule them all.

Adding Task Lighting Inside A Desk

storage-task-lighting

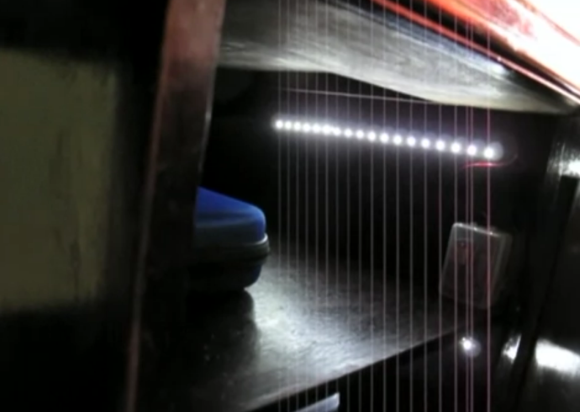
[Mahesh Venkitachalam] wanted to light up the dark recesses of his desk. What good is all that storage if you can’t see a darn thing in there? His solution was to add LED strips which turn on automatically when the door is opened.

The design is quite simple. A 2N2222 NPN transistor is responsible for connecting the ground rail of the LED strips mounted under each shelf. The base of that transistor is held high with a pull-up resistor. But a reed switch always connects the base to ground when the door is shut. Opening the door removes the magnet that keeps that reed switch closed. This allows current to flow from the pull-up to the base, connecting the ground rail to the LED strips and turning them on. You can see the video demo after the break.

One problem that we see with the design is that these are driven by a 9V battery. Over a long period of time that pull-up resistor will drain the cell. You can pick up a magnetic reed switch at the hardware or electronics store that is rated for 500 mA. If you can stay under that with the LED strips, and get one that is open when the magnet is present you will have zero power drain when the lights aren’t being used.

Continue reading “Adding Task Lighting Inside A Desk”

Heavy Metal Computer Case Desk

heavy-metal-computer-case-desk

This desk is also a computer case. From this view it may not seem like much, but the build log has hundreds of images which could be called metal fabrication porn. The desk surface is made of wood, but all of the other parts were crafted from stainless steel.

The three components that weren’t fabricated by [Paslis] are the pair of legs and the column supporting the screens. These pieces are actually lifting columns that allow you to adjust desk and screen height at the touch of a button. The build starts off with a sub-surface to house the computer guts. After careful cutting, bending, welding, and polishing this comes out looking like the work surface in a commercial kitchen. After attaching the lifting legs to that assembly a foot for the desk takes shape from square pipe which is then skinned with stainless steel to match the finished look of the sub-surface. After spending countless hours on brackets, trim pieces, grills, and wood accents he sent everything off for painting before the final assembly.

Certainly this is in a different realm than the case desk from yesterday. But a mere mortal can pull that off while this is surely the work of an experienced tradesman.

[Thanks Andreas]

Custom Desk Is A Custom Computer Case

desk

[Paul] had been kicking around his idea of a perfect computer desk for some time, and when given the opportunity to remodel his office decided it was time to build his dream computer case.

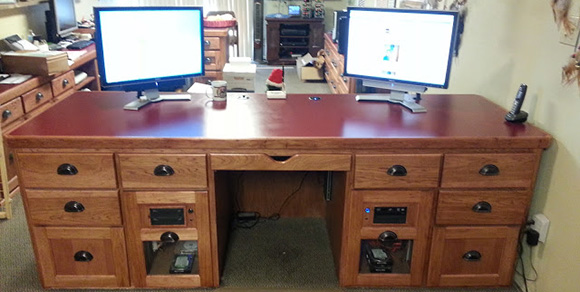
The desk itself is made of hickory with a formica top to match the other workbenches in [Paul]’s workspace, The two largest drawers house an ATX motherboard, power supply, disk drives, and a pair of CD drives. On top of the desk are two 24″ monitors – one for each computer – and a built-in powered USB hub that allows [Paul] to charge his phone or use an external drive.

As a computer tech, [Paul] needed a way to connect customer’s drives. He did this by putting two Startech UniDock2U USB to SATA and IDE converters in the top right drawer. It’s one of his most used features and very handy for duplicating bare drives.

Also included in [Paul]’s desk is a large UPC, and a pair of 120mm case fans venting to the front of the desk. It’s a wonderful piece of workmanship, and the removable computer cases make cleaning and upgrading a breeze.

A Custom Monitor Mount Built From Wood

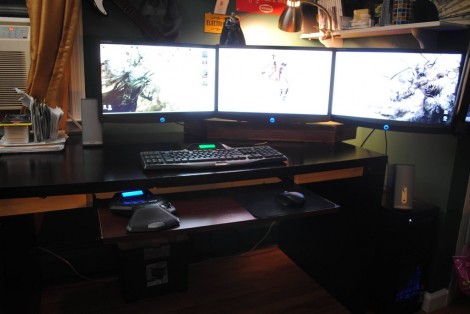
[LuckyNumbrKevin] wanted an epic monitor array of his own but didn’t really have the desk real estate to pull it off. His solution was to build a three computer monitor mounting rack with a relatively small footprint.

The design started with some virtual test builds using SketchUp. Once he had it dialed in he began transferring measurements for the base onto some plywood. The rest of the parts are built using dimensional lumber. As the project shaped up he wrapped the edges of the plywood with some trim, and gave the piece a good sanding. After a few passes with a dark stain he was ready to mount the monitors he bought from Newegg.

[Kevin] left a comment in the Reddit thread about the parts cost for his design. Including the monitors, this came in under $300. That does not include the Nvidia graphics card which is capable of driving the trio.

The Most Surprising Game Of Simon You’ve Every Played

How does one take a game of Simon and make it extremely awesome? The folks at the North Street Labs — a Hackerspace in Portsmouth, Virginia — have found the secret and it’s all in the execution. They turned this chair-desk into a coin-operated Simon game that hides a huge surprise.

We suppose you should be able to guess the secret. Most coin-operated sidewalk attractions are rides, and so is this. As their Red Bull Creation entry the team built a base for the desk around a 2000 Watt floor buffer. These are the kind of things that you’d see a janitor in the 1980’s using to polish the tiles of your middle-school.  This one just happens to shake the bejesus out of a player who makes a mistake. To help suck you into the game this won’t happen right away. You have to make it past at least four rounds before making the mistake.

The rest of the game is as expected. The playing area is nicely milled from a piece of wood with acrylic windows serving as the buttons. Apparently the biggest problem with that part of the build is finding a way to hold everything together despite the intense vibrations. See for yourself in the clip after the break.

Continue reading “The Most Surprising Game Of Simon You’ve Every Played”

Computer Desk… Literally

This piece of furniture begs the question, why think of a desk and a computer case as separate things? It combines Ikea furniture with electronic hardware to create the ultimate command center.

First the obvious parts: there’s a nook for the computer case that hangs just below the desktop off to the side, and the twin displays are mounted front and center. The divider between the cabinet pieces was cut away to allow the monitors to be wall-mounted. But things start to get interesting to the left of those monitors. You can see a series of dial displays in the door for that cabinet. Those meters were sourced from the MIT Flea Market and after a bit of alteration they display CPU load information fed to them by  an Arduino board. This also drives some LED strips which are mounted behind the frosted glass panel that we guess could be called a back splash. The heavier the load, the better the light show.

All of the power management is taken care of in the cabinet to the right of the monitors. The top row hides a printer, external hard drive backup system, and several gaming consoles. Heat will be an issue so exhaust fans were added to each of these partitions. They’re switched based on a temperature sensor in each. It’s a lot of work, but the outcome proves it was worth it.

[via Reddit]