STEP Up Your Jetson Nano Game With These Printable Accessories

Found yourself with a shiny new NVIDIA Jetson Nano but tired of having it slide around your desk whenever cables get yanked? You need a stand! If only there was a convenient repository of options that anyone could print out to attach this hefty single-board computer to nearly anything. But wait, there is! [Madeline Gannon]’s accurately named jetson-nano-accessories repository supports a wider range of mounting options that you might expect, with modular interconnect-ability to boot!

A device like the Jetson Nano is a pretty incredible little System On Module (SOM), more so when you consider that it can be powered by a boring USB battery. Mounted to NVIDIA’s default carrier board the entire assembly is quite a bit bigger than something like a Raspberry Pi. With a huge amount of computing power and an obvious proclivity for real-time computer vision, the Nano is a device that wants to go out into the world! Enter these accessories.

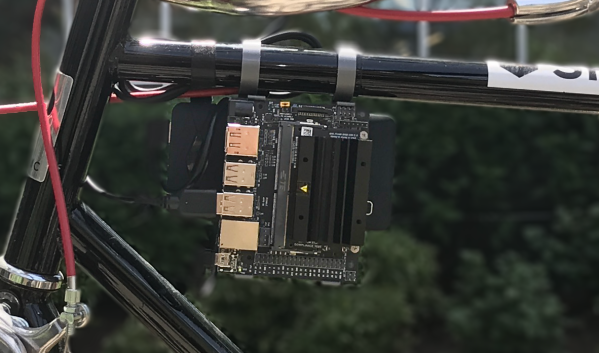
At their core is an easily printable slot-and-tab modular interlock system which facilitates a wide range of attachments. Some bolt the carrier board to a backplate (like the gardening spike). Others incorporate clips to hold everything together and hang onto a battery and bicycle. And yes, there are boring mounts for desks, tripods, and more. Have we mentioned we love good documentation? Click into any of the mount types to find more detailed descriptions, assembly directions, and even dimensioned drawings. This is a seriously professional collection of useful kit.

Summer Is Approaching. Are You Prepared To Relax?

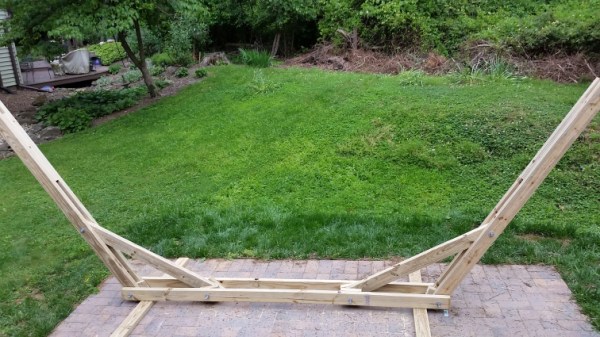
[Blake Schreurs] found himself in dire straights — there was a critical lack of available hammocks in his immediate vicinity, and he wanted one. Fast. So he built a hammock stand in half an afternoon.

Initially dismayed by the cost of store-bought models, [Schreurs]’ hammock stand is perfect for woodworking-newbies and yard-loungers on a budget alike, as the build requires only a few straight cuts and some basic tools to whip up.

After cutting and laying out the lumber to make sure that it will all fit together as intended, [Schreurs] aligned and drilled holes through the pieces — don’t worry, he’s included the measurements in his post. Playing a game of connect-the-boards-with-carriage-bolts-nuts-and-washers — with a minor pause in the action to attach the feet to the base — all but finished this quick build. All that’s missing now is a hammock in which to recline!

One final note: be sure to use galvanized hardware for this — or any — project that’s expected to spend time out in the elements. Rust is not usually your friend!

Lounging in your backyard beginning to feel a little cramped? Take you relaxation on the road.

Landscape To Portrait At The Click Of A Mouse

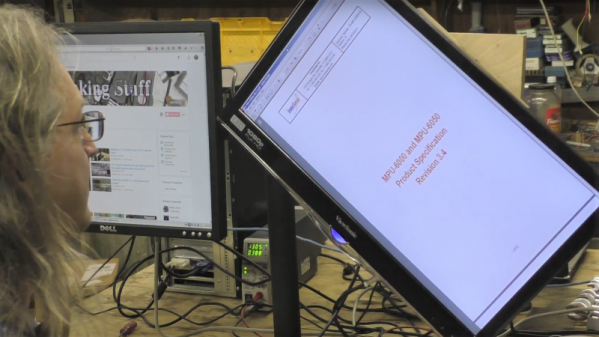
Modern 16:9 aspect ratio monitors may be great for watching a widescreen movie on Netflix, but for most PDFs, Word documents, and certain web pages, landscape just won’t do. But if you’re not writing the next great American novel and aren’t willing to commit to portrait mode, don’t — build an auto-rotating monitor to switch your aspect ratio on the fly.

Like many of us, [Bob] finds certain content less than suitable for the cinematic format that’s become the standard for monitors. His fix is simple in concept, but a little challenging to engineer. Using a lazy susan as a giant bearing, [Bob] built a swivel that can be powered by a NEMA 23 stepper and a 3D-printed sector of a ring gear. Due to the narrow clearance between the top and bottom of the lazy susan, [Bob] had to do considerable finagling to get through holes for the mounting hardware located, but in the end the whole thing worked great.

Our only quibble would be welding galvanized pipe for the stand, which always gives us the willies. But we will admit the tube notching turned out great with just a paper template. We doubt it would have been much better if he used an amped-up plasma-powered tubing notcher.

Continue reading “Landscape To Portrait At The Click Of A Mouse”

Re-purposing An Old Laptop Display

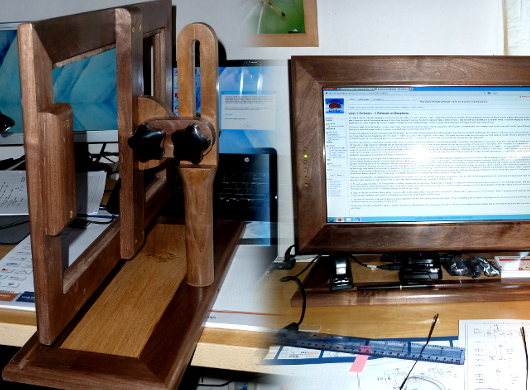
InitsEnvironment[Tim] found himself with a laptop that had a good 18.4″ screen, but otherwise didn’t run properly. It would be a shame to throw that away, so he decided to salvage the screen by turning it into a standalone monitor. This isn’t exactly new, as he did what many people have done and looked to eBay for an after-market LCD controller board. The real beauty is in the enclosure he built. [Tim] had some scrap wood available from a previous project, so he set about designing a new frame for the monitor, and a very nice adjustable stand, as can be seen in the photo above.

One nice detail is in the control panel buttons. The LCD controller comes with a separate board housing the controls, and while he made a mistake mounting it initially, he ended up with a nice set of oak buttons that match the frame perfectly. He then built a nice backing out of styrene that holds the screen in place as well as housing the electronics.

Overall, it’s a nice looking project, and it is always nice to see electronics re-purposed rather than ending up in a landfill. We can’t help but think this would be a great frame for building a picture frame or a wall-mounted PC as well.

A Custom Monitor Mount Built From Wood

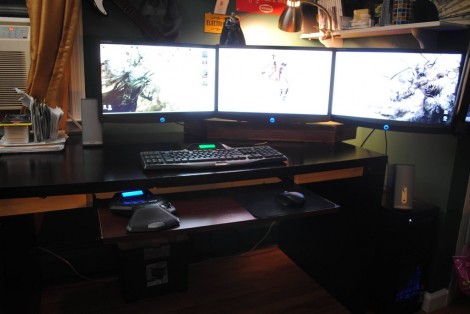
[LuckyNumbrKevin] wanted an epic monitor array of his own but didn’t really have the desk real estate to pull it off. His solution was to build a three computer monitor mounting rack with a relatively small footprint.

The design started with some virtual test builds using SketchUp. Once he had it dialed in he began transferring measurements for the base onto some plywood. The rest of the parts are built using dimensional lumber. As the project shaped up he wrapped the edges of the plywood with some trim, and gave the piece a good sanding. After a few passes with a dark stain he was ready to mount the monitors he bought from Newegg.

[Kevin] left a comment in the Reddit thread about the parts cost for his design. Including the monitors, this came in under $300. That does not include the Nvidia graphics card which is capable of driving the trio.

Androcade Is A Controller And Stand In One

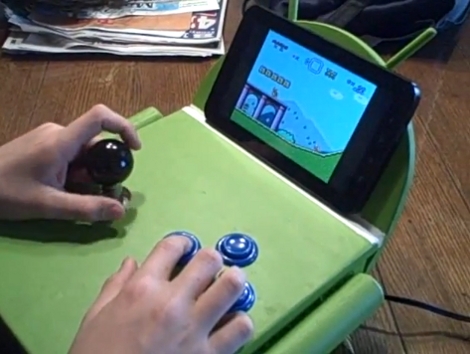
We remember when retro-gaming required a lot of equipment and a serious time commitment to put together a gaming interface. [Scooter2084] proves that we’ve come a long way with this gaming controller built to complement Android hardware.

It’s not immediately obvious from the image above, but the controller itself looks just like Andy the Android. His head is tilted upward and acts as the tablet stand, while his torso hosts the controls. We don’t the arms and legs have a functional use but they are necessary to complete the look.

Traditionally arcade controls have used a hacked gamepad, or dedicated hardware like the MAME cabinets that use iPac control boards. But this rendition interfaces the joystick and four buttons using an Arduino. A Bluetooth shield lets you control the Android device wirelessly, and opens up the possibility to use this as a controller for laptop-based emulators and the like. Don’t miss the video after the break.

Continue reading “Androcade Is A Controller And Stand In One”