Heavy Metal Computer Case Desk

heavy-metal-computer-case-desk

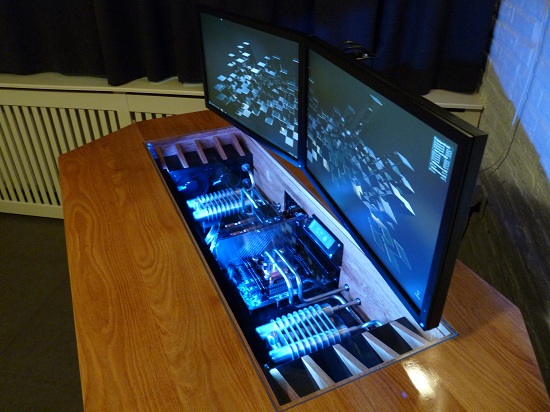
This desk is also a computer case. From this view it may not seem like much, but the build log has hundreds of images which could be called metal fabrication porn. The desk surface is made of wood, but all of the other parts were crafted from stainless steel.

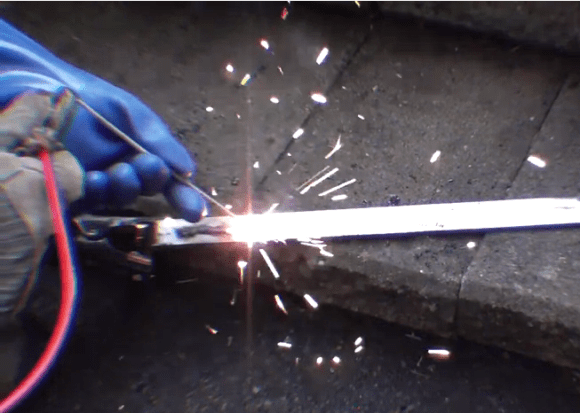
The three components that weren’t fabricated by [Paslis] are the pair of legs and the column supporting the screens. These pieces are actually lifting columns that allow you to adjust desk and screen height at the touch of a button. The build starts off with a sub-surface to house the computer guts. After careful cutting, bending, welding, and polishing this comes out looking like the work surface in a commercial kitchen. After attaching the lifting legs to that assembly a foot for the desk takes shape from square pipe which is then skinned with stainless steel to match the finished look of the sub-surface. After spending countless hours on brackets, trim pieces, grills, and wood accents he sent everything off for painting before the final assembly.

Certainly this is in a different realm than the case desk from yesterday. But a mere mortal can pull that off while this is surely the work of an experienced tradesman.

[Thanks Andreas]

Hacked Together NAS In A Box

hacked-together-nas-in-a-box

[David] is serving up files on his home network thanks to this Frankenstein’s monster of a Network Attached Storage device. It looks like he raided all the good bits from his parts bin to bring it all together.

The case is a tin box which may have been for a card/board game or some holiday treats. The hardware started with an NS-K330 server which he picked up from Deal Extreme. It has a NIC and a couple of USB ports but it tends to run really hot so he added a heat sinks to the board’s main chips. The hard drives are both 2.5″ form factor from old laptops. He uses some 2.5″ to 3.5″ mounting adapters to attach them to the tin box. A pair of USB to IDE adapters shed their cases and were solder directly to the wires which make a connection with the server’s USB ports.

There is a Linux distro specifically for this hardware but [David] wasn’t impressed with it. He ended up compiling OpenWRT for it and is satisfied with the functionality that provides.

Using Newlib With Stellaris Launchpad

using-newlibc-with-stellaris-launchpad

[Brandon] is taking us further down the rabbit hole by demonstrating how to use newlib with the TI Stellaris Launchpad. This is a nice continuation of the framework he built with his post about using GCC with ARM hardware. But it is most certainly one level of complexity deeper than that initial article.

Using newlib instead of glibc offers the option of compiling C code that includes system calls common when coding for computers but which are rare in embedded systems. Using something like printf is generally avoided because of the overhead associated with it. But these processors are getting so fast and have so much RAM that it may be useful in certain cases. We briefly thought about implementing malloc for creating a linked list when working on our STM32 snake game. [Brandon’s] work here makes the use of that command possible.

The process starts by adding labels for the beginning and end of the stack/heap. This makes it possible for functions to allocate memory. After taking care of the linker script changes you must implement a few system call functions like _sbrk.

Organ Pedals Fill In When Your Bass Player Is Missing

organ-foot-pedals-instead-of-string-bass

Since his string bass player isn’t always around [Antoine] built his own electric bass stand-in using the pedals from an old organ. The project — which he calls the Organ Donor — was inspired by a similar standalone organ pedal bass project. That instrument was built using a 555 timer to generate the sound. But [Antoine] has a little more room for growth as he’s using an old microcontroller development board to generate sound.

The octaves worth of pedals were pulled from an old broken Yamaha A55 Electone organ. After extracting the assembly from the instrument he built a nice wooden case around it. This doubles as a stand for the amplifier which broadcasts the sound. An old Freescale development board is wired up to twelve of the keys (the top C is unused). It generates a square wave at the appropriate frequency for each key. This signal is fed through a low-pass filter before being routed to the audio jack on the back of the case.

Future improvements include building an amplifier into the pedal assembly. We would also love to see different signal processing to expand the range of sounds the pedals can generate. We’re not sure of the capabilities of that microcontroller, but it would be neat to hear tone generation using stored samples.

Electric Clothes Drier Repair Heats Things Up

clothes-dryer-fix

[How To Lou] sure has shown us how to do quite a few things. This time he’s dealing with an electric clothes dryer that won’t heat. We’ve been elbow deep in our own appliances and we think [Lou’s] matter-of-fact demonstration will help you gain the confidence to investigate problems before deciding if it’s a job to be relegated to the repair man.

This picture shows the back side of a clothes dryer after having a protective panel removed. Just out of frame is a functional schematic which lists each part and it’s resistance measurement. Lou has labelled those parts in this image to help us understand what we’re looking at. In the video after the break he begins doing the same troubleshooting that a repair would use. He grabbed his multimeter and used it to test the resistance of each component after removing the wires from it. All of them should read zero Ohms except for the heater coil which the schematic rates at 7.8-11.8 Ohms. The high limit thermostat is loose and measures an infinite resistance. This, coupled with the charred wire on one side is the culprit. As with that ice maker repair from yesterday, [Lou] searches for the numbers on the part to find the replacement he needs.

Continue reading “Electric Clothes Drier Repair Heats Things Up”

Welding With Over A Hundred A123 Lithium Cells

a123-cell-powered-welder

[Doctor Bass] needed to do some welding on his electric bicycle. The problem is that he’s never welded before and doesn’t have any tools for it. As you can see, that didn’t stop him. He used a bicycle battery made from reclaimed DeWalt A123 cells to power his diy welding rig.

He has a huge adjustable resistor which is responsible for limiting the current. 80 Amps seems to work the best with the welding rods he’s chosen. It is worth noting that when he shows off each part of the welder (see the clip after the break) the color of the wire used for positive and negative leads is opposite of convention. His positive wiring is black while his ground connection is red.

To get the welding under way he connects a jumper-cable-like clamp to his work piece which serves as the positive electrode. To hold the welding rod he drilled a hole in a pair of vice grip pliers and bolted on the negative lead. This way the end of the welding rod can be clamped in the vice grips while his other hand guides the tip. So far he’s still practicing, but it looks like he’s nearly ready to take on the job at hand.

Continue reading “Welding With Over A Hundred A123 Lithium Cells”

Build A $360 Synthetic Aperture Radar With MIT’s OpenCourseware

A few profs from MIT’s Lincoln Lab are giving those poor MIT undergrads something to do over winter break: they’re teaching a three-week course on building a laptop-powered radar system capable of radar ranging, doppler, and synthetic aperture imaging. Interestingly, the radar system that teams will build for the class has a BOM totaling $360, and they’re also putting the entire class online if you’d like to follow along and build your own.

From the lecture notes from the course, the radio system is made out of an off-the-shelf  LNA, oscillator, and  splitter. By connecting two coffee can ‘cantennas’, it’s possible to record a .WAV file from the signal coming from the radar and use MATLAB to turn that audio signal into a doppler radar.

It’s a very ambitious project that goes deep down the rabbit hole of RF and analog design. One of the lecturers made a YouTube demo of the radar in ranging mode; you can check that out after the break.

Continue reading “Build A $360 Synthetic Aperture Radar With MIT’s OpenCourseware”