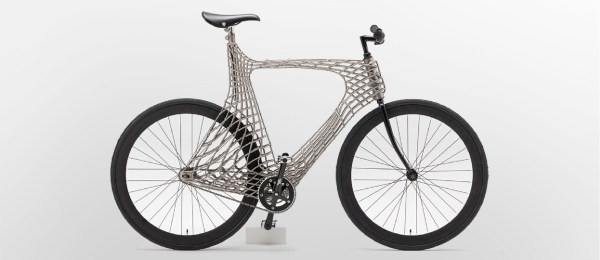
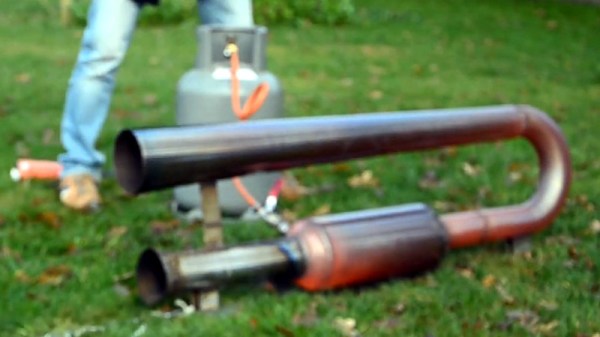
This Stainless Steel Knife Build Starts With Raw Iron Ore

Making knives at home has become a popular hobby, thanks partly to reality TV and the free time and idle hands afforded by lockdowns. Depending on how far you get into the hobby, builds can range from assembling and finishing a kit with pre-forged parts, to actual blacksmithing with a hammer and anvil. But pretty much every build includes steel from a commercial supplier.

Not this one. Rather than buy his metal from the usual sources, [Thoisoi]’s first stop was an iron mine in the Italian Alps, where he picked up a chunk of iron ore — magnetite, to be precise. Smelting one’s own iron from raw ore and alloying it into steel is generally not a backyard project thanks to the high temperatures needed, a problem [Thoisoi] solved with the magic of thermite. The iron oxide and aluminum in the thermite mix react in an exceptionally exothermic manner to generate elemental iron, which under controlled conditions can be captured as a more or less pure ingot, ready for forging.

After a test with commercially obtained iron oxide, [Thoisoi] tried his pulverized magnetite. And thanks to the addition of goodies like graphite, manganese, nickel, silicon, and chromium, he was eventually able to create a sizable lump of 402 stainless steel. He turned the metal over to an actual blacksmith for rough forging; it sure seemed to act like steel on the anvil. The finished knife looks good and performs well, and the blade has the characteristic look of stainless. Not a bad result, and all at the cost of a couple of clay flowerpots.

Continue reading “This Stainless Steel Knife Build Starts With Raw Iron Ore”

Spherical Keyboard Build Leaves Hacker Well-Rounded

Often times we as hackers don’t know what we’re doing, and we sally forth and do it anyway. Here at Hackaday, we think that’s one of the best ways to go about a new project, and the absolute fastest way to learn a whole lot as you go. Just ask [Aaron Rasmussen] regarding this spherical, standing 5×6 dactyl manuform keyboard build, which you can see in a three-part short video series embedded after the break.

[Aaron] gets right down to it in the first video. He had to get creative right away, slicing up the dactyl manuform model to fit on a tiny print bed. However, there’s plenty of room inside the sphere for all that wiring and a pair of Elite-C microcontrollers running QMK. Be sure to turn on the sound to hear the accompanying voice-overs.

The second video answers our burning question: how exactly does one angle grind a slippery sphere without sacrificing sheen or shine? We love the solution, which involves swaddling the thing in duct tape and foam.

You may be wondering how [Aaron] is gonna use any kind of mouse while standing there at the pedestal keyboard. While there is space for a mouse to balance on top, this question is answered in the third video, where [Aaron] learns the truth behind the iconic ThinkPad nubbin and applies this knowledge to build a force-feedback joystick/trackpoint mouse. Awesome answer, [Aaron]!

Not ready to go full-tilt, sci-fi prop ergo? Dip your toe in the DIY waters with a handy macropad.

Continue reading “Spherical Keyboard Build Leaves Hacker Well-Rounded”

A 136 Euro Pulse Jet For Some No-Firework Lockdown Fun

With the aim of reducing virus transmission due to gatherings during the pandemic, the Dutch government have banned fireworks. The people of the Netherlands like their noisy things so we’re told that the ban has been widely flouted, but [Build Comics] are a law-abiding group of workshop tool heroes. For their lockdown noise, they created an entirely-legal pulsejet. The interesting part is that it was made entirely using fairly basic tools on a minimalist budget, with TIG and MIG eschewed in favour of a mundane stick welder.

The form of the pulse jet will probably be familiar as it has been taken from other published designs. A long tube is bent back upon itself with a combustion chamber placed in one of its arms such that the jet forms a resonant chamber that produces continuous pulses of exhaust gas. This one is made from stainless steel tube, and the exhaustive documentation should be worth a look for anyone tempted to make their own. Welding thin sheet with a stick welder requires quite a bit of skill, and in a few places they manage to burn a hole or two. One requires a patch, but the time-honoured technique of running a bead around the edge manages to successfully close another.

Their first attempt to fire it up using a leaf blower with a 3D-printed adapter fails, but following the construction of a more resilient part and a more efficient gas injector the engine starts. It’s then taken out on a farm for some serious noise without too many angry neighbours, as you can see in the video below the break.

The hero tools of Build Comics have appeared here before, most recently with an analogue meter clock.

Continue reading “A 136 Euro Pulse Jet For Some No-Firework Lockdown Fun”

Scratch Built Toe Clamps Keep Your Work In Place

[Kevin] owns a benchtop CNC mill that has proven itself to be a capable tool, but after becoming familiar with some of its shortcomings, he has made a few modifications. In order to more efficiently hold and access workpieces on his custom fixturing table, he designed and made his own toe clamps and they look beautiful.

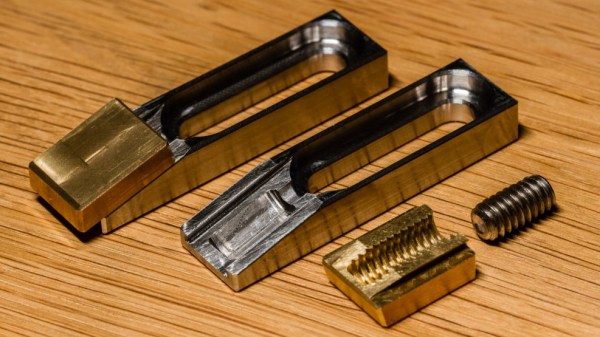
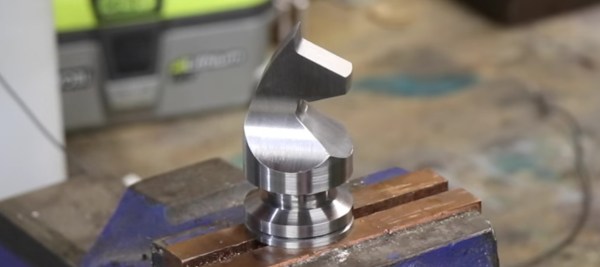
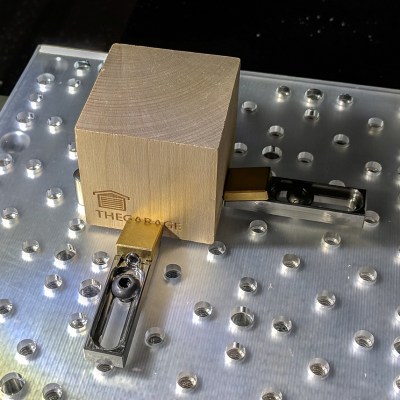
The usual way to secure a piece of stock to a fixturing table is to use top-down clamps, which hold the workpiece from the top and screw down into the table. However, this method limits how much of the stock can be accessed by the cutting tool, because the clamps are in the way. The most common way around this is to mount a vise to the table and clamp the workpiece in that. This leaves the top surface completely accessible. Unfortunately, [Kevin]’s benchtop Roland MDX-450 has a limited work area and he simply couldn’t spare the room. His solution was toe clamps, which screw down to the table and have little tabs that move inwards and downward. The tabs do the work of clamping and securing a piece of stock while maintaining a very low profile themselves.

The clamp bases are machined from stainless steel and the heads are brass, and the interface between the two is a set screw. Inserting a hex wrench and turning the screw moves the head forward or back, allowing a workpiece to be clamped from the sides with minimal interference. His design was done in Fusion 360 and is shared online.

Another option for when simple clamps won’t do the job is a trick from [NYC CNC], which is to use an unexpected harmony of blue painter’s tape and superglue which yields great results in the right circumstances.

3D Printed Bicycle From Stainless Steel!

You wouldn’t 3D print a car, would you? That’d simply be impractical. However, if you’re a team of students attending the Delft University of Technology (TU Delft) in the Netherlands, you might be inclined to 3D print a stainless steel bicycle instead.

The TU Delft team collaborated with MX3D, a company that uses an articulated industrial robot arm with a welder for an effector, welding and building the Arc Bicycle, glob by molten glob. Printed in chunks, this process allows the practical construction of larger objects that are able to withstand the stresses and forces of everyday use. Weighing around 20kg, you might not want to spend much time carrying it up to an apartment anytime soon, so stick to the cobblestone streets — the Arc Bicycle can take it.

Continue reading “3D Printed Bicycle From Stainless Steel!”

Heavy Metal Chess

Chess is a slow game of careful decision-making, looking several moves ahead of the current state of the board. So is machining, and combining the two is an excellent way to level up your machine shop chops. And so we have the current project from [John Creasey] who is machining a chess set out of stainless steel.

This isn’t that new-fangled computer numerical control at work, it’s the time-tested art of manual machining. Like chess, you need to plan several steps ahead to ensure you have a way to mount the part for each progressive machining process. In this first video of the series [John] is milling the knights — four of them, with two which will eventually get a black oxide treatment.

Milling the horse head is fun to watch, but you’ll be delighted when the work gets to the base. [John] is using a pipe fitting as a fixture to hold the already-milled horse-head-end while working the base on his lathe. The process begins by getting rid of the inner threads, then working the pipe fitting very carefully to the diameter of the chess piece for a perfect press fit. Neat!

At the end, [John] mentions it took “quite a few months of weekends to get to this point” of having four pieces made. They look great and we can’t wait to see the next piece in the set come to life. You’ll find the video embedded below, but if you can’t sink this kind of time into your own chess set, you may try three-dimensional laser cut acrylic pieces.

Continue reading “Heavy Metal Chess”

Heavy Metal Computer Case Desk

heavy-metal-computer-case-desk

This desk is also a computer case. From this view it may not seem like much, but the build log has hundreds of images which could be called metal fabrication porn. The desk surface is made of wood, but all of the other parts were crafted from stainless steel.

The three components that weren’t fabricated by [Paslis] are the pair of legs and the column supporting the screens. These pieces are actually lifting columns that allow you to adjust desk and screen height at the touch of a button. The build starts off with a sub-surface to house the computer guts. After careful cutting, bending, welding, and polishing this comes out looking like the work surface in a commercial kitchen. After attaching the lifting legs to that assembly a foot for the desk takes shape from square pipe which is then skinned with stainless steel to match the finished look of the sub-surface. After spending countless hours on brackets, trim pieces, grills, and wood accents he sent everything off for painting before the final assembly.

Certainly this is in a different realm than the case desk from yesterday. But a mere mortal can pull that off while this is surely the work of an experienced tradesman.

[Thanks Andreas]