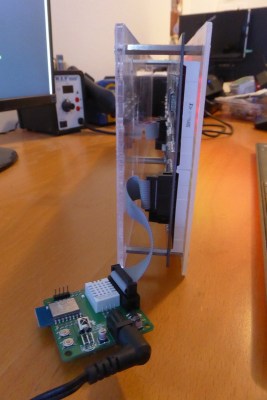
The Trials And Tribulations Of Building An IOT Garage Door Opener

Garage doors can be frustrating things, being a chore to open manually and all. Many people opt to install a motorized opener, but for some, even this isn’t enough. Hooking up a garage door to the Internet of Things has long been a popular project, and [Simon Ludborzs] decided to give it a shot. Naturally, there were some obstacles to be overcome along the way.

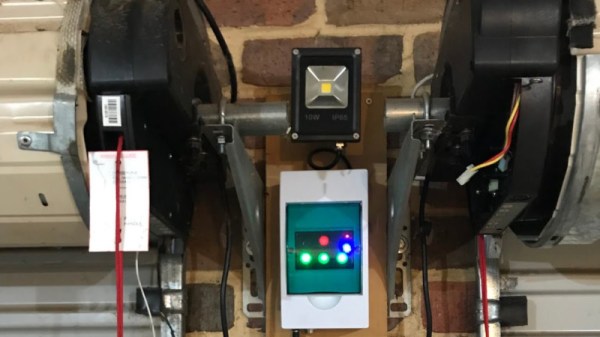
[Simon]’s build is relatively straight down the lines, using an ESP-12 as the brains of the operation, which connects to the internet over WiFi. However, robustness was a major goal of the project, and being reliant on shaky cloud-based services wouldn’t do. This opener is set up to work independently of an internet connection, too. There’s a nifty control panel with glowing buttons to operate the opener, in addition to the webpage served up on the network.

During the development, [Simon] ran into several roadblocks. A set of roller door motors were inadvertently killed, and there were issues in getting the web interface working as expected. None of these were showstoppers, though, and with a little work and some new parts, everything came together in the end. The project was then given a proper commercial-grade case, sourced from AliBaba. This is a great step to take for a project expected to hold up to daily use for years on end. He also took the time to document his tips for easier ESP8266 development, which may prove useful to those just getting started with the platform.

Garage door openers remain a common theme around here, but every project has its own story to tell. If you’ve developed a particularly unique solution to your garage access problems, you know who to call.

Adding Buttons To The ESP-12 – The Cheat Way

[sorki] had an ESP-12F and wanted to play with nodeMCU, but found they were lacking buttons for reset & flash. We’ve all been there – mucking about with a project on a breadboard, trying to save the time required to solder up a button by shorting pins with wire or bending component legs to touch. This either doesn’t work or ends up bricking the microcontroller when it inevitably goes wrong. [Buger] found a tidier solution to adding buttons to the ESP-12F with the minimum of effort.

It’s the spirit of deadbug applied to buttons. One side of a piece of wire is soldered to the pin needing to be pulled down. Component leg offcuts are ideal for this. The other end of the wire is bent up and left to float over the metal shield of the ESP-12, which is connected to ground. When you want the pin to go low, press the wire into the shield, grounding it. Let it go, and the pin returns high again, assuming your pullup resistors are all in order.

It’s a quick hack that’s much more robust than trying to hold two ends of a piece of hookup wire in place. It’s also still easier than trying to find a tactile switch solder leads to, and you don’t end up having it hanging off the board either.

For deadbug construction taken to an impressive conclusion, check out this clock built out of discrete components.

[Thanks to Richard Marko for the tip!]

Forgot About Valentine’s Day? A Quick IoT Valentine

Did you forget about Valentine’s Day? Do you need a quick project to get ready for Valentine’s Day? [Becky Stern] has you covered. She’s whipped up a neat Internet-enabled Valentine project which should be pretty quick to put together.

At its heart (pun intended) is an ESP8266 microcontroller, in this case an Adafruit Feather Huzzah. Several layers of tissue paper heart are stitched together and cut out into a heart shape and then attached to a spring. A vibrating pager motor is used to shake the it when a signal comes in. Two buttons are used to send the message and a red LED is used to light the heart up. The whole thing is enclosed in a shadow box. [Becky] also put together another controller with a similar setup in a plastic enclosure. When the buttons are pressed on either controller, the other gets a signal and the heart shakes and lights up.

These projects send and receive Valentines, but they could be programmed to send whatever information you’d like. If you’re looking for a quick Valentine’s Day project, this is a great one, and you might have all you need already in your component drawer. Break out the soldering iron and send your Valentine a message! If you’re still looking for a quick Valentine’s Day project, check out this animated heart or this PCB Valentine.

Continue reading “Forgot About Valentine’s Day? A Quick IoT Valentine”

64×16 LED MQTT Laundry Display

When you have an MQTT broker receiving messages, you want to be able to see them. [Xose Pérez] already had a system set up that sent him notifications, but he had a pair of 32×16 LED matrices, so he decided to make a big, bright sign to let him know when he got an important message sent to the broker.

[Xose Pérez] had already built a laundry monitor which was sending messages to an MQTT broker so he wouldn’t forget his laundry sitting in the washing machine. To communicate with the broker, he used an ESP-12. He had already ported an Arduino library for the Holtek HT1362C display drivers used by the matrices to work with his driver board.

mqtt-led-matrix-driver-boardHe wanted to try out SMD soldering so he built a custom PCB to hold the ESP-12, power supply, passive components, and a connector and he describes his methods and results. Instead of hardcoded messages, he wanted the system to be configurable and display messages coming in, not only from his laundry system, but also from other sensors. A web interface, built with jQuery and WebSockets, running on the ESP-12 allows the user to subscribe to a topic on the broker and show a customized name and value on the display when a payload is available.
All-in-all, [Xose Pérez] has posted a great tutorial in which he goes over the hardware he built, the libraries he used, SMD soldering, how he made the enclosure, and even his choice in IDE (PlatformIO). He also posted the software, board designs and enclosure models software and hardware on bitbucket. The end result is a great looking LED matrix that displays not only his laundry’s status, but also anything else he wants to from his MQTT broker.

If you want to try your hand with MQTT, the ESP8266 is a wonderful device for sensor nodes, and any Linux box (like the Raspberry Pi) makes an easy broker. Check out [Elliot Williams’] Minimal MQTT series and you will be up and running in no time.

A Dev Board For The ESP Lua Interpreter

From the great minds behind the NodeMCU Lua interpreter for the ESP8266 comes a proper dev board for the WiFi platform of 2015. They are calling it, the NodeMCU-devkit, and it’s a reasonable, cheap, and breadboardable breakout board for the ESP8266.

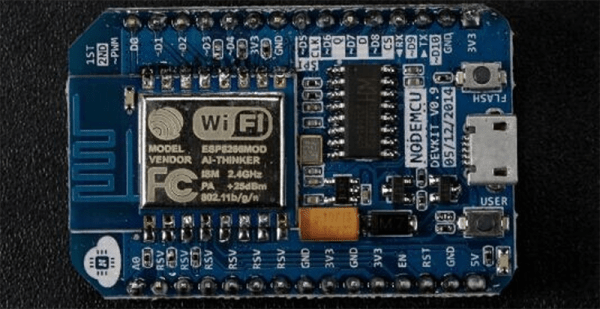
The version of ESP8266 used in this project is the ESP-12, the newer, fancier model with RF shielding, a questionable FCC logo, and every single one of the GPIOs exposed on castellated connectors. The rest of the board is a USB to serial converter (the CH340G – probably the cheapest USB to serial chip out there), a few passives, and a USB micro connector. It’s simple, cheap, and open source. You can’t do better than that.

This dev board is explicitly designed to work with the NodeMCU firmware, a Lua-based firmware for the ESP. Already we’ve seen some projects make the Hackaday front page with this firmware. Sure, it’s just a garage door opener, but that’s extremely impressive for a chip that’s only a few months old.

Thanks [Baboon] for the tip.