Remote-Control Kinetic Sand Table Uses A Single Arduino

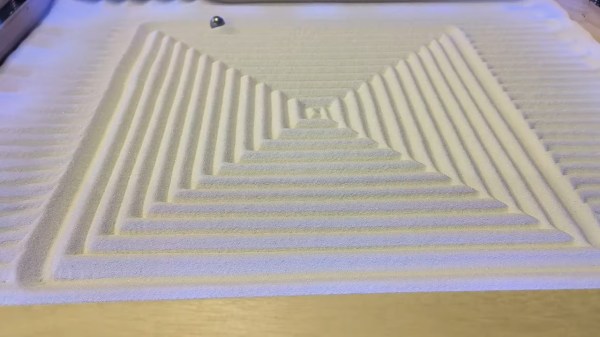
There’s nothing fun about a Sisyphean task unless you’re watching one being carried out by someone or something else. In that case, it can be mesmerizing like this Arduino-driven kinetic sand table.

What you can’t see. Image via [thang010146] on YouTube
Like many of these builds, it all started with an ordinary coffee table from the hacker’s favorite furnitüre store. [NewsonsElectronics] opened it up and added a 3mm-thick board to hold the sand and another to hold the rails and magnets.

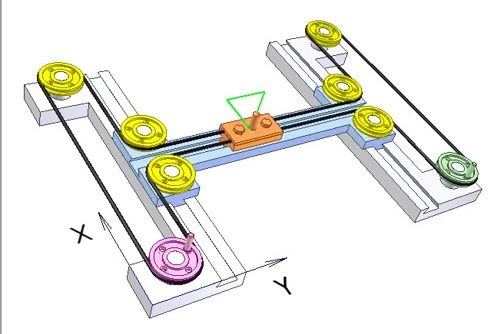
After designing some pieces to connect the rails and pulleys together, [NewsonsElectronics] let the laser cutter loose on some more 3mm stock. A pair of stepper motors connected to a CNC shield do all of the work, driving around a stack of magnets that causes the ball bearing to trudge beautifully through the sand.

Be sure to check out the videos after the break. The first is a nice demonstration, and the second is the actual build video. In the third video, [NewsonsElectronics] explains how they could write the world’s smallest GRBL code to swing this with a single Arduino. Hint: it involves removing unnecessary data from the g-code generated by Sandify.

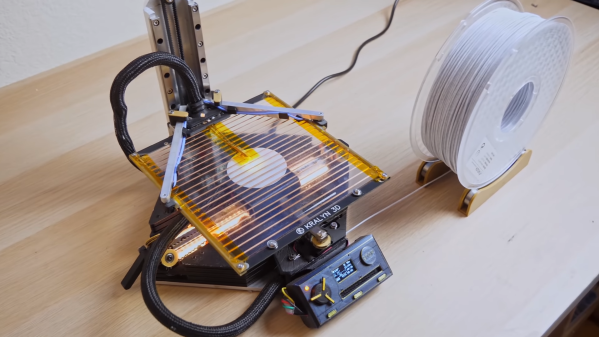
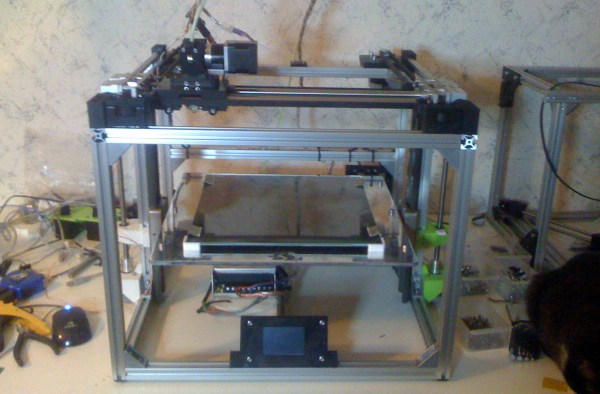
Don’t have a laser cutter? Here’s a sand table built from 3D printer parts.

Continue reading “Remote-Control Kinetic Sand Table Uses A Single Arduino”

Strangest Upside-Down 3D Printer Fits In A Filament Box

It’s rare these days for a new FDM printer to come along that sparks our interest, but the [Kralyn]’s Positron managed to do it. (Video, embedded below.) It prints upside down and packs down into a filament box while still boasting a print volume of 175 mm x 176 mm x 125 mm.

Unlike most 3D printers, the hotend and XY-gantry is mounted below the build plate, directly onto the base. You might assume that a printer needs to extrude plastic with gravity to work properly, but the real action is in the smooshing of the plastic layers. It appears that it might even improve bridging since the hotend is supporting the plastic as it gets extruded. A clear glass build plate is used, with the same heating strips found on the rear windows of most cars. This also allows the user still see the part, and provides the added advantage of being able to quickly spot bed leveling and adhesion problems.

Another interesting side effect of this arrangement is rigidity. There is no need to suspend the XY gantry with the heavy hotend in the air, so it can be mounted directly on the thick aluminum base plate. It uses an H-bot style gantry, with Synchromesh timing cables instead of belts, which eliminates the concern of belt twist. To get the best possible print volume within the size of a filament box, the gantry axes are arranged diagonally across the base plate. The Z-axis can disconnect and lay flat on top of the printer and uses the linear rails to keep it perfectly straight and perpendicular when mounted. Continue reading “Strangest Upside-Down 3D Printer Fits In A Filament Box”

Hackaday Links: Sunday, May 26th, 2013

hackaday-links-chain

The warmer months cometh and it’s time to think of this year’s Burning Man. [Matt’s] already set himself up with a sound-reactive LED project he calls the Seed of Life.

Older readers, and those who really know their hobby electronic history, will know the name Heathkit. Many readers tipped us off about their triumphant return. We’re not sure what form this reincarnation will take, but you can help shape it by participating in the survey.

Dust off that MSP430 launchpad and turn it into a composite video Pong console.

Here’s a way to use your Android phone as a computer mouse.

We’re not quite sure what this is, but turn your volume down before watching the video about a modular sythesizer hack.

[Arkadiusz Spiewak] wrote in to share some of the printing success (translated) he’s had recently with the H-bot style printer we saw a while back.

Strap an Arduino and an Electric Imp to your arm (and everyone else’s) and it’ll remember everyone you meet. You know, kind of like Google Glass but with geeky arm-wear instead of geeky headgear?

And finally, [Nerick] has just finished a thermometer project using Nixie tubes (translated).

H-bot Style 3D Printer Moves Bed For Z-axis

Check out this 3D printer (translated) which [Arkadiusz Śpiewak] has been working on. When sending in the tip about his project he made the important distinction that it isn’t finished, but he has reached that critical threshold where he has printed items with it.

He decided to go with a design that is sometimes referred to as an H-bot. If you’re completely unfamiliar with it, you may find this H-bot design article helpful. The gist of it is that this technique makes it so that the motors used to move the extruder along the X and Y axes are themselves stationary. One large timing (toothed) belt makes a circuit around the top of this cube in the shape of the letter H. This is a bit easier to see in [Arkadiusz’s] rendered image found after the jump along with video of an early print test.

The Z axis uses two motors mounted along the bottom of the cube. These raise and lower the bead, instead of moving the extruder itself. All-in the printer should have a maximum object size of 30x30x30 centimeters. It’s being driven by a Smoothieboard, which was mentioned quite a bit when we were discussing using the RA driver board with a 3D printer.

Continue reading “H-bot Style 3D Printer Moves Bed For Z-axis”