Worried About Running Out Of Filament Mid-Print? Join It!

If you’ve ever cringed over throwing away any printer filament you know wouldn’t cover your next small part — let alone an overnight print — you may appreciate [starlino]’s method for joining two spools of filament together.

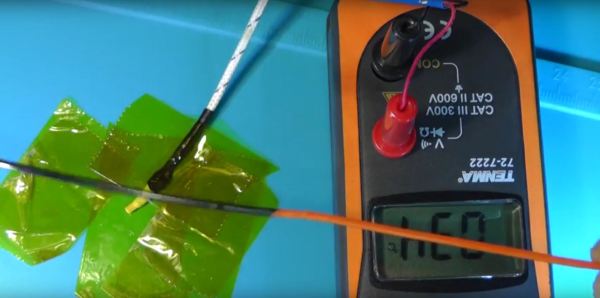
While there are other methods to track how much filament you’re using, this method removes some of the guesswork. First, snip the ends of the filament on a diagonal — as close to the same angle as possible. Cover both ends with shrink wrap tubing — 2mm tubing for 1.75mm filament for example — ensuring that the two ends overlap inside the wrap. Tape the filament to a heat resistant mat with Kapton tape, leaving exposed the joint between the two filaments. A temperature sensor may help you to find your filament’s melting point, or you can experiment as necessary to get a feel for it.

Melt the filament inside the tubing with a hot air soldering station or heat gun and cool it down promptly with a few blasts from an air duster. All that’s left is to cut the filament free of the tape and shrink wrap, scraping away any excess so as to prevent printer jams. Done! Now, back to printing! Check out the tutorial video after the break.nning

Continue reading “Worried About Running Out Of Filament Mid-Print? Join It!”

Hackaday Links: October 18, 2015

We have our featured speakers lined up for the Hackaday Supercon, one of which is [Fran Blanche]. We’ve seen a lot of her work, from playing with pocket watches to not having the funding to build an Apollo Guidance Computer DSKY. In her spare time, she builds guitar pedals, and there’s a biopic of her in She Shreds magazine.

Halloween is coming, and that means dressing children up as pirates, fairies, characters from the latest Marvel and Disney movies, and electrolytic capacitors.

There’s a new movie on [Steve Jobs]. It’s called the Jobs S. It’s a major upgrade of the previous release, featuring a faster processor and more retinas. One more thing. Someone is trying to cash in on [Woz]’s work. This time it’s an auction for a complete Apple I that’s expected to go for $770,000 USD.

Hackaday community member [John McLear] is giving away the factory seconds of his original NFC ring (think jewelry). These still work but failed QA for small reasons and will be fun to hack around on. You pay shipping which starts at £60 for 50 rings. We’ve grabbed enough of them to include in the goody bags for the Hackaday Superconference. If you have an event coming up, getting everyone hacking on NFC is an interesting activity. If you don’t want 50+, [John] is also in the middle of a Kickstarter for an improved version.

Your 3D printed parts will rarely come out perfectly. There will always be some strings or scars from removing them from the bed. There’s a solution to these problems: use a hot air gun.

Everyone has a plumbus in their home, but how do they do it? First, they take the dinglebop, and smooth it out with a bunch of schleem. The schleem is then repurposed for later batches.

Swapping Dev Board Crystals To Suit Your Needs

Microcontroller Dev Boards have the main hardware choices already made for you so you can jump right into the prototyping by adding peripherals and writing code. Some of the time they have everything you need, other times you can find your own workarounds, but did you ever try just swapping out components to suit? [Andy Brown] documented his process of transplanting the clock crystal on an STM32F4 Discovery board.

Even if you don’t need to do this for yourself, the rework process he documented in the clip after the break is fun to watch. He starts by cleaning the through-hole joints of the crystal oscillator with isopropyl alcohol and then applies some flux paste to each. From there the rest is all hot air. The crystal nearly falls out due to gravity but at the end he needs to pluck it out with his fingers. We’re happy to see others using this “method” as we always feel like it’s a kludge when we do it. Next he grabs the load caps with a pair of tweezers after the briefest of time under the heat.

We’d like to have a little bit of insight on the parts he replaces and we’re hoping there are a few crystal oscillator experts who can leave a comment below. [Andy] calculates a pair of 30pf load caps for this crystal. We understand the math but he mentions a common value for board and uC input capacitance:

assuming the commonly quoted CP + CI = 6pF

So we asked and [Andy] was kind enough to share his background on the topic:

It’s a general “rule of thumb” for FR4 that the stray capacitance due to the traces on the board and the input (lead) capacitance of the the MCU is in in the range of 4-8pF. I’m used to quoting the two separately (CP,CI) but if you look around you’ll see that most people will combine the two and call it just “CP” and quote a value somewhere between 4 and 8pF. It’s all very “finger in the air” and for general purpose MCU clocks you can get away picking the mid-value and be done with it.

That leaves just one other question; the original discovery board had an in-line resistor on one of the crystal traces which he replaces with a zero ohm jumper. Is it common to include a resistor and what is the purpose for it?

Continue reading “Swapping Dev Board Crystals To Suit Your Needs”

Desoldering Surface Mount and Through Hole Components

SMT And Thru-Hole Desoldering

My introduction to electronic manufacturing was as a production technician at Pennsylvania Scale Company in Leola PA in the early 1980’s. I learned that to work on what I wanted to work on I had to get my assigned duties done by noon or thereabouts. The most important lesson I had learned as a TV repairman, other than not to chew on the high voltage cable, was to use your eyes first. I would take a box of bad PCB’s that were essentially 6502 based computers that could count and weigh, and first go through inspecting them; usually the contents were reduced 50% right off by doing this. Then it was a race to identify and fix the remaining units and to keep my pace up I had to do my own desoldering.

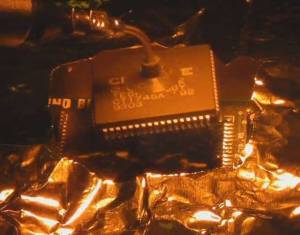
Desoldering with IR System

It worked like this; you could set units aside with instructions and the production people would at some point go through changing components etc. for you or you could desolder yourself. I was pretty good at hand de-soldering 28 and 40 pin chips using a venerable Soldapulit manual solder sucker (as they were known). But to really cook I would wait for a moment when the production de-soldering machine was available. There was one simple rule for using the desoldering station: clean it when done! Failure to do so would result in your access to the station being suspended and then you might also incur the “wrath of production” which was not limited to your lunch bag being found frozen solid or your chair soaked in defluxing chemicals.

Continue reading “SMT And Thru-Hole Desoldering”