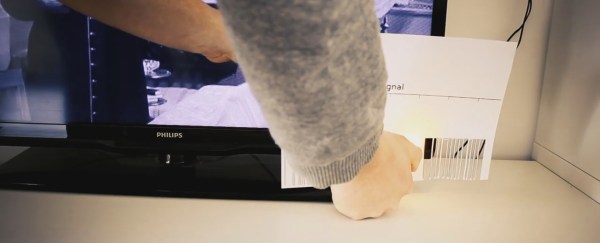
Paper and lighter IR remote control

Faking TV Remote Control With Paper And A Lighter

Cut slots into a piece of paper to represent the IR remote control bitstream for putting your TV into standby. Insert it between your TV’s IR receiver and the flame from a lighter, and pull the slots along to generate the coded pattern. Get it just right and you have a paper and lighter remote control. That’s just what [ViralVideoLab] did and you can see it in action in the video below.

Think of this as just the germ of an idea. Imagine how you’d automate this and extend it to include more commands. A wheel with the various bitstreams cut into the circumference comes to mind. A servo would turn the wheel to the desired command and something else would fire up the lighter just as the slots pass by. Now take it a little further. You already have a remote control with keypad and IR light. Hack that to talk to a microcontroller which would control the servo and the IR light. And there you go. A useless but fun hack (hint hint).

Continue reading “Faking TV Remote Control With Paper And A Lighter”

Hacklet 118 – Infrared And Universal Remote Controls

The first remote control for a TV was the Zenith Space Command back in the 1950’s. Space Command used sounds at ultrasonic frequencies to control the set. It wasn’t until the 1980’s and the Viewstar cable box that infrared entered the picture. Remote controls spread like wildfire. It wasn’t long before every piece of consumer electronics had one. Coffee tables were littered with the devices. It didn’t take long for universal remotes to hit the scene. [Woz] himself worked on the CL9 Core device, back in 1987. Even in today’s world of smart TV’s and the internet of things, universal remotes are still a big item. Hackers, makers, and engineers are always trying to build a device that works better for them. This week’s Hacklet is about some of the best universal and IR remote projects on Hackaday.io!
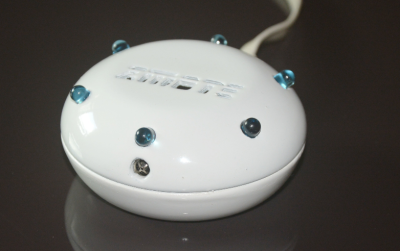
smoteWe start with [Harikrishna] and zmote. Zmote is an open source WiFi enabled, infrared,  360° remote control. That’s a mouthful. It might be easier to say it’s an ESP8266 and some IR LEDs. An ESP-01 module connects the device to WiFi and provides the 32-bit processor which runs the show. Learning functionality comes courtesy of a TSOP1738 modulated infrared receiver. The beauty of the Zmote is in the software. REST and MQTT connectivity are available. Everything is MIT licensed, and all the code is available on Github.
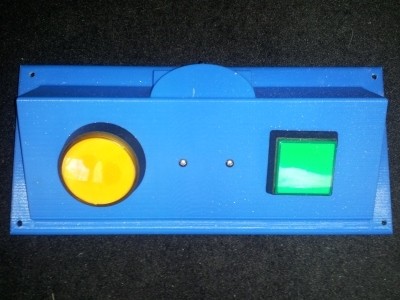
 

easton

Next up is [Benjamin Kenobi] with TV Remote Control, Limited. Not everyone can operate the tiny buttons on a modern remote. [Benjamin] built this device for Easton, a special kid with a disability that impairs his motor skills. The 3D printed case holds two buttons – one for power, and one to change the channel. An Arduino Nano running [Ken Shirriff’s] IR library is the brains of the operation. The IR signal timing is hard coded for simplicity. One problem [Ben] ran into was the Nano’s high current draw, even in sleep mode. Batteries wouldn’t last a week. A simple diode circuit with a reed relay keeps the Nano shut down until Easton presses a button.
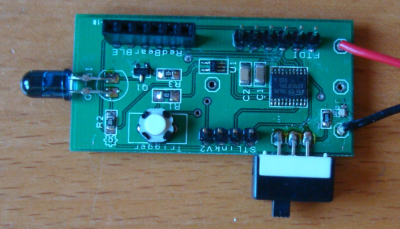
 

openirNext we have [Nevyn] with OpenIR – Infrared Remote Control. A dead DSLR remote shutter release was all the motivation [Nevyn] needed to start work on his own universal remote control. OpenIR can be connected to (and controlled by) just about anything with a UART – a PC via an FTDI cable, a Bluetooth module, even an ESP8266. The module can be programmed by entering pulse length data through a custom Windows application. The Windows app even allows the user to view the pulses graphically, like a scope. The data is stored on an EEPROM on OpenIR’s PCB. Once programmed, the OpenIR board is ready to control the world.
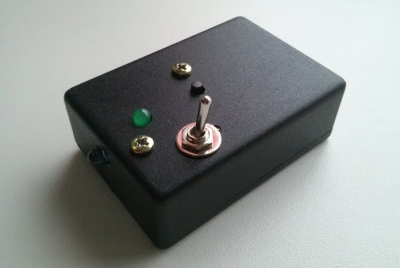
onebuttonFinally, we have [facelessloser] with One button TV remote. This project may be the simplest open source remote control this side of TV-B-GONE. He wanted to build a simple remote control for his young daughter to scan between the various kids channels. A simple toggle switch turns the device on, and one button performs the rest of the magic. [Facelessloser] wanted to “move up” from an Arduino to an ATtiny85. This project became part of his ATtiny education. A custom PCB from OSH Park ties things together. A simple black project box keeps the electronics safe from tiny fingers – at least until she’s old enough to use a screwdriver.

If you want to see more IR and universal remote��projects, check out our new infrared and universal remote projects list. See a project I might have missed? Don’t be shy, just drop me a message on Hackaday.io. That’s it for this week’s Hacklet, As always, see you next week. Same hack time, same hack channel, bringing you the best of Hackaday.io!

Cute USART Trick Brings PWM To IR LEDs

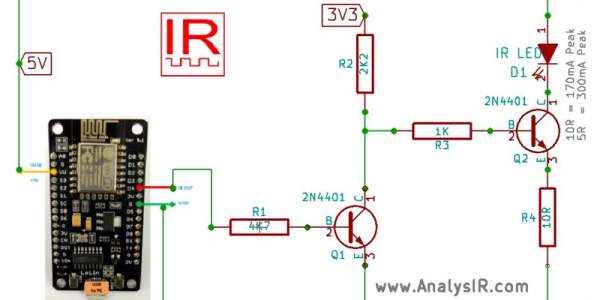
We love little tricks like this. Suppose that you want to generate an IR remote’s signal. It’s easy, because most of the codes are known. But it can be slightly harder because most IR remotes and receivers modulate the on pulses with a square wave at roughly 38 kHz for background lighting immunity.

With a competent PWM generator on a microcontroller, you can create this carrier modulation easily enough yourself. Set the PWM frequency to 38 kHz and the duty cycle somewhere in the 33%-50% range, and you’re set. But what if you don’t have a competent PWM generator? Such was the case that prompted [AnalysIR Blog] to fake it, with USART.

Here’s the trick. You set up the serial port to communicate at ten times the desired carrier frequency, and then transmit “special” data. (The number ten comes from eight bits of data plus a start and a stop bit.) If you want a 50% duty cycle, you simply send 0b11110000, as fast as the microcontroller will allow, for a mark and nothing for a space.

There’s some extra detail with inverting the signal if, as most do, your USART idles high. But that’s really it. It’s a cute trick for when you’re desperate enough to need it. And if you’d like to brush up some more on your asynchronous serial skills, check out our guide on troubleshooting USART, and the great comments that ensued.

Metalab Bypasses IR Remote With Audio Circuit

Infra-red (IR) remotes are great, unless you’re in a hackerspace that’s full of crazy blinking lights and random IR emissions of all kinds. Then, they’re just unreliable. Some smart folks at Metalab in Vienna, Austria cut out the IR middle-man with a couple transistors and some audio software. They call the project HDMI Whisperer, and it’s a cute hack.

Metalab’s AV system has a web-frontend so that nobody ever has to stand up unless they want to. They bought an incredibly cheap 5-to-1 HDMI Switch to switch between displaying multiple video streams. But how to connect the switch to the Raspberry Pi server?

Fortunately, the particular switch has a remote-mounted IR receiver that connects to the main unit through a stereo audio jack. Plugging this sensor into a laptop and running Audacity while pressing the buttons on the remote got them audio files that play the remote’s codes. Simply playing these back out of the Raspberry Pi’s audio out and into the switch’s IR input through a tiny transistor circuit does the trick. Now they have a networked five-way HDMI switch for $10.

Given the low data rates of most IR remotes, we could imagine using the same trick for devices that have built-in IR receivers as well. Simply clip out the IR receiver and solder in a couple wires and then inject your “audio” signal directly.

But IR hacks are loads of fun. We’ve seen a bunch here, from the classic camera shutter-release hack to a more general tutorials on cloning IR signals with Arduinos.

Thanks [overflo] for the tip!

RoomMote home automation

RoomMote, A DIY Remote For Your Room Project

[Rohit] wrote in to tell us about a project he has created. Like most projects, his solves a problem. Sometimes while sleeping, a mosquito will infiltrate his room. He has a mosquito repellent machine but there are 2 problems, he has to get up to turn it on/off and it smells bad when in use. [Rohit] only needed a remote-controlled mosquito repelling machine but decided to make a 6 channel system he calls the RoomMote.

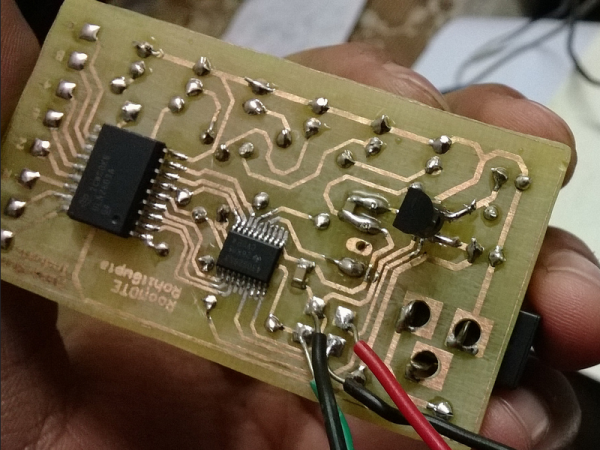
From the beginning, the plan was to use an old Sony TV remote to do the transmitting. The receiver unit was completely made from scratch. [Rohit] designed his own circuit around a surface mount MSP430 chip and made a really nice looking PCB to fit inside a project box he had kicking around. The MSP430 chip was programmed to turn relays on and off based on the signals received from the Sony remote.  These relays are inside an electrical box and control AC outlets. Just plug in your light, radio or mosquito repellent into the appropriate outlet for wireless control. Code for the MSP430 is made available on [Rohit’s] project page for anyone wanting to make something similar.

In addition to the relays, there is an RGB LED strip attached to the custom circuit board. By using more of the Sony remote’s buttons, the LED strip can output 6 pre-programmed colors, some mood lighting for the mosquitoes!

Continue reading “RoomMote, A DIY Remote For Your Room Project”

Homer Smart Remote

Homer Robot Ensures You Don’t Miss An Episode

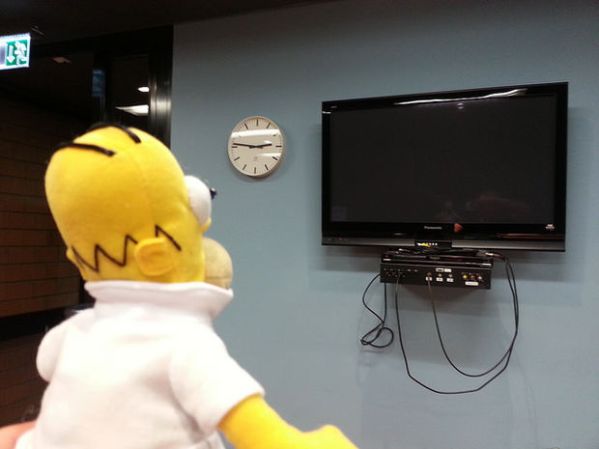
With our busy lives, who has time to pay attention to TV show schedules? [Tamberg] certainly didn’t and that is why he came up with the web-enabled TV remove he calls the Smart Homer. This miraculous device knows when ‘The Simpsons’ is being broadcast, turns on the TV and switches to the appropriate channel.

Like the real Homer, not too much is going on up in this toy’s noggin. A couple of IR emitters are mounted in place of pupils and the associated wires are run down into his body. Right between a pink donut and a Krusty burger resides an Arduino and ethernet shield. This electronic duo acts as a web server and looks out to the ‘net for an online script. The script polls an online TV Program Guide and if ‘The Simpsons’ are on at that time, it sends a signal back to the Arduino to turn the TV on.

Homer Smart Remote   Jolly Homer

A 7″ Touchscreen TV Remote Control From Scratch

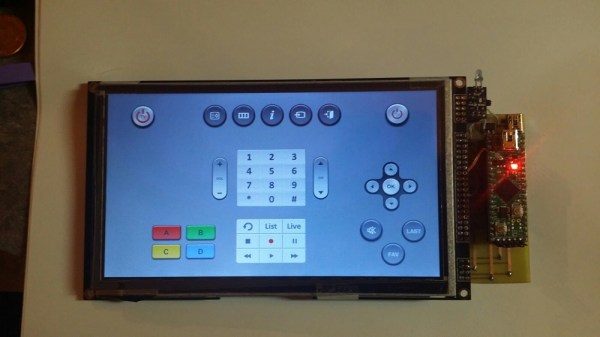
[Jason] always wanted a touchscreen TV remote control. He could have pressed an older Android tablet into service, but he wanted to roll his own system. [Jason] gathered the parts, and is in the process of building his own 7″ touchscreen setup. He started with a 7″ LCD capacitive touchscreen. He ordered his display from buy-display.com, a Far East vendor.

[Jason’s] particular display model comes mounted on a PCB which includes controllers for the display and touchscreen, as well as some memory and glue logic. The LCD controller board has quite a few jumpers to support multiple interfaces and options. While the documentation for the display was decent, [Jason] did find a few errors. After getting in touch with tech support at buy-display, he wrote a simple application which determines which jumpers to set depending on which hardware interfaces are selected from drop down lists.

With the LCD sorted, [Jason] still needed a processor. He selected the venerable Microchip PIC32MX series. This decision allowed him to use a Fubarino for the early prototypes, before switching to his own board as the system matured. [Jason] was able to get a simple GUI up and running, with standard remote buttons to control his TV and cable box. Code is on his Github repository.

[Jason’s] most recent work has centered on cutting the cord. He’s switched over from DC power to a 2600 mAh LiPo battery. Click past the break to see [Jason] test out his fully wireless work in progress.

Continue reading “A 7″ Touchscreen TV Remote Control From Scratch”