Tiny 3x3x3 SMD LED Cube

led cube

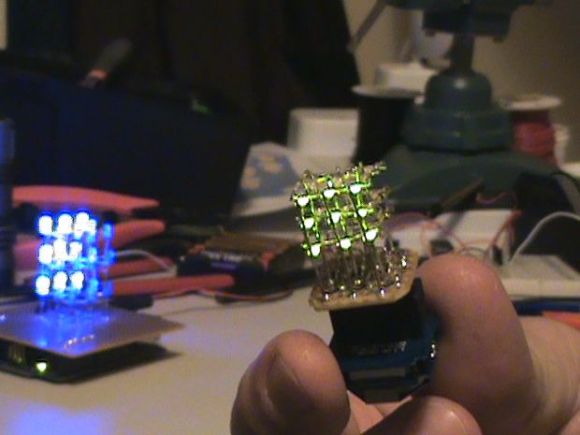
LED cubes are cool, but they’re usually pretty big and clunky. [One49th] set out to make one of the smallest LED cubes we’ve seen yet, and he’s shared how he did it in his Instructable!

His first LED cube was the traditional kind, and it turned out pretty nice. But he wanted to go smaller — what about using SMD’s? What he did next was no simple feat — in fact, we’d be willing to call him an artist with a soldering iron. The array is just over one centimeter across.

Using a combination of vices and pliers he soldering each SMD onto his structure one by one. Each LED anode is tied together on each horizontal layer. Each cathode is tied together on each vertical column. This allows the TinyDuino to control any one LED by knowing which of the 9 columns and 3 layers the LED is on. Send a high signal to chosen layer, and a low signal to the column to light the LED. Doing this quickly allows you to create the illusion of different LEDs being on at the same time. Take a look through his image gallery to see just how tight the soldering quarters were, it’s definitely not something we’re planning on doing anytime soon!

Looking for a bigger cube? Check out this gorgeous 7x7x7 one that is capable of 142 frames per second!

Hackaday Links: Sunday, June 9th, 2013

hackaday-links-chain

This week we saw an interesting animated motorcycle tail light over on Reddit. But there wasn’t really enough background to get its own feature.

The NeuroKnitting project captures brainwaves by weaving them into a scarf.

On Semiconductor is showing off an 8x8x8 LED cube which they claim as 12,000 LEDs. We can’t figure out where all those LEDs are used in the design, but maybe you can. Here’s one that we know has 4096 LEDs in its matrix.

[Jeff] used hard drive platters as the disc section of his original Enterprise desk model.

Play around with an SNES controller and Arduino by following [Damon’s] guide.

Hackaday Alum [Jeremy Cook] posted an update of his laser graffiti project. His earlier effort used camera tricks to capture the image but this time around he’s exciting phosphorescent glow material to make a persistent display visible to the human eye.

This server hides in plain sight after being wrapped in a hard cover book binding. Hopefully this won’t cause heat dissipation problems.

[Trumpkin] built his own Nixie tube wristwatch which we think has the potential to be as neat as the one [Woz] wears.


7x7x7 LED Cube Driven By Arduino Mega

Sure, the physical build itself looks great, but it’s what [Michael] did with the firmware that impresses us the most. He’s using an Arduino Mega to drive the 7x7x7 cube and manages to squeeze out what he calls 142 frames per second with the setup. We’re not sure FPS is the right measurement, as we believe it’s the multiplexing rate that he’s trying to describle. It takes 144 uS to scan the entire matrix once. He performs the scan seven times per frame and the result is a flicker-free appearance, even to cameras.

You can see a video demonstration after the break. Since [Michael] emailed us directly with more details about the build we’ve pasted those below the fold as well.

If you’re looking for a more entry-level Arduino LED cube this 4x4x4 project is just the thing.

Continue reading “7x7x7 LED Cube Driven By Arduino Mega”

8x8x8 LED Cube And The Board That Drives It

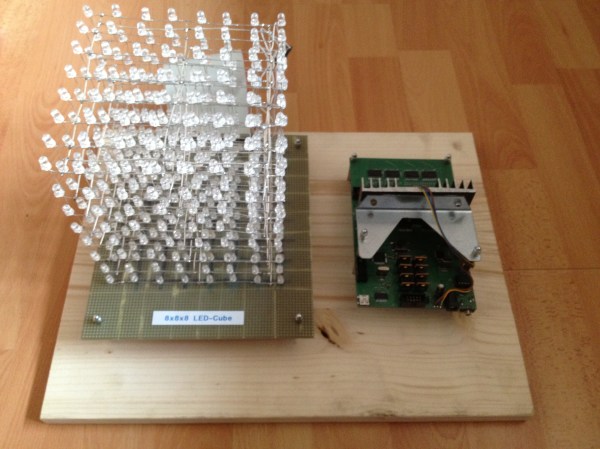
Check out the LED cube which [Thomas], [Max], and [Felix] put together. But don’t forget to look at that beautiful PCB which drives it… nice! But hardware is only part of what goes into a project like this one. After the soldering iron had cooled they kept going and wrote their own software to generate patterns for the three-dimensional display.

Looking at a clean build like this one doesn’t drive home the amount of connections one has to make to get everything running. To appreciate it you should take a look at this other 512 LED cube which has its wires showing. You can see from the schematic (available in the project repository) that all of these lines are managed by a series of shift registers. The board itself connects to a computer from which it gets the visualization commands. A Java program they call CubeControl can push letters or turn the cube into a VU meter.

The team built at least two of these. This smaller version uses red LEDs, while the larger one shown in the video after the break has blue ones.

Continue reading “8x8x8 LED Cube And The Board That Drives It”

4096 LEDs Means The Biggest LED Cube Ever

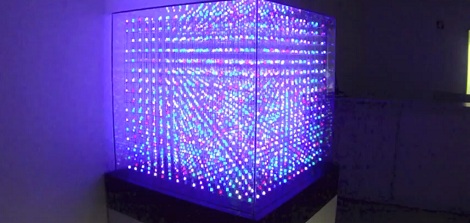
Adaptive Computing, a cloud management and high performance computing outfit in Utah, needed something really cool to bring to their trade shows. Something that makes order out of chaos, and demonstrates their attention to detail in the midst of miles of wiring. They decided building the largest non-commercial LED cube would be a good project, and thus the 16x16x16 All Spark Cube was born.

The All Spark Cube was constructed using 10 mm RGB LEDs wired together with three-foot lengths of 16 ga pre-tinned copper wire. In this video, [Kevin] shows off the process of constructing a single row; first the LEDs are placed in a jig, the leads are bent down, and a bus wire is soldered to 16 individual anodes per row.

The hardware for the build uses 16 Arduino Megas with a custom-made shield powering a 16×16 LED grid. The custom shields provide the 24V for the LEDs, 5V for the ‘duino, The Arduino boards communicate to each other through an RS485 connection, and the entire cube is connected to a computer through an RS232 serial connection.

The software is, admittedly, still a little janky. [Spencer] and [Thomas], the Adaptive Computing volunteers that are working on the control system, are still having a few problems getting logos and animations to display. They have managed to create a control app to draw individual pixels, as seen after the break.

Not bad for nearly a mile of wire and a summer’s worth of work, huh?

Continue reading “4096 LEDs Means The Biggest LED Cube Ever”

Simulating LED Cubes In Blender

[youtube=http://www.youtube.com/watch?v=bl-kvfJxYwM&w=470]

The Jyväskylä, Finland hackerspace hacklab-jlk was lucky enough to work on a public arts project for their home town. They had the opportunity to design, build, and install a trio of LED cubes in Jyväskylä’s central Church Park. As such a high-profile project, the hacklab-jlk team decided to take their time and ended up implementing a lot of very cool features for their LED cubes, including simulating the light show in Blender.

The LED cube is similar to all the other LED cube builds we’ve seen before; it’s an 8x8x8 cube controlled by an ATMega328. The Elovalo project, as it is called, is a trio of LED cubes – one using red LEDs, one using green LED, and a blue LED cube each mounted on a pedestal in a Jyväskylä park.

Because the Elovalo is a permanent installation, the team needed a way to verify new firmware for the LED cubes. They came up with a LED cube simulator for Blender that allows them to write a new display function in C and render either single frames or a full animation of the lighting pattern.

A very cool build, and nearly too awesome for a public arts project. We look forward to a video of the complete installation, but until then we’ll make do with the short preview video available after the break.

Continue reading “Simulating LED Cubes In Blender”

The Best LED Cube Build We’ve Seen

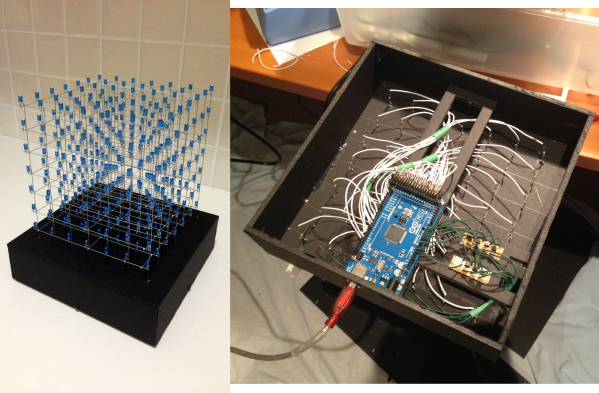
[Nick] wrote in telling us about the LED cube he built over the course of six months. He calls LED cubes ‘done to death,’ but [Nick] might be too humble. His 8x8x8 RGB LED cube is the best we’ve ever seen.

To start his build, [Nick] built a simple 4x4x4 cube as a proof of concept. The baby cube worked but the fabrication process got him thinking. Instead of building his monster LED cube in layers from the bottom up, he would need to build columns from left to right. After the construction of a jig, soldering eight panels of 64 LEDs, and buying a new soldering iron tip, [Nick] had a beautiful assembled LED cube. The only thing missing was the electronics.

Most of the LED cubes we’ve seen use the TLC5940 LED driver for hardware PWM, [Nick] decided to go with the simpler but more familiar STP16 chip. After hooking up his huge LED driver board up to a chipKIT Uno, the 80 hours of programming began.

In the end, [Nick] built the best LED cube we’ve seen (even though it isn’t the largest) and put together one of the best build logs in recent memory. Because no LED cube build is complete with out a video there’s an awesome demo after the break.

Continue reading “The Best LED Cube Build We’ve Seen”