Switch Mode Breadboard Supply From A PTH08080

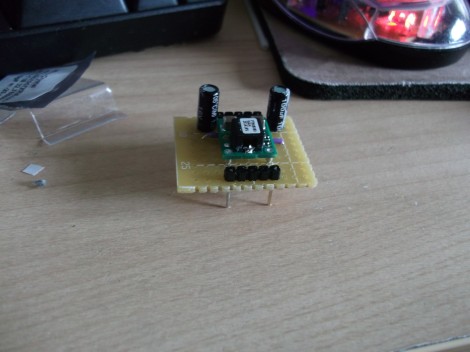
[Ben] wanted a switch mode power supply for his breadboard. He ordered a PTH08080 module which is made by Texas Instruments. The spec sheet would make it a great choice for him, but he was not happy to learn that the pinout doesn’t conform to the 0.1″ spacing used by solderless breadboards. His solution was to make a breakout adapter from some protoboard.

The PTH08080 can source up to 2.25A. It accepts 4.5-18V input and can output 0.9-5.5V. The best part is the efficiency that a switch mode supply achieves compared to linear regulators. This design adds in two capacitors which are suggested in the application circuit from the datasheet (PDF). Notice that there are two headers on the breakout board. One supplies power and ground to the breadboard. The other gives him a place to connect the adjustment resistor used to select the output voltage. This connects between one pin on the PTH08080 and GND. [Ben] plans to upgrade the design by included a precision trimpot for easy output voltage adjustments.

Building Your Own LED-based Home Lighting

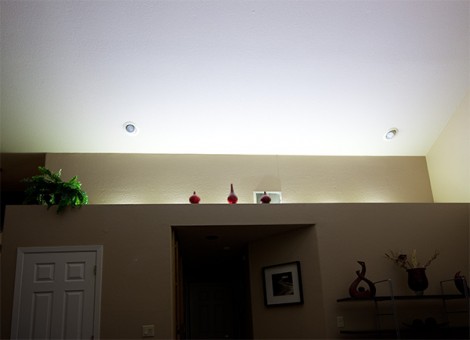
We see LEDs used in all kinds of projects but rarely does someone build a home lighting system from scratch with them. [Paulo Oliveira] decided to give the idea a try, included a fading power supply for the LEDs which he built himself. Here you can see the installation at full brightness, but his controller also offers a single lower setting.

We saw [Sprite_TM] use an RGB LED strip to light up his living room. [Paulo] went with individual LED modules instead, all the same color. They are Cree XM-L power LEDs so some thought needs to be put into heat dissipation. All six are mounted along an aluminum strip which serves as the heat sink. They’re wired in series and powered by an old laptop power supply. A PIC 12F683 uses PWM to dim the string via a MOSFET.

The control system for the two brightness levels uses the wall switch. When turned on, the LEDs fade in to full brightness. If you turn the switch off and back on before they are all the way on, the dimmed setting takes over. This was complicated by the capacitance of the PSU but [Paulo] solved that by adding a power resistor.

PIC-based USB Conversion For An NES Controller

[Andres] wrote in to share his USB for NES controller project (translated). It enumerates as a USB keyboard and is easily mapped on most emulators. Over the weekend we looked in on an AVR programmer used for this purpose. [Andres] went a different direction, using a PIC microcontroller and eventually incorporating his circuit into the body of the controller.

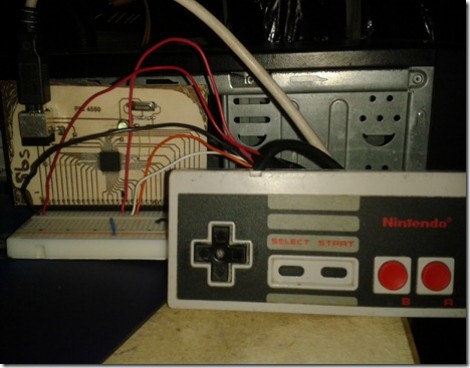
The prototype circuit can be seen above. [Andres] uses a breakout board for the PIC 18F4550 to test the circuit. The chip has native USB support, and reading the button states from the controller’s shift register is a snap. You can see him using this test rig to play Super Mario Bros. on an emulator in the video after the break.

The second iteration of the project moves from breadboard to a soldered circuit. A 18F2550 is used as it comes in a rather small DIP package. If the legs are flattened there’s room inside the controller case for it, along with a few capacitors and a crystal. The original controller cord is removed to make way for a USB cable.

Continue reading “PIC-based USB Conversion For An NES Controller”

An STM32 Processor Powers This PC

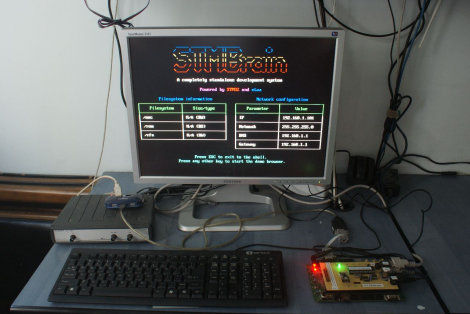
This 32-bit computer is a project [Bogdan Marinescu] built as a contest entry. Sadly he didn’t win, but he did do an excellent job of documenting the build. Having seen several other home built PC projects we’re familiar with the challenges that go into such a thing, and he found some great solutions to each of them.

He started with an STM32F103ZET6 chip. This is an ARM Cortex-M3 processor which brings a lot of power to the playing field. That being said, generating a VGA signal would pretty much zap the usefulness of the chip for other processes so he offloaded that work on a separate Propeller chip. A microSD card serves as storage for the machine, which runs eLua (embedded Lua programming language). There is 1 MB of external RAM and a PS/2 port for keyboard interface. The system is networked thanks to an ENC28J60 Ethernet controller. Don’t miss the video after the break where you can see several demos running on the system.

Continue reading “An STM32 Processor Powers This PC”

Steam-powered Hexapod

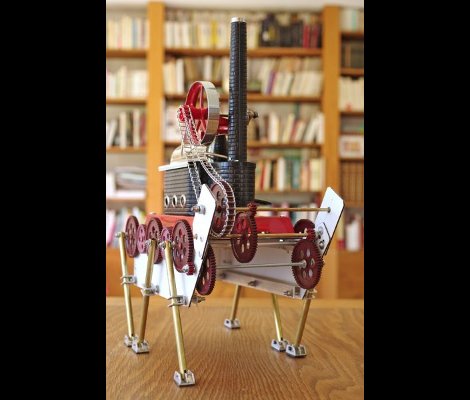
This all-mechanical hexapod (translated) was meticulously planned and beautifully constructed. It’s not craning its neck to see what’s ahead. That’s a smoke stack for the steam engine which propels the machine.

Mechanically the legs were the hardest part. That’s only because the steam engine was not built from scratch. It’s a Wilesco D14 which is powered by solid fuel tablets. It puts out high RPM but low power so the gear ratio was set at 286:1 to make the most of its output.

The legs themselves are made of brass rods. These are anchored on one side of a larger gear, with a pivot point that allows the leg to slide vertically. The result is best seen in the clip after the break. As the drive wheel rotates, the pivot point moves the body forward until the foot is lifted by the sliding motion of the rod. It ends up looking more elegant than some of the more dexterous hexapods, but it lacks the ability to turn.

Continue reading “Steam-powered Hexapod”

Displaying Images On The Surface Of Bubbles

The image you see above isn’t a simple photograph of our blue marble from thousands of miles above. No, that image is much cooler than a satellite because it’s a projection of the Earth onto a soap film screen. Yes, we can now display images on the surface of bubbles.

Instead of a the soap bubbles you’d normally give a small child, this project uses a mixture of sugar, glycerin, soap, surfactant, water, and milk to produce a film much more resistant to popping than your standard soap bubble. Shining an image through these films doesn’t result in much of an image, so the researchers used ultrasonic speakers to vibrate the film and make it possible to display a picture.

With a small projector, this system makes it possible to display an image on the surface of bubble. Of course, the display area is tiny right now, but the size will most likely increase as the experimentations continue.

You can check out a whole bunch of videos demoing this tech after the break.

Continue reading “Displaying Images On The Surface Of Bubbles”

Simulating LED Cubes In Blender

[youtube=http://www.youtube.com/watch?v=bl-kvfJxYwM&w=470]

The Jyväskylä, Finland hackerspace hacklab-jlk was lucky enough to work on a public arts project for their home town. They had the opportunity to design, build, and install a trio of LED cubes in Jyväskylä’s central Church Park. As such a high-profile project, the hacklab-jlk team decided to take their time and ended up implementing a lot of very cool features for their LED cubes, including simulating the light show in Blender.

The LED cube is similar to all the other LED cube builds we’ve seen before; it’s an 8x8x8 cube controlled by an ATMega328. The Elovalo project, as it is called, is a trio of LED cubes – one using red LEDs, one using green LED, and a blue LED cube each mounted on a pedestal in a Jyväskylä park.

Because the Elovalo is a permanent installation, the team needed a way to verify new firmware for the LED cubes. They came up with a LED cube simulator for Blender that allows them to write a new display function in C and render either single frames or a full animation of the lighting pattern.

A very cool build, and nearly too awesome for a public arts project. We look forward to a video of the complete installation, but until then we’ll make do with the short preview video available after the break.

Continue reading “Simulating LED Cubes In Blender”