Giving Old Appliances A Second Life With Simple Tweaks

blender-light

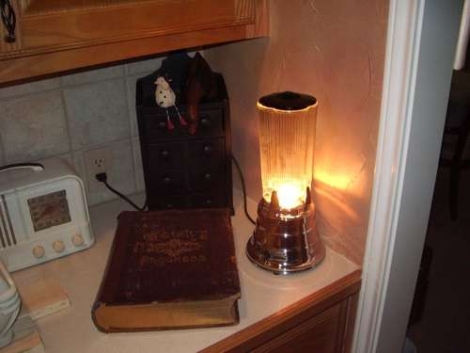
Cruising estate sales can be a total crapshoot – sometimes you find a goldmine, other times nothing but junk. [John Ownby] recently found a sleek-looking old blender at such a sale and decided to take it home. The chrome plated base and fluted glass immediately caught his eye, but he didn’t buy the blender so he could make mediocre frozen drinks – he wanted a lamp instead.

The conversion was fairly simple, requiring him to gut the machine of its moving parts including the motor and blades, replacing them with a small incandescent candelabra base. While his modifications themselves are not groundbreaking, taking them a step further would make for some really cool (and functional) retro house fixtures.

Indulge me for a moment, if you will, and imagine swapping out the simple incandescent bulb for some LED strips or even EL wire. Replace the blender’s cap with a small speaker, and you can use several of these together as retro-looking surround satellites.

We can definitely get behind his reuse of the blender, which would have otherwise likely ended up in a landfill. It’s great to see solid, durable appliances given a second life, even in ways which were never intended. Have you rescued anything from the trash heap like [John], or do you have other ideas for your fellow hackers who might come across similar goods? Let us know in the comments.

Happy Late Lit Acrylic Valentines Day

Although [Danman] was right on time with his home-hacked Valentines day gift, this article comes to you a little late. With the message on the heart changed, however, it could be a perfect “Sorry I forgot Valentines Day again” gift, so it may still be useful.

The concept isn’t that complicated, simply a strip of LED lights around a piece of acrylic. A battery holder and switch rounds out this build. It’s a neat way to light things up, but what we thought was especially interesting was the way it was engraved and cut out with a minimum of traditional tools.

Sure, [Danman] had access to a bandsaw, but as for actually engraving the outline he used a modified electric toothbrush! We’d love to see that build written up. If that wasn’t enough, the lettering was “ghetto blasted”, as he puts it, using a compressed air nozzle, a pen tube, and a styrofoam cup full of ceramic dust! Macgyver would be proud!

Tool Box Light Dimmer Helps Out A Friend, Offers Up Design Tips

toolbox-lighting

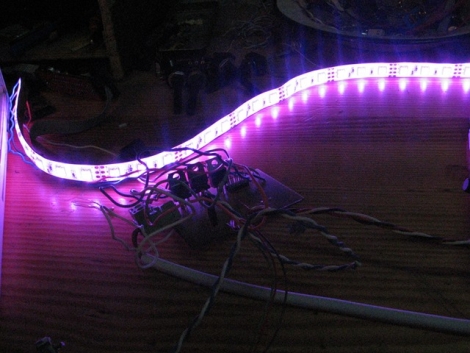
[miceuz] has a friend that works as a theatre technician, and in the course of his job he often needs to jigger with various stage components while shows are in progress. As you can imagine, the lighting situation is far from ideal, so he asked [miceuz] to build him an adjustable lighting solution for his tool box.

The circuit itself is relatively straightforward, using an ATMega88 to provide the PWM required for dimming and color control. Input is taken from three different sources, a rotary encoder for color selection, a pot for brightness control, and a button to turn the light strip on and off.

[miceuz] says that while project came together pretty easily, it still presented some issues along the way which provide some useful design reminders for beginners (and some veterans) alike.

First and foremost: debounce, debounce, debounce. [miceuz] forgot this mantra and made a mad dash to add capacitors to his design after etching the PCB to ensure that his inputs were not bouncing all over the place. He also noted that one should always be sure to read the ADCL before the ADCH register when decoding ADC data. His final observation is that using thick traces is the best policy whenever possible – he ran into a lot of issues with traces detaching during assembly, which he had to rework with wire and solder.

In the end, his friend was happy with the result, and [miceuz] is a better hacker for having worked through his issues. What sorts of important/useful lessons have you learned through the course of your projects? Be sure to share them with us in the comments.

Controlling Dioder Light Strips Wirelessly

dioder_universal_io

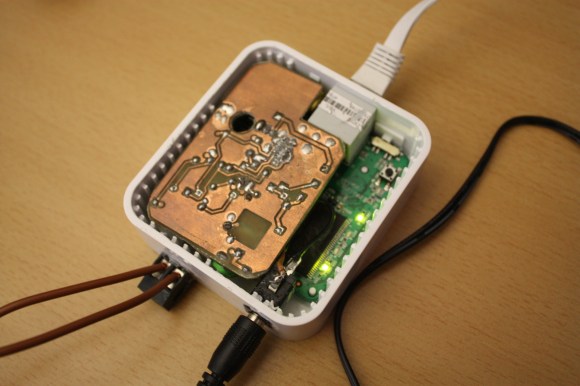
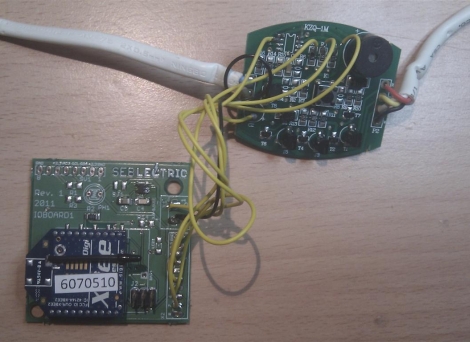
[SeBsZ] does a lot of work in home automation, using Xbee modules, LEDs, and other home lighting systems. Naturally, people look to him for help with different electronics projects, but one thing he has been asked time and time again is if he can make a simple mood lighting solution that can be easily installed.

He has always been interested in playing around with RGB LEDs, but he wasn’t looking to reinvent the wheel with this project. Instead he based his work off the Ikea Dioder product, an off-the-shelf set of adjustable LED strips. As we’ve seen before, the control module for these LEDs leaves a bit to be desired, so he removed the Dioder’s onboard PIC and wired up a controller of his own. His “Universal IO Board” uses an Atmega88 for control and has all the pins required to attach an Xbee wireless module. With everything wired up, he now has full wireless control of the Dioder light strips, without a ton of fuss.

Although he’s selling a few different hardware kits, the schematics for his IO board are freely available on his site, should you want to make your own. The only thing that we didn’t see was the code for the Atmega, but we’re guessing he has that posted somewhere as well.

Control LED Lighting With An Old Stereo Receiver

stereo_controlled_home_lighting

[Marklar] needed an IR receiver for a project he was working on, and his local electronics store was fresh out. He dug through his junk pile and found an old stereo receiver, so he decided to pull the IR module from it before tossing it out. Once he had it taken apart, he figured that he could utilize the wide array of electronic components he found inside, and set off to start a new project.

The control panel housed the components which interested him most of all. Using an Arduino, he was able to easily interface with the rotary encoders as well as the buttons, giving him a cheap and easy way to control his home lighting system. With a bit of programming, he was able to map lighting presets to various buttons, as well as use the rotary encoder to control the LEDs’ brightness and color. As an added bonus, he kept the IR receiver intact and can control his setup wirelessly as well.

Check out the video we have embedded below to see his scavenged control system at work.

[via HackedGadgets]

Continue reading “Control LED Lighting With An Old Stereo Receiver”

Impressive Lighting Console Offers Professional Features For A Fraction Of The Price

diy_dmx_lighting_control_panel

Hackaday reader [Michael] wrote in to share the build details of an impressive lighting console he has been working on for some time. He says that the 36+ channel console is on par with lighting rigs costing upwards of $5,000, but his was constructed for just around $1,000 – quite the substantial savings.

The console was constructed around an old IBM desktop computer, which handles all of the DMX output as well as preset management. An array of 20 ATMega 328Ps running the Arduino bootloader are scattered throughout the device, 18 of which are used to manage the six fader panels, while the remaining two handle management tasks. Aside from the fader banks, the console features a main control board featuring several LCD screens along with 17 capacitive touch buttons used for menu navigation and console control.

While [Michael] is finished building the board, he has just begun the documentation of the construction process. His blog should be updated regularly with more details, so be sure to check back often. Code, as well as hopefully tons of pictures and videos are all forthcoming.

[Edit: Cost comparison update]

Workshop Lights So Bright, They Will Give You Sunburn

workshop_led_lighting_control

There are few things more frustrating than trying to tinker at your workbench with suboptimal lighting. [Jeremy] was toiling away in his workshop one afternoon when he decided that he finally had enough, and set out to overhaul his lighting setup.

His workshop is incredibly bright now, sporting a handful of under the shelf CCFL tubes to complement the mixture of cool and warm LEDs that are mounted on the ceiling. One thing we really liked about his setup is that he added a handful of LEDs to the bottom of his workbench, aimed at the floor – perfect for those times when a tiny screw or SMD component goes missing.

Everything is controlled by an ATMega 328 that he shoved into a project box, allowing him to tweak the lighting to suit his needs using a few simple buttons and a small LCD panel.

[Jeremy] says that the entire thing is “overkill” and that it is decidedly the messiest wiring job he has ever done. For something that was put together hastily in an afternoon, we think it’s just fine. The only thing we’re left wanting is some schematics and source code.

As far as the overkill comment goes, say it with me: There. Can. Never. Be. Too. Many. LEDs!

Stick around to watch [Jeremy] give a demonstration of how the system operates.

[via Adafruit blog]

Continue reading “Workshop Lights So Bright, They Will Give You Sunburn”