SamplerBox Uses Raspberry Pi 2 To Make Music

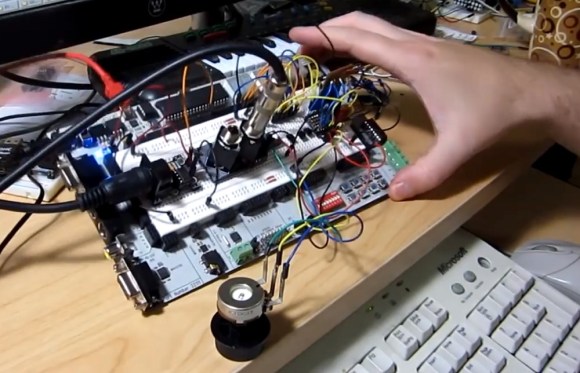
[JosephErnest] wanted a cost-effective alternative to the commercially available MIDI samplers and expanders on the market. He also wanted to avoid being tethered to a computer all the time. His solution is the SamplerBox, a standalone drop-and-play sampler that costs less than 100 euros to make. Simply insert an SD card with your sample set in WAV format, boot it up, and play it through your keyboard or MIDI controller to your heart’s content!

[JosephErnest] used a Raspberry Pi 2 in the SamplerBox because it provided higher performance. He wasn’t thrilled with the sound quality of its built-in soundcard, so he installed a USB DAC PCM2704 (an older model, but any USB DAC will do) to output the audio. He also installed a USB card reader to make switching SD cards containing sampler sets easier while keeping the Pi 2’s own microUSB card exclusively for the OS and software. Both a DIN MIDI connector and USB are included as MIDI inputs in the design. If you only plan to use a USB, the MIDI connector can be omitted from the build. The software is written in Python and cython which allows the Pi 2 to have over 128-voice polyphony. Users can also create their own sample sets to use with the SamplerBox. Preset changes can be made on the fly. All we need to rock out are some music lessons!

Continue reading “SamplerBox Uses Raspberry Pi 2 To Make Music”

Kyub MIDI Keyboard Puts A Piano In Your Pocket

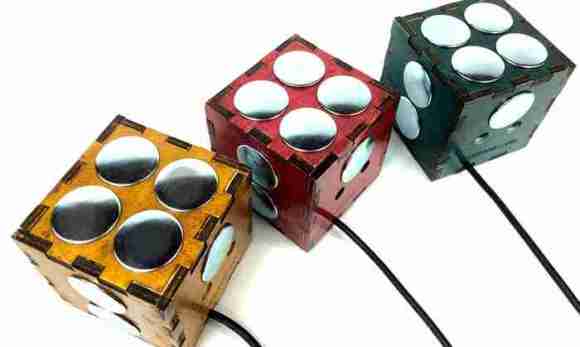
[Keith Baxter] loves making electronic instruments. His latest vision has come to life as Kyub, an open-source MIDI keyboard. [Keith] has previously graced our site and cracked Popular Science with his servoelectric guitar.

[Keith] wanted to make a completely open source instrument that’s elegant, useful, and a bit more accessible than the servoelectric guitar, so he teamed up with a hacker/electronic music expert and an industrial designer. He built the early prototypes around an Arduino Uno. The current iteration uses a Teensy 2.0 and is available in various forms through Kickstarter. [Keith] opened the Kyub up to crowd funding in an effort to obtain volume pricing on some of the parts as well as an Eagle license to make the PCB files available commercially.

The Kyub has eleven pressure-sensitive capacitive keypads on five sides of the cube. The accelerometer can be used to vary note volume, bend the pitch, or whatever else you program it to do. Of course, you’ll need a computer with a synthesizer program, but [Keith] says it is compatible with most software synth programs, some of which are free.

There’s a demo video of an early prototype after the break. Videos of the Kyub in its current form are available on the Kickstarter page.

Continue reading “Kyub MIDI Keyboard Puts A Piano In Your Pocket”

Circuit Bent Toy Keyboard Is MIDI Controlled

tymkrsKeyboard
The [Tymkrs] crew has come up with a pretty neat circuit bent toy keyboard hack. It’s been a while since we’ve seen a good circuit bending hack. This project started as a way to demo the [Tymkrs] “MIDI In Me” kit. A cheap toy keyboard was sacrificed for its sound generator board. Like many cheap mass-produced toys, this board is based upon a COB (chip on board) package. The silicon die of the main ASIC is placed directly on the PCB and bonded out to pads. A round epoxy blob keeps everything protected.

The [Tymkrs] found a number of the chip’s pads were unused in their keyboard. The inputs appeared to trigger drums, possibly for use in a different toy. These inputs, coupled with the ‘demo song’ buttons turned out to be the basis of this hack. MIDI input is sent to a Parallax Propeller. The prop runs a program that will set its I/O pins based upon MIDI Note On/Off commands. The I/O pins then drive transistors which inject signals into the button inputs of the keyboard.

The [Tymkrs] even went so far as to use a voltage divider on the main clock circuit of the keyboard. Changing the main clock causes a sort of pitch bend effect often heard with circuit bent toys. As with the buttons, a MIDI signal commands the prop to enable or disable oscillator signal injection. A potentiometer is used to tweak the oscillator frequency.

Continue reading “Circuit Bent Toy Keyboard Is MIDI Controlled”

Turning Toy Pianos Into MIDI Keyboards

Building a MIDI device is always a great microcontroller project, and nearly everyone has an old toy keyboard lying around in the back of a closet or in the basement. [JenShen] decided to take one of these toy keyboards and build a MIDI keyboard.

The keyboard [JenShen] used was a simple Casio keyboard with built-in voices. After tearing out the guts of the keyboard, the only thing that remained is the row of push buttons underneath the keys. These buttons were laid out in a row/column matrix, so [JenShen] needed to decode this matrix before sending the result to an Arduino for processing.

A 74HN595 shift register was used to read the 8 rows of buttons underneath the keys, while the rows were tied to different input pins on the ‘duino. This allowed [JenShen] to scan the keyboard matrix with an Arduino and generate MIDI notes and send them to other synths.

In the video after the break, you can check out [JenShen]’s circuit and code that allowed him to turn a toy keyboard into a proper 32-note MIDI keyboard. It’s not velocity sensitive, but he says he’ll show everyone how to accomplish that in a future post.

Continue reading “Turning Toy Pianos Into MIDI Keyboards”