Hackaday Prize Entry: Reverse Engineering Blood Glucose Monitors

Blood glucose monitors are pretty ubiquitous today. For most people with diabetes, these cheap and reliable sensors are their primary means of managing their blood sugar. But what is the enterprising diabetic hacker to do if he wakes up and realizes, with horror, that a primary aspect of his daily routine doesn’t involve anĀ Arduino?

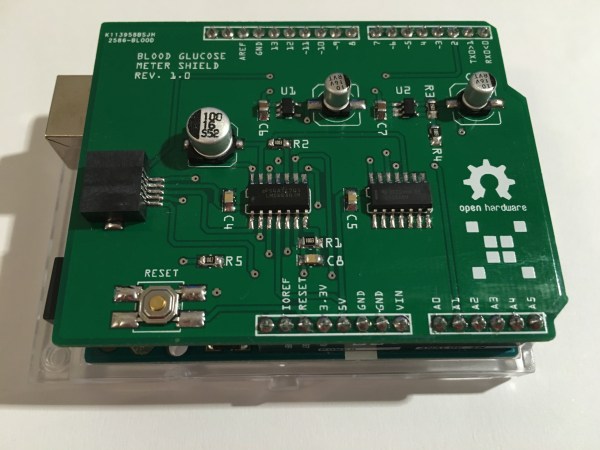
Rather than succumb to an Arduino-less reality, he can hopefully use the shield [M. Bindhammer] is working on to take his glucose measurement into his own hands.

[Bindhammer]’s initial work is based around the popular one-touch brand of strips. These are the cheapest, use very little blood, and the included needle is not as bad as it could be. His first challenge was just getting the connector for the strips. Naturally he could cannibalize a monitor from the pharmacy, but for someone making a shield that needs a supply line, this isn’t the best option. Surprisingly, the connectors used aren’t patented, so the companies are instead just more rigorous about who they sell them to. After a bit of work, he managed to find a source.

The next challenge is reverse engineering the actual algorithm used by the commercial sensor. It’s challenging. A simple mixture of water and glucose, for example, made the sensor throw an error. He’ll get it eventually, though, making this a great entry for the Hackaday Prize.

The HackadayPrize2016 is Sponsored by:

Pinball Simulator Makes The Neighbors Happy

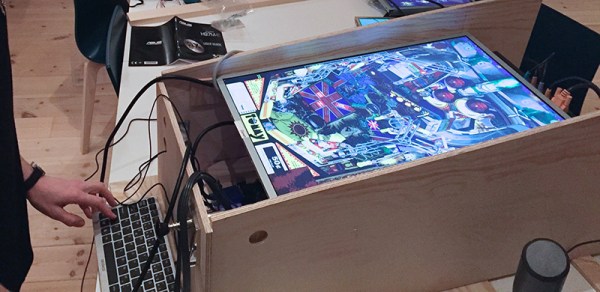
There are a lot of simulators out there if you want to try something out that would be otherwise impossible. Great examples are flight simulators for simulating the piloting of a fighter jet, or goat simulators for simulating the life of a goat who destroys a town. [Erland] wanted a pinball machine, but like planes and goats, found it was impractical to get a real one because it would probably upset his neighbors in his apartment. Instead, he set out to build a pinball simulator.

The cabinet is miniature-sized compared to a regular pinball machine so it can more easily fit in the apartment. It utilizes three monitors, a 24″ one in portrait mode for the main playing area, a 20″ one for the back screen, and a smaller one for the “dot matrix” style scoreboard. Once the woodwork was completed, a PC was put together to control everything and an Arduino was installed to handle the buttons and output USB commands to the PC.

Of course, we’ve featured many other pinball simulators before, but this one is no slouch when it comes to features either. It is very well crafted and the project is very well documented, and the miniature size sets it apart as well. However, if you want to go a step further with your pinball simulator, you might want to check out this augmented reality pinball system.