Hackaday Prize Entry: Reverse Engineering Blood Glucose Monitors

Blood glucose monitors are pretty ubiquitous today. For most people with diabetes, these cheap and reliable sensors are their primary means of managing their blood sugar. But what is the enterprising diabetic hacker to do if he wakes up and realizes, with horror, that a primary aspect of his daily routine doesn’t involve an Arduino?

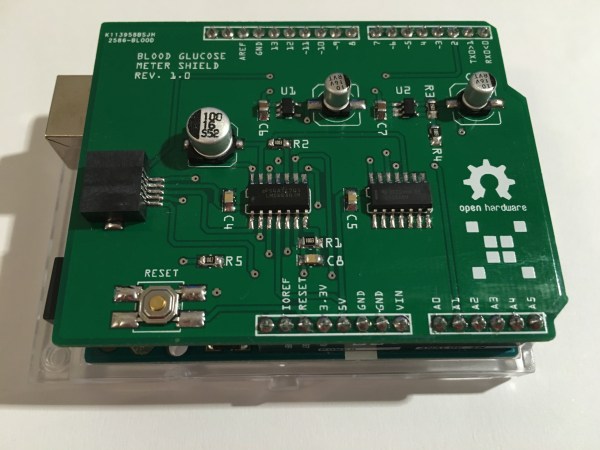
Rather than succumb to an Arduino-less reality, he can hopefully use the shield [M. Bindhammer] is working on to take his glucose measurement into his own hands.

[Bindhammer]’s initial work is based around the popular one-touch brand of strips. These are the cheapest, use very little blood, and the included needle is not as bad as it could be. His first challenge was just getting the connector for the strips. Naturally he could cannibalize a monitor from the pharmacy, but for someone making a shield that needs a supply line, this isn’t the best option. Surprisingly, the connectors used aren’t patented, so the companies are instead just more rigorous about who they sell them to. After a bit of work, he managed to find a source.

The next challenge is reverse engineering the actual algorithm used by the commercial sensor. It’s challenging. A simple mixture of water and glucose, for example, made the sensor throw an error. He’ll get it eventually, though, making this a great entry for the Hackaday Prize.

The HackadayPrize2016 is Sponsored by:

Open Source Solar

What’s the size of a standard euro-palette, goes together in 15 minutes, and can charge 120 mobile phones at one time? At least one correct answer is Sunzilla, the open source solar power generator. The device does use some proprietary components, but the entire design is open source. It contains solar panels, of course, as well as storage capacity and an inverter.

You can see a video about the project below. The design is modular so you can pick and choose what you want. It also is portable, stackable, and easy to transport. The team claims they generate 900W of solar power and can store 4 kWh. Because of the storage device, the peak power out is 1600W and the output is 230V 50Hz AC.

Continue reading “Open Source Solar”

Kansas City Maker Faire: Pi-Plates

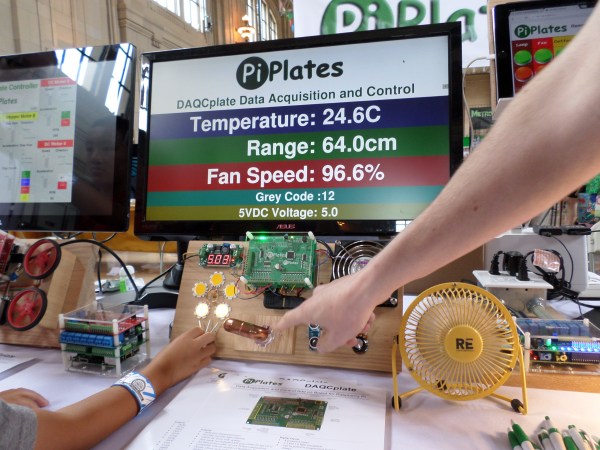
As soon as he spied the Jolly Wrencher on my shirt, [Jerry Wasinger] beckoned me toward his booth at Kansas City Maker Faire. Honestly, though, I was already drawn in. [Jerry] had set up some interactive displays that demonstrate the virtues of his Pi-Plates—Raspberry Pi expansion boards that follow the HAT spec and are compatible with all flavors of Pi without following the HAT spec. Why not? Because it doesn’t allow for stacking the boards.

[Jerry] has developed three types of Pi-Plates to date. There’s a relay controller with seven slots, a data acquisition and controller combo board, and a motor controller that can handle two steppers or up to four DC motors. The main image shows the data acquisition board controlling a fan and some lights while it gathers distance sensor data and takes the temperature of the Faire.

The best part about these boards is that you can stack them and use up to eight of any one type. For the motor controller, that’s 16 steppers or 32 DC motors. But wait, there’s more: you can still stack up to eight each of the other two kinds of boards and put them in any order you want. That means you could run all those motors and simultaneously control several voltages or gather a lot of data points with a single Pi.

The Pi-Plates are available from [Jerry]’s site, both singly and in kits that include an acrylic base plate, a proto plate, and all the hardware and standoffs needed to stack everything together.

R/C Bot Takes Your Strawberries Away

Don’t let the friendly smile on this RC cart fool you, it will take your strawberries away — though that’s kinda the point. It’s an RC car that [transistor-man] and a few friends modified for carrying freshly picked strawberries at strawberry fields so that you don’t have to.

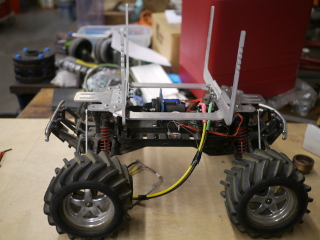
RC strawberry carrying robot before putting on the cooler
RC strawberry carrying robot – WIP

They started with an older Traxxas Emaxx, a 4-wheel drive RC monster truck. The team also bought a suitable sized water cooler at a local hardware store. A quick load test showed that 5lbs collapsed the springs and shock absorbers, causing the chassis to sink close to the ground. The team had two options: switching to stronger springs or locking out the springs altogether. They decided to replace one set of shocks with metal plates effectively locking them. After that it was time for some CAD work, followed by the use of a water jet to cut some aluminum plate. They soon had a mounting plate for the water cooler to sit in. This mounting plate was attached to 4 posts which originally held the vehicle’s Lexan body. A bungee cord wrapped around the cooler and posts on the mounting plate holds the cooler in place.

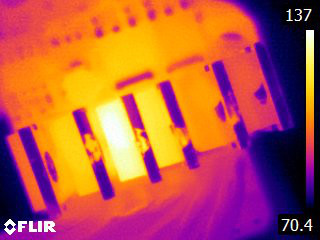
Thermal image of bad MOSFET

Some initial testing showed that the vehicle moved too fast even in low gear and tended to tip over, as you can see in the first video below. Some practice helped but a 3:1 reduction planetary gearbox brought the vehicle down to walking speed, making a big difference. A trip was arranged to go to local strawberry picking field at Red Fire Farms, but not without some excitement first. At 1AM the UNIK 320A High Voltage Speed controller emitted some magic smoke. A quick check with a thermal-camera found the culprit, one of the MOSFETs had failed, and after swapping it with one that was close enough they were back in business.

As you can see in the second video below, testing in the strawberry field went very well, though it wasn’t without some tipping. Kids also found it a fun diversion from picking strawberries, alternating between mock fright and delight.

Continue reading “R/C Bot Takes Your Strawberries Away”

Broadcasting Bluetooth Beacons With Bubbles

Bluetooth beacons have only been around for a few years, but the draw is incredible. With Bluetooth beacons, your phone is location aware, even with location services are turned off. They’re seen in fast food joints, big box retailers, and anywhere else there’s a dollar to be made. [Nemik] has been working on a home automation project, and came up with a use for Bluetooth beacons that might actually be useful. It’s a WiFi-based Bluetooth beacon notifier that scans the area for beacons and forwards them to an MQTT server.

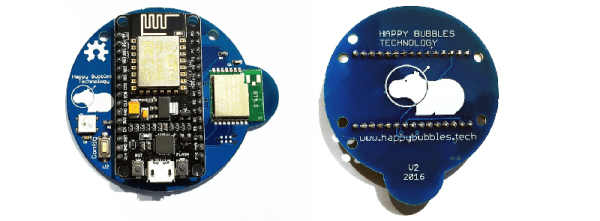
[Nemik]’s ‘Presence Detector’ for Bluetooth advertisements is actually a surprisingly simple build, leveraging the unbelievably cheap wireless modules available to us today. The WiFi side of the equation is a NodeMCU v2 ESP8266 dev board that provides all the smarts for the device via Lua scripting. The Bluetooth side of the board is a PTR5518 module that has a nRF51822 tucked inside. With the right configuration, this small board will listen for BLE advertisements and forward them to an MQTT server where they can be seen by anyone on the network.

[Nemik] is selling these beacon to WiFi bridges, but in the spirit of Open Hardware, he’s also giving away the designs and firmware so you can make your own. If you ever have an abundance of Bluetooth beacons sitting around and want to make a beacons of Things thing, this is the build for it.

Walnut Guitar Back Yields Wood For Classy Word Clock

Word clocks are cool, but getting them to function correctly and look good is all about paying attention to the details. One look at this elegant walnut-veneered word clock shows what you can accomplish when you think a project through.

Most word clocks that use laser-cut characters like [grahamvinyl]’s effort suffer from the dreaded “stencil effect” – the font has bridges to support the islands in the middle of characters like “A” and “Q”. While that can be an aesthetic choice and work perfectly well, like in this word clock we featured a few months back, [grahamvinyl] was going for a different look. The clock’s book-matched walnut guitar back was covered in tape before being laser cut; the tape held the letters and islands in place. After painstakingly picking out the cutouts and tweaking the islands, he used clear epoxy resin to hold everything in place. The result is a fantastic Art Deco font and a clean, sleek-looking panel to sit on top of an MDF light box for the RGB LED strips.

The braided cloth cable adds a vintage look to the power cord, and [grahamvinyl] mentions some potential upgrades, like auto-dimming and color shifting. This is very much a work in progress, but even at this point we think it looks fabulous.

[via r/diy]